
Introduction
Getting started with the Coinsnap Bitcoin Wallet only takes a few minutes. Whether you’re using an iPhone or an Android smartphone, the setup process is straightforward and requires no technical knowledge.
In this guide, we’ll walk you through every step—from downloading the app to creating your wallet and securing it with an optional backup. Once you’ve completed these steps, your wallet will be ready to receive Bitcoin payments via both the Lightning Network and the Bitcoin blockchain.
This guide covers only the wallet installation and initial setup. Creating a Point of Sale, adding products, and configuring payment terminals are covered in this tutorial.
How do I set up the Coinsnap Bitcoin Wallet?
Setting up the Coinsnap Bitcoin Wallet takes only a minute. Download the app from the Apple App Store or Google Play, create your wallet, choose a Personal and Business Lightning Address, and optionally secure your wallet with a Recovery Phrase. No email, no Lightning node, no blockchain synchronization, or any technical configuration is required.
Coinsnap Wallet features at a glance
| Setup time | Less than 2 minutes |
| Difficulty | Beginner |
| Platforms | iPhone & Android |
| Bitcoin | Yes |
| Lightning | Yes |
| Personal Wallet | Included |
| Business Wallet | Included |
| Personal Lightning Address | Included |
| Business Lightning Address | Included |
| Email required | No (unless using merchant features) |
| Recovery Phrase | Optional but highly recommended |
| Lightning node required | No |
| Merchant features | Included |
Before You Begin

Before installing the Coinsnap Wallet, make sure you have:
- an iPhone or Android smartphone
- an internet connection
- access to your email address
- about five minutes of time
No Bitcoin experience is required.
Step 1: Download the Coinsnap Wallet
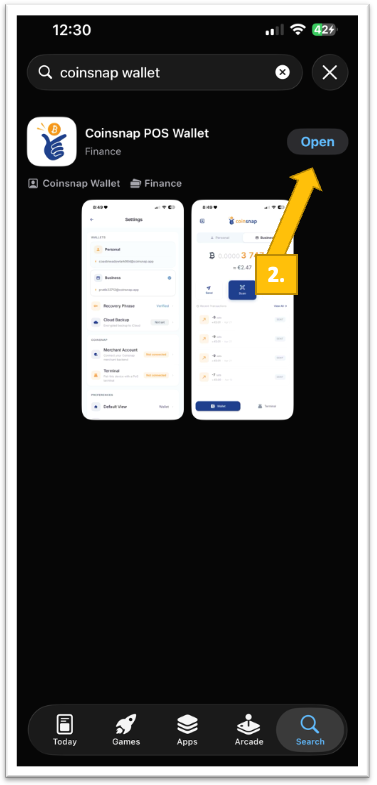
Download the Coinsnap Bitcoin Wallet from your device’s official app store. Simply scan the QR code above or search for “Coinsnap Bitcoin Wallet” in the Apple App Store or Google Play Store.
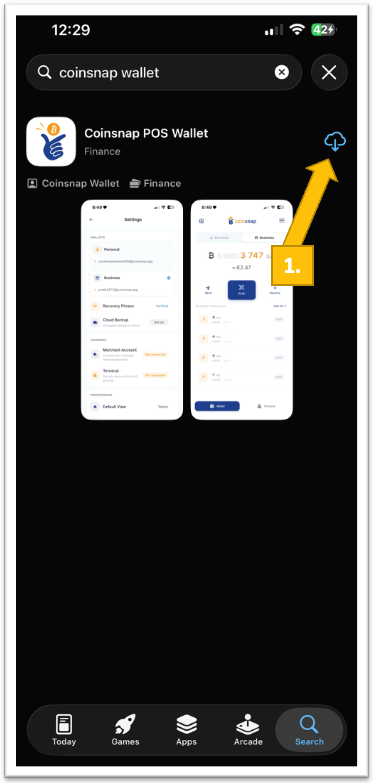
Tap install [1] and wait until the download has completed. Now launch the Coinsnap Bitcoin Wallet [2]:
Step 2: Create your wallet
You’ll be welcomed by the start screen.
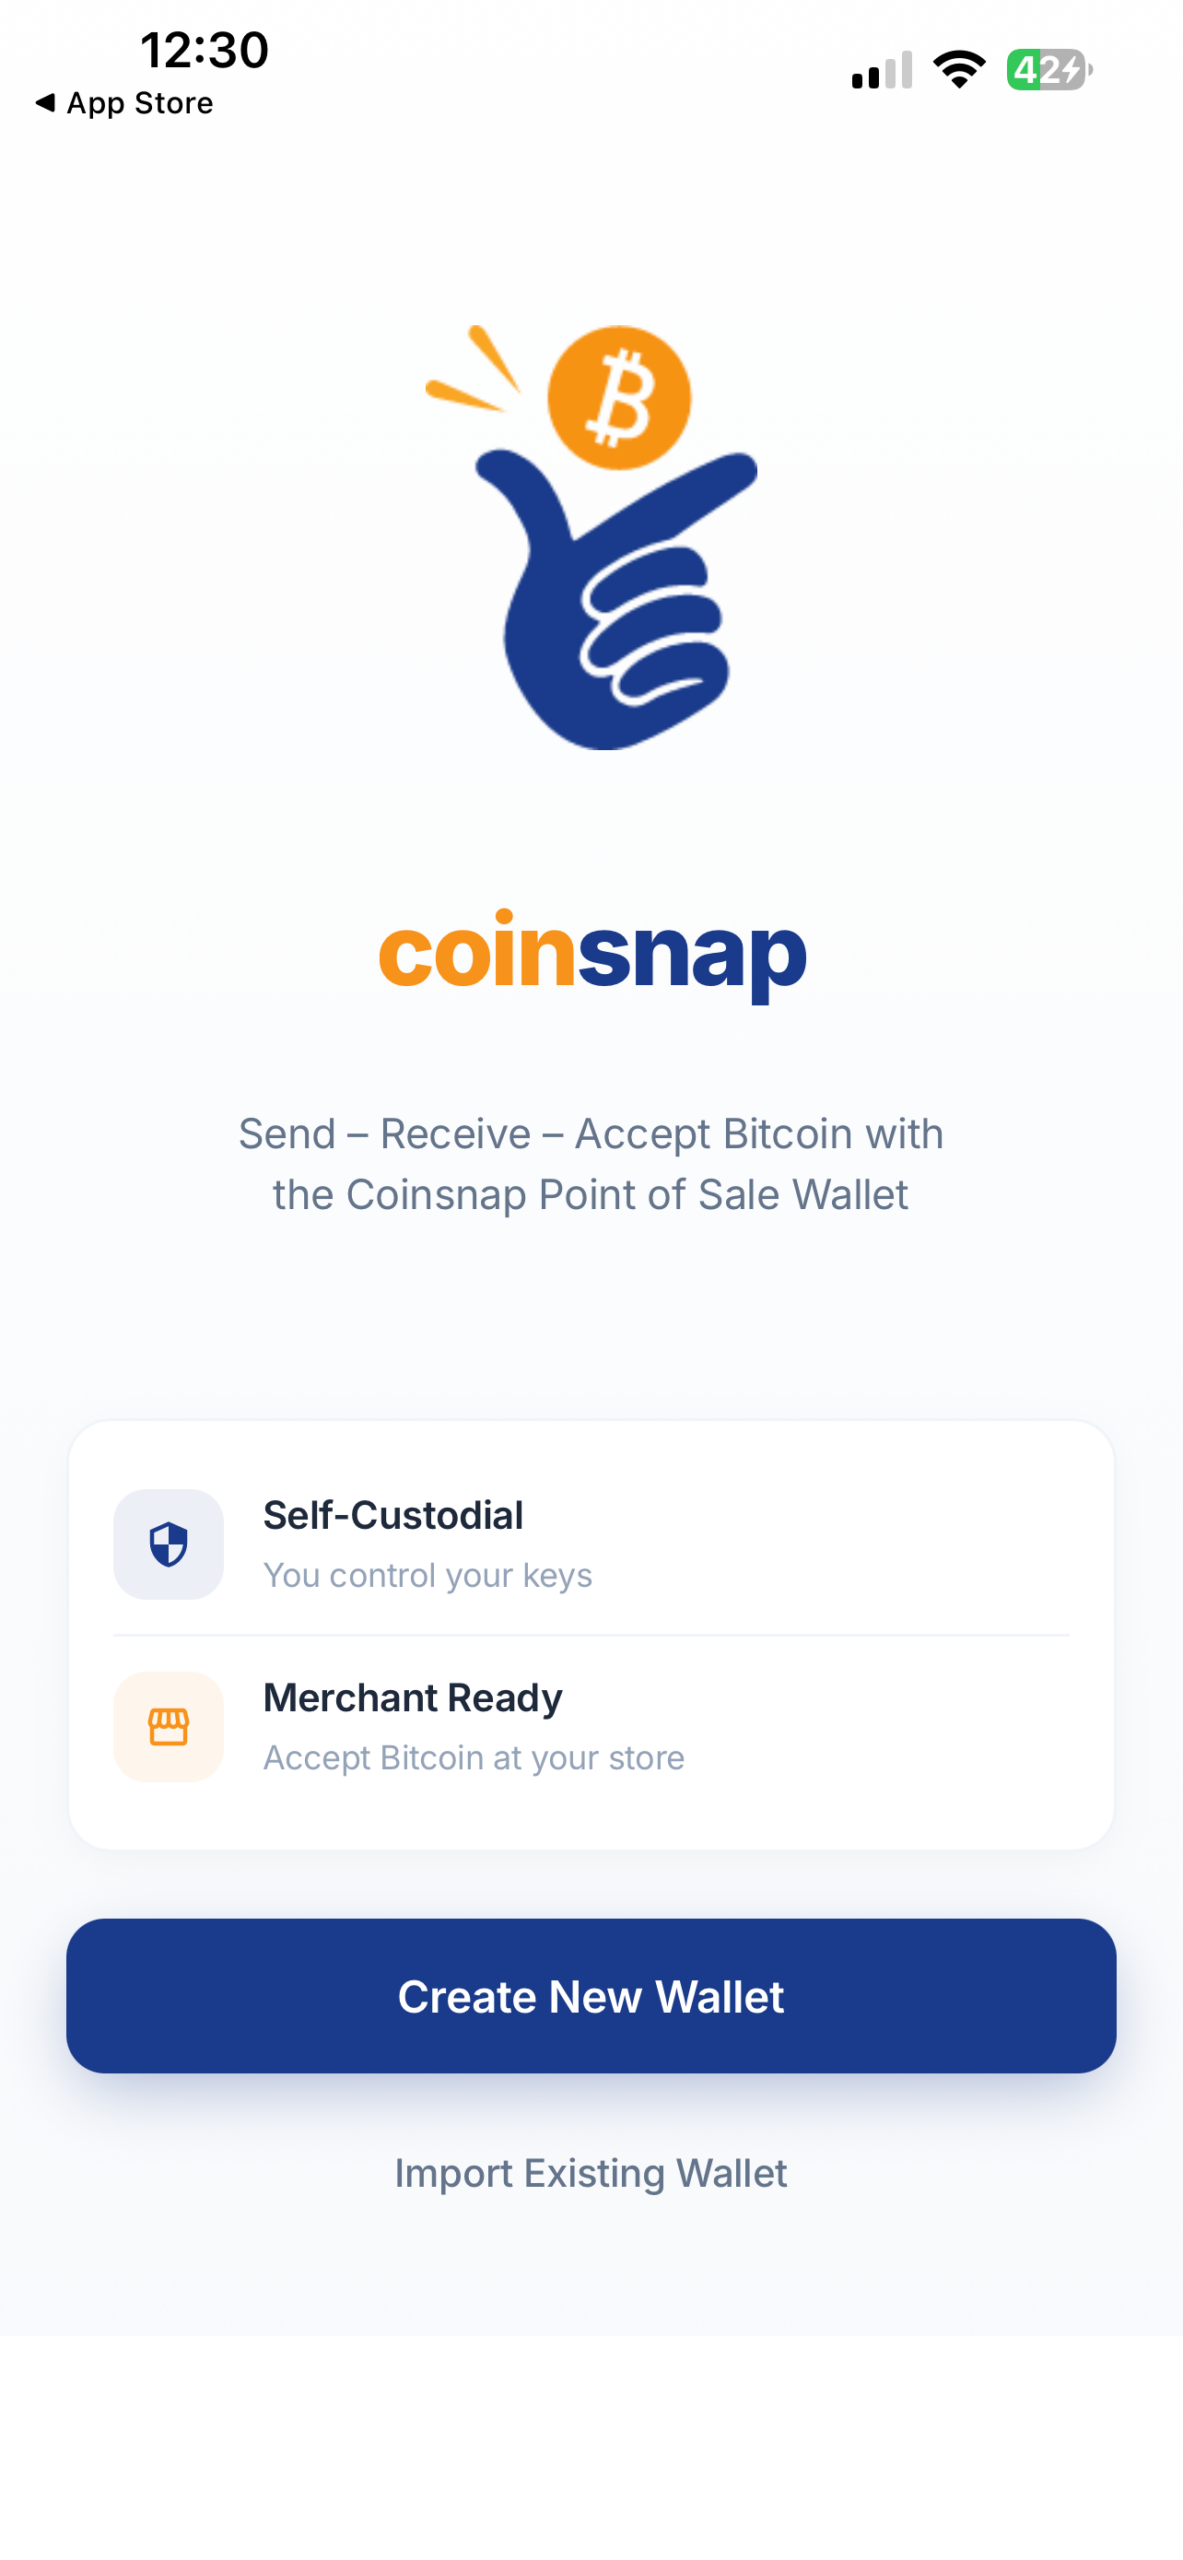
Tap Create New Wallet.
Step 3: Choose Your Lightning Addresses
As part of the setup process, you’ll create two Lightning Addresses—one for your personal account and one for your business account.
Personal Lightning Address
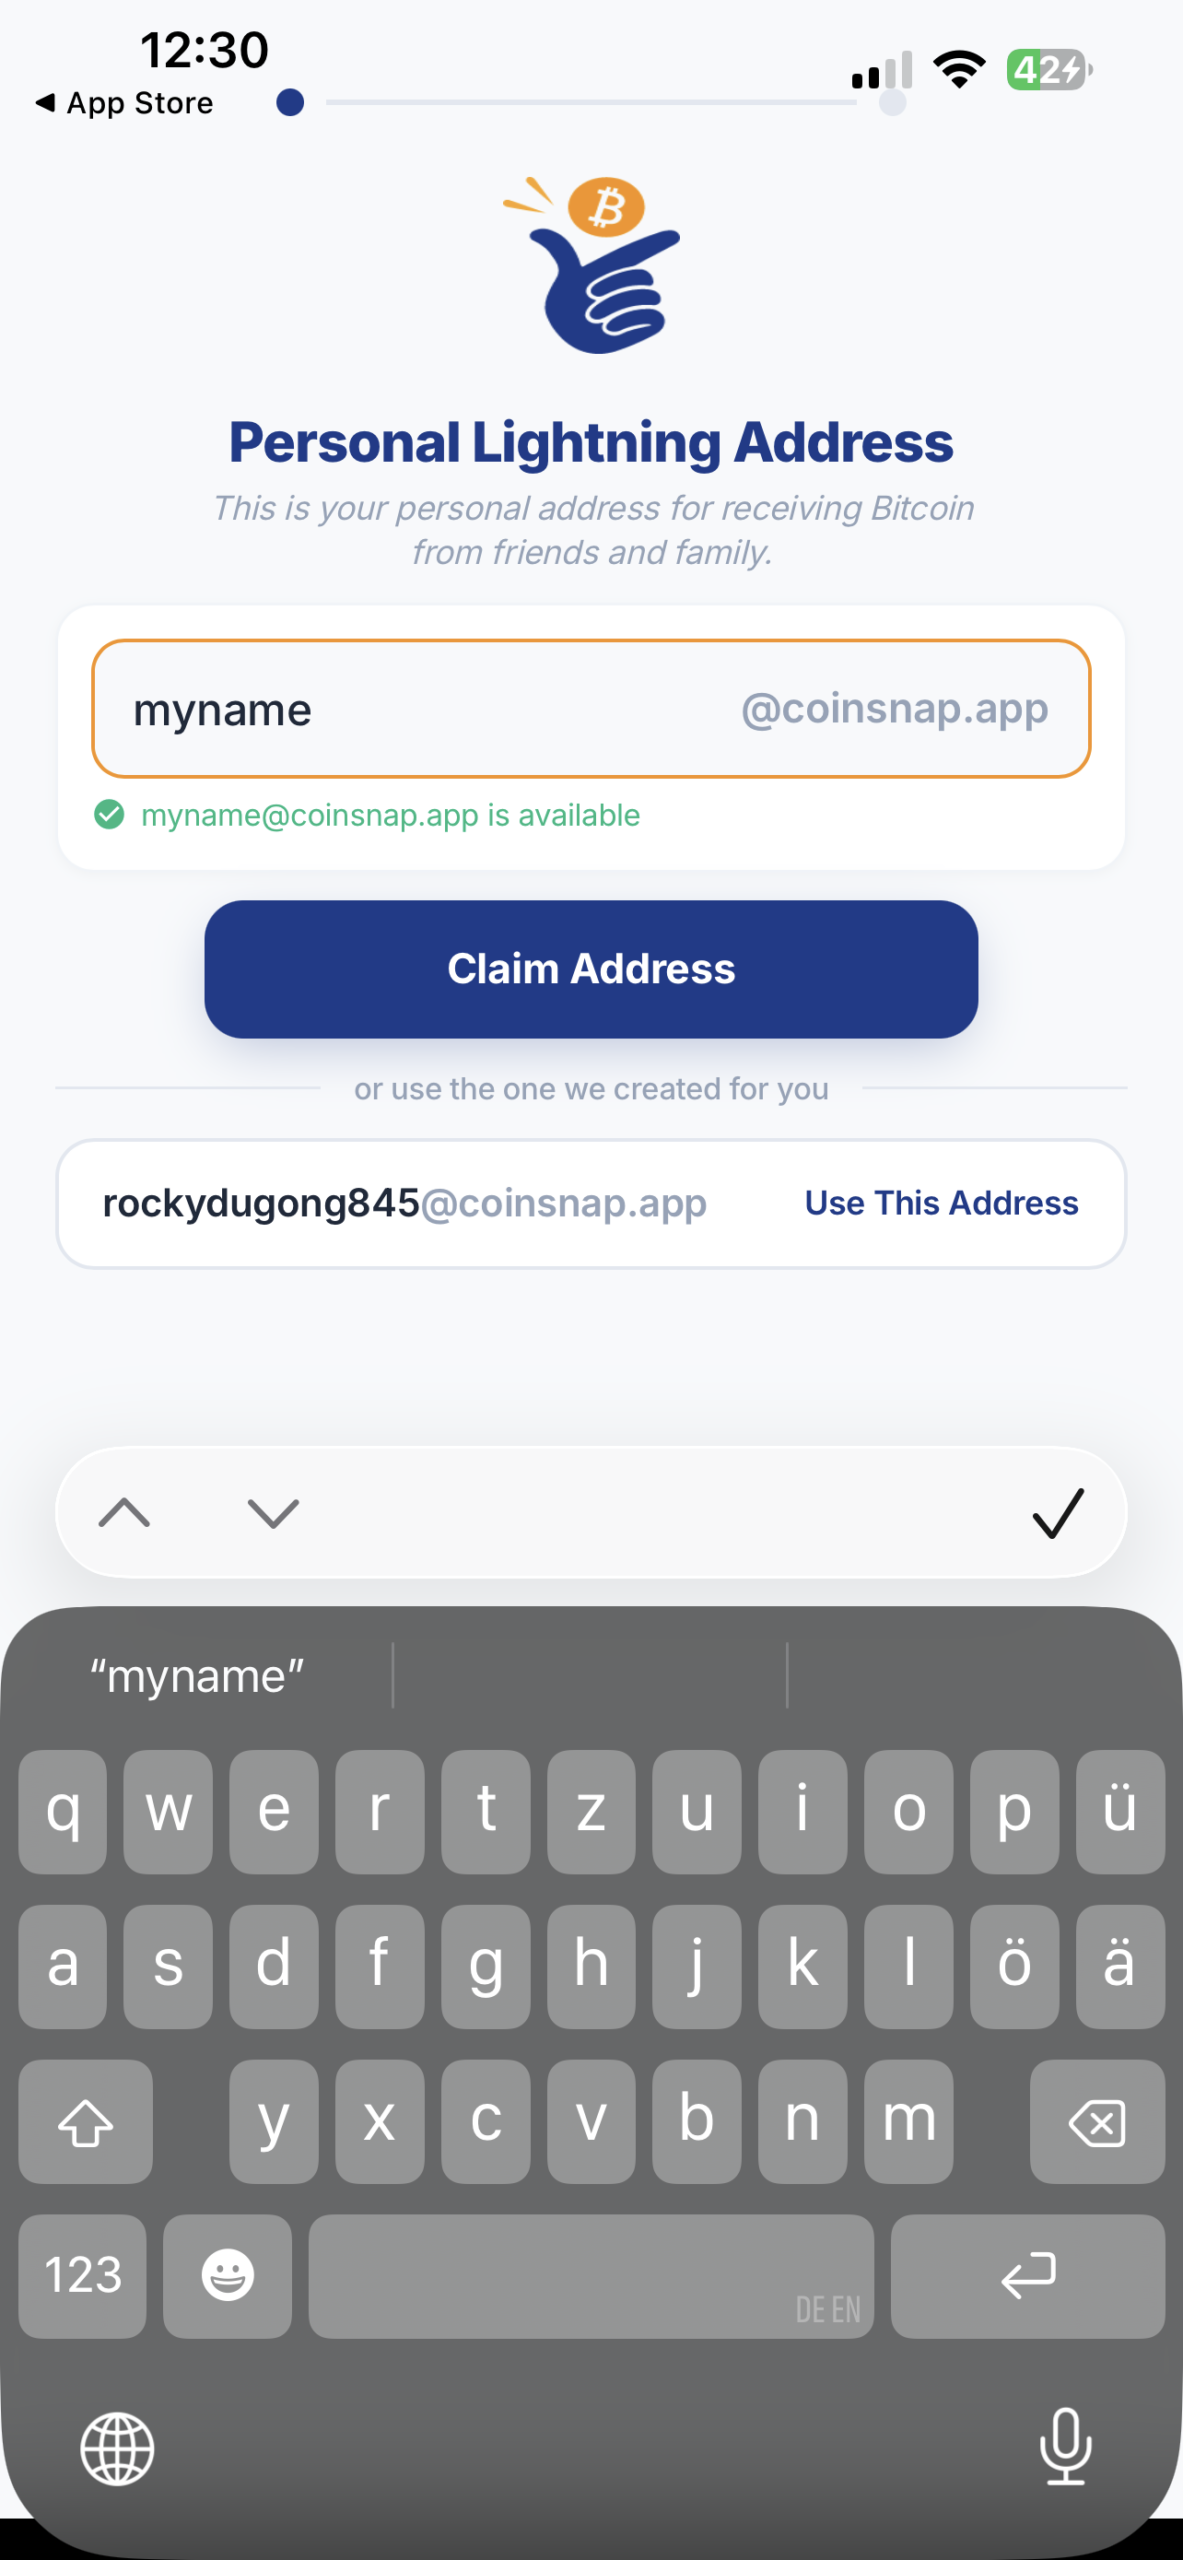
First, choose your Personal Lightning Address. This address is intended for receiving Bitcoin from friends, family, or anyone sending you a personal payment.
Simply enter your preferred username. If it’s available, tap Claim Address to reserve it. If your preferred name has already been taken, choose another one or use the automatically generated address suggested by the app.
Business Lightning Address
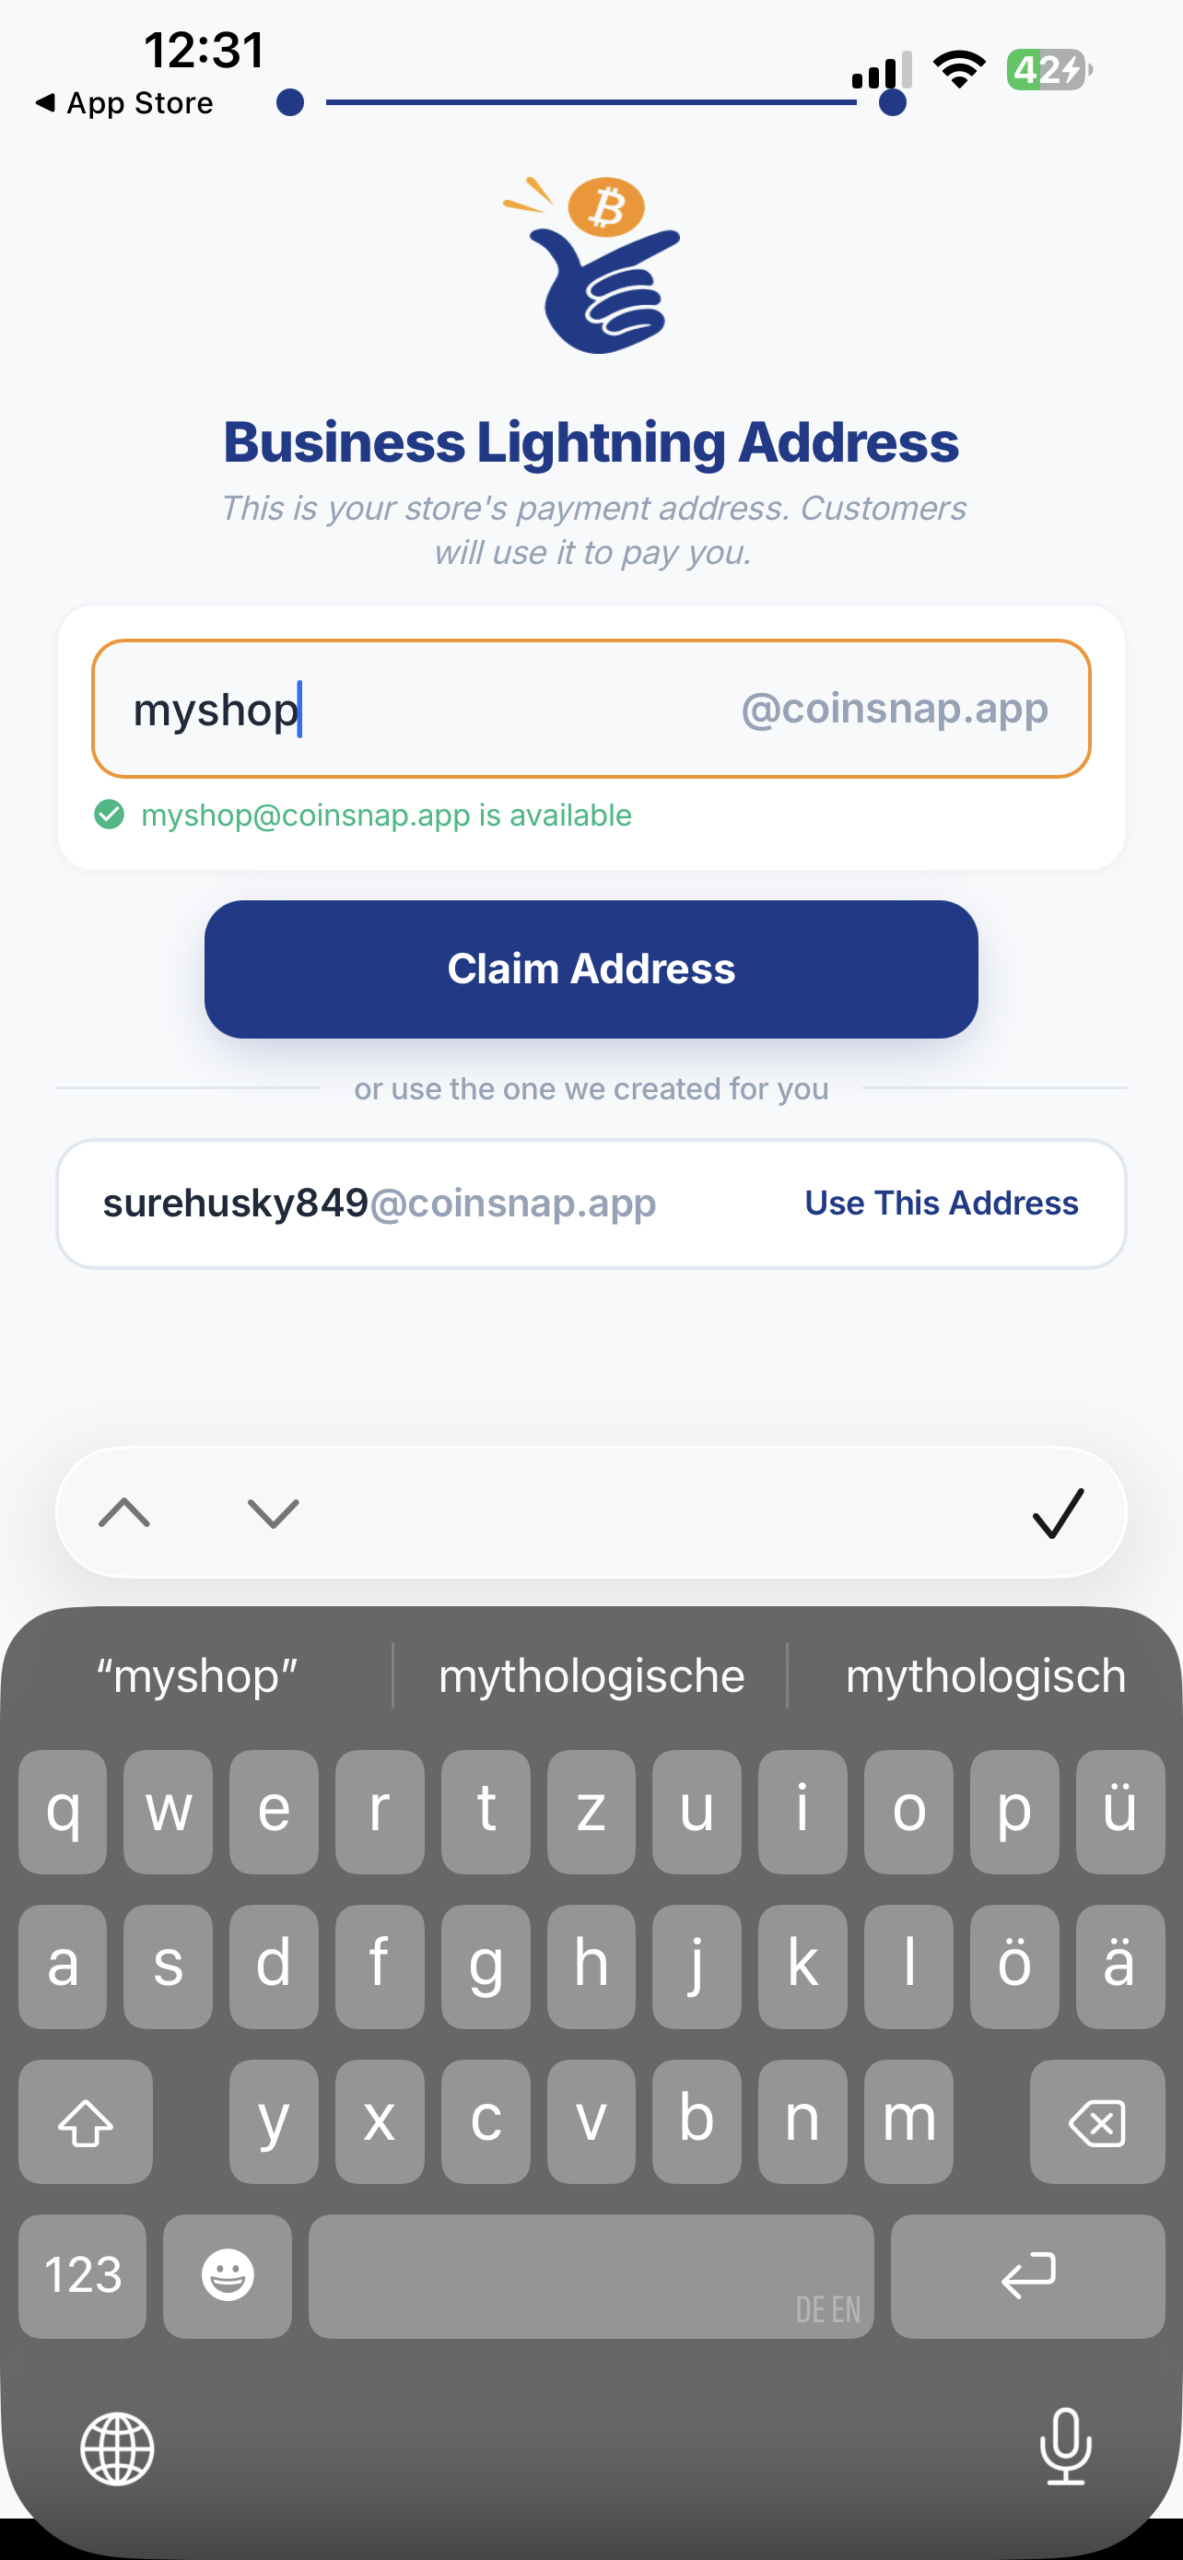
Next, choose your Business Lightning Address. This is the payment address you’ll use to receive Bitcoin from customers through your business.
As with your personal address, enter your preferred business name, check its availability, and tap Claim Address. Alternatively, you can keep the automatically generated address.
Lightning Addresses work much like email addresses. Instead of sharing long Lightning invoices or payment strings, you can simply tell someone to send Bitcoin to addresses such as:
This makes receiving Bitcoin payments simple, memorable, and easy to share.
Your Coinsnap Wallet Is Ready
Once you’ve claimed your Lightning Addresses, your Coinsnap Bitcoin Wallet is fully set up and ready to use.
Your wallet includes two separate accounts:
- Personal – for your private Bitcoin and Lightning transactions.
- Business – for receiving and managing business payments.
In addition, Coinsnap automatically prepares the integrated merchant environment, including the Point of Sale (PoS) and terminal functionality. There is nothing you need to configure at this stage—we’ll cover these merchant features in a separate guide.
Your wallet is now ready to send and receive Bitcoin over the Lightning Network. No blockchain synchronization, Lightning node setup, or other technical configuration is required.
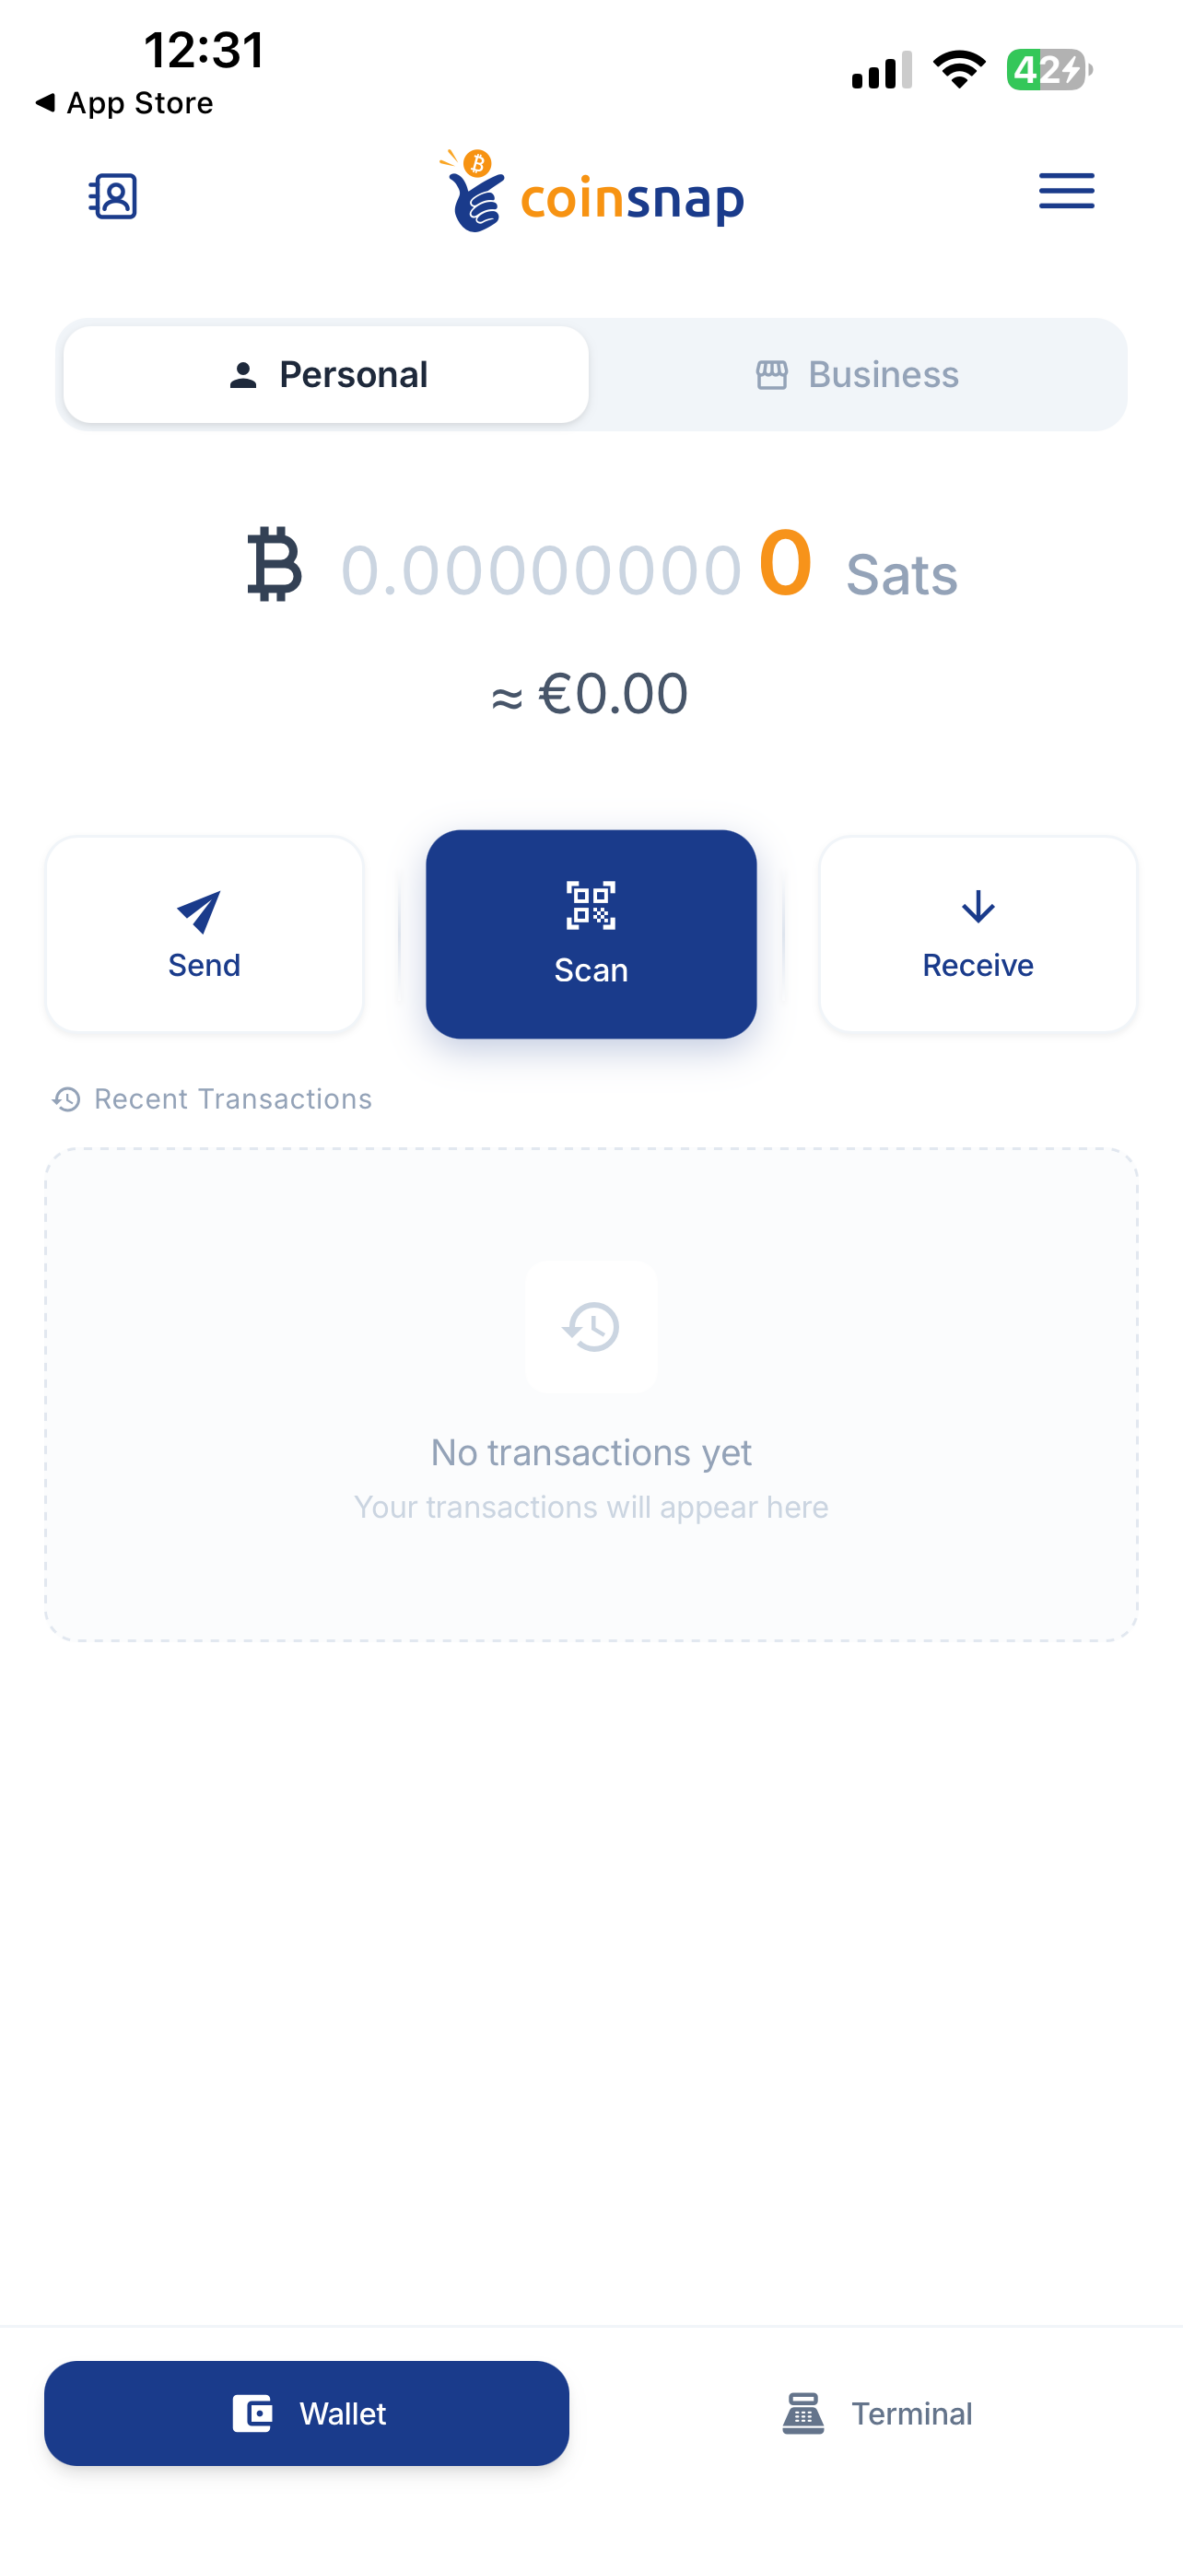
Optional but Highly Recommended: Back Up Your Wallet
Your Coinsnap Bitcoin Wallet is now ready to use. Before you start receiving Bitcoin, you should create a secure backup of your wallet.
The backup consists of a Recovery Phrase (also called a Seed Phrase)—a list of secret words that can restore your wallet if your phone is ever lost, stolen, or damaged.
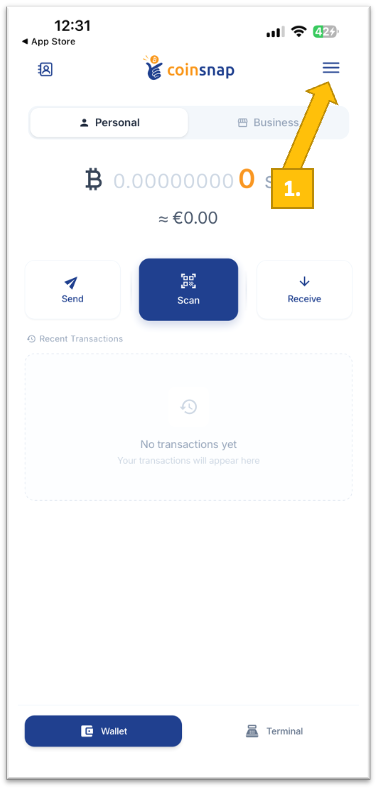
Open the Wallet Settings
From the Wallet screen, tap the menu icon in the upper-right corner to open Settings [1].
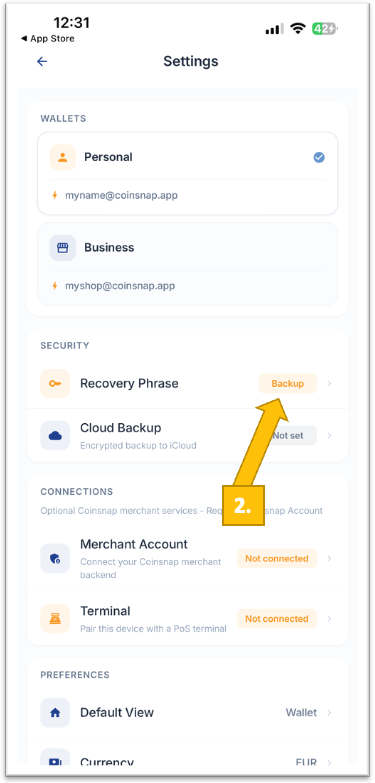
Open the Recovery Phrase
In Settings, locate the Recovery Phrase section under Security and tap Backup [2].
Verify and Store Your Recovery Phrase
The wallet will display your Recovery Phrase:
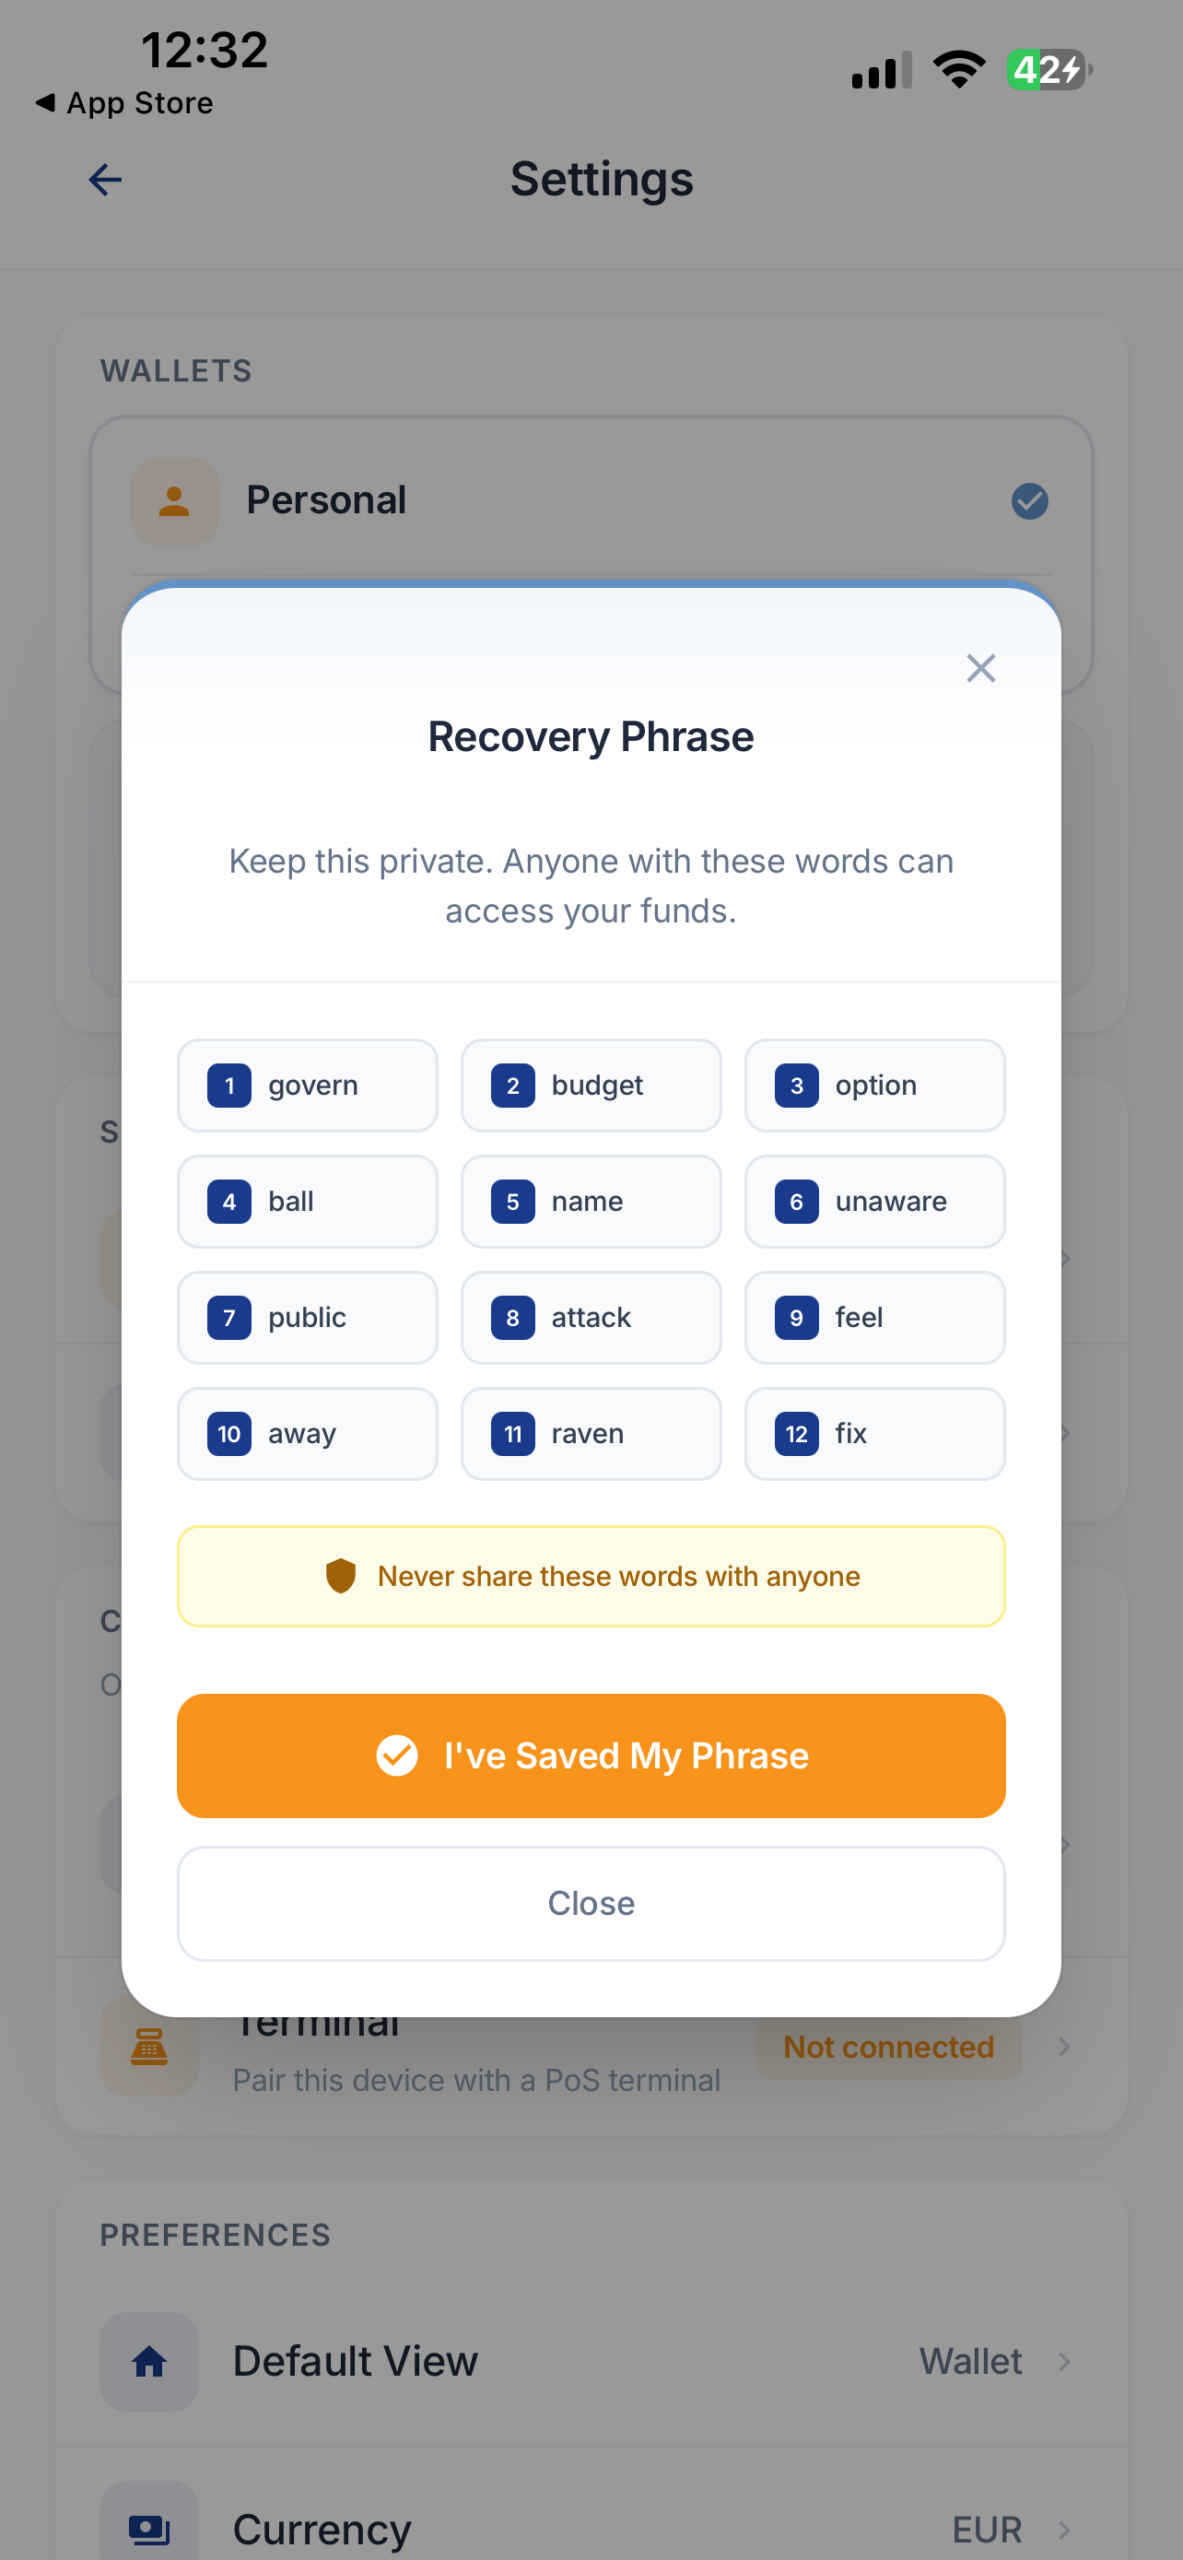
You will then be asked to verify it – just enter the three respective words.
Then write the words down in the correct order and store them in a safe offline location, such as a secure drawer or a fireproof safe. Do not take screenshots, save the words in cloud storage, or send them by email or messaging apps.
Once you have successfully verified your Recovery Phrase, your wallet backup is complete.
Your Coinsnap Bitcoin Wallet Is Ready
Congratulations! Your Coinsnap Bitcoin Wallet is now fully configured and protected.
You can now:
- Send and receive Bitcoin over the Lightning Network.
- Use your Personal and Business Lightning Addresses.
- Switch between your Personal and Business wallets.
- Start using your wallet immediately.
In our next guide, we’ll show you how to set up your first Coinsnap Point of Sale, connect a terminal, and start accepting Bitcoin payments from customers.
All About the Coinsnap POS Wallet
Everything you need to get started with the Coinsnap Wallet, Bitcoin POS, and the business management tools behind it is covered in our three-part Coinsnap POS Wallet Guide.
From installing your wallet and setting up your first POS and terminals to managing sales, transactions, orders, fees, accounting, and reporting, we have broken the complete process down into three practical step-by-step guides:
- Coinsnap Bitcoin Wallet Setup: Install and Set Up Your Wallet — Install your Coinsnap Wallet, create your personal and business Lightning addresses, and get ready to receive Bitcoin.
- Coinsnap Bitcoin POS Setup: How to Set Up Your POS, Terminals and Products — Create your POS, connect your terminals, and configure your product catalogue.
- Coinsnap POS Dashboard: The Cockpit of Your Bitcoin Business — Monitor your Bitcoin business, manage transactions and orders, choose how you receive your funds, and prepare the records you need for accounting and reporting.
From your first wallet setup to your first Bitcoin sale – and from that sale to your accounting records – these three guides give you everything you need to run your Bitcoin POS business with Coinsnap.
Coinsnap Bitcoin Wallet Setup FAQ
Most users can complete the Coinsnap Bitcoin Wallet setup in less than two minutes.
No. If you only use the Coinsnap Bitcoin Wallet for personal Bitcoin and Lightning payments, you do not need to register or provide an email address. An email address is only required if you want to use the wallet’s merchant features, such as accepting customer payments through the integrated Point of Sale (PoS), creating a business account, or using other business-related services.
No. The backup is optional, but it is strongly recommended. Your Recovery Phrase allows you to restore your wallet if you lose your phone.
Yes. You control your wallet and your Recovery Phrase.
The Complete Coinsnap Bitcoin Wallet Guide
Everything you need to get started with the Coinsnap Bitcoin Wallet, Bitcoin POS, and the business management tools behind it is covered in our four-part Coinsnap Bitcoin Wallet Guide.
From installing your wallet and setting up your first POS and terminals to managing sales, transactions, orders, fees, accounting, and reporting, we have broken the complete process down into four practical step-by-step guides:
- Coinsnap Bitcoin Wallet Setup: Install and Set Up Your Wallet — Install your Coinsnap Wallet, create your personal and business Lightning addresses, and get ready to receive Bitcoin.
- How to Send and Receive Bitcoin with the Coinsnap Wallet — Pay for something with Bitcoin, or create a payment request for someone to pay you.
- Coinsnap Bitcoin POS Setup: How to Set Up Your POS, Terminals and Products — Create your POS, connect your terminals, and configure your product catalogue.
- Coinsnap POS Dashboard: The Cockpit of Your Bitcoin Business — Monitor your Bitcoin business, manage transactions and orders, choose how you receive your funds, and prepare the records you need for accounting and reporting.
From your first wallet setup to your first Bitcoin sale – and from that sale to your accounting records – these four guides give you everything you need to run your Bitcoin POS business with Coinsnap.