Prerequisites
Before you start to connect your Coinsnap plugin with your Coinsnap account, make sure the following requirements are met:
- You have an active Coinsnap account (how to open an account)
- You have installed and activated a Coinsnap plugin on your WordPress website (how to install and activate a Coinsnap plugin in WordPress or in GitHub)
- You are logged in to your WordPress admin dashboard
If you haven’t created a Coinsnap account yet, do that first and complete the initial setup (store name and wallet connection).
Step 1: Log in to Your WordPress Admin Area
Open your WordPress backend and navigate to Plugins to ensure the Coinsnap plugin you want to use is installed and activated.
Once activated, you’ll find a new Coinsnap entry in your WordPress menu or under the settings section of the specific plugin (for example: Donation, Invoice, Voting, Paywall, or Web POS).
Step 2: Open the Coinsnap Plugin Settings
Note: This guide applies to WordPress plugins only. If you use a different website platform, please refer to the relevant installation guide.
Find the plugin in the left sidebar of your WordPress dashboard and click Settings.
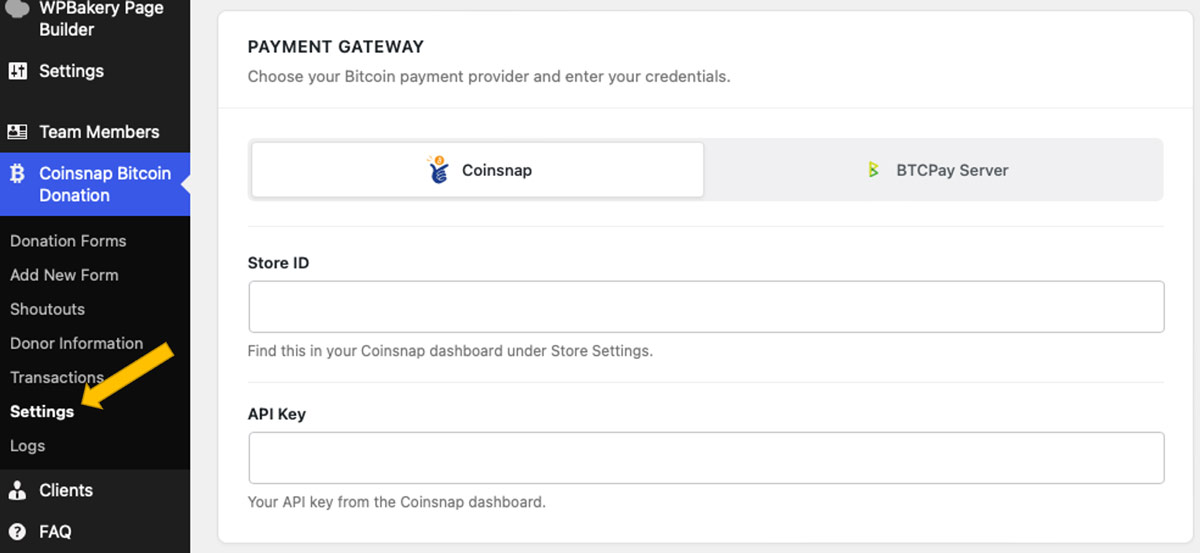
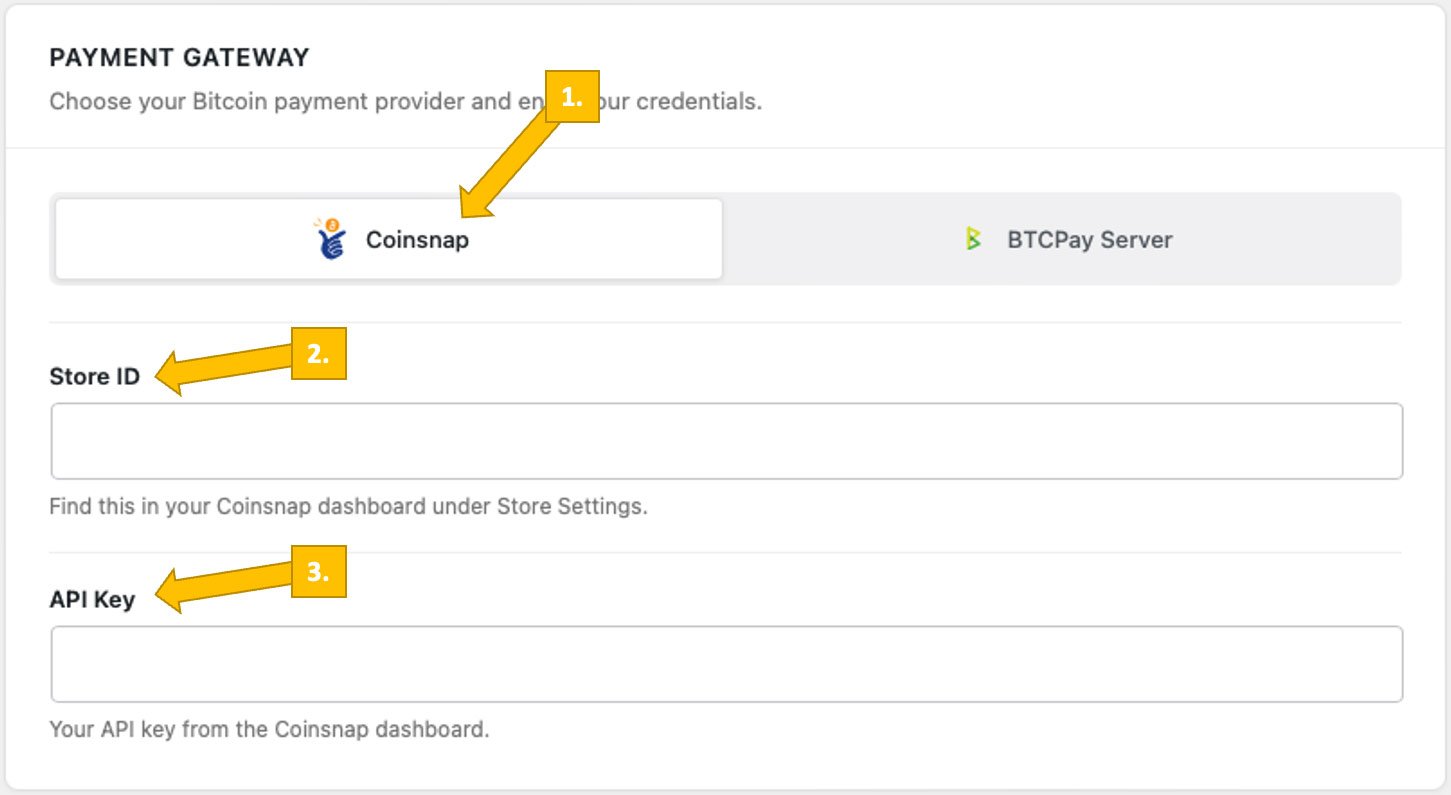
Step 3: Connect the Plugin to Your Coinsnap Account
To connect your plugin to your Coinsnap account, select Coinsnap as your payment gateway [1], then enter your Coinsnap Store ID [2] and your Coinsnap API Key [3].
Step 4: How to Retrieve Your Coinsnap Store ID and Your API Key
In your Coinsnap dashboard, go to Finances -> Settings [1], then Store [2]. Now you can copy your Store ID [3] and API Key [4].

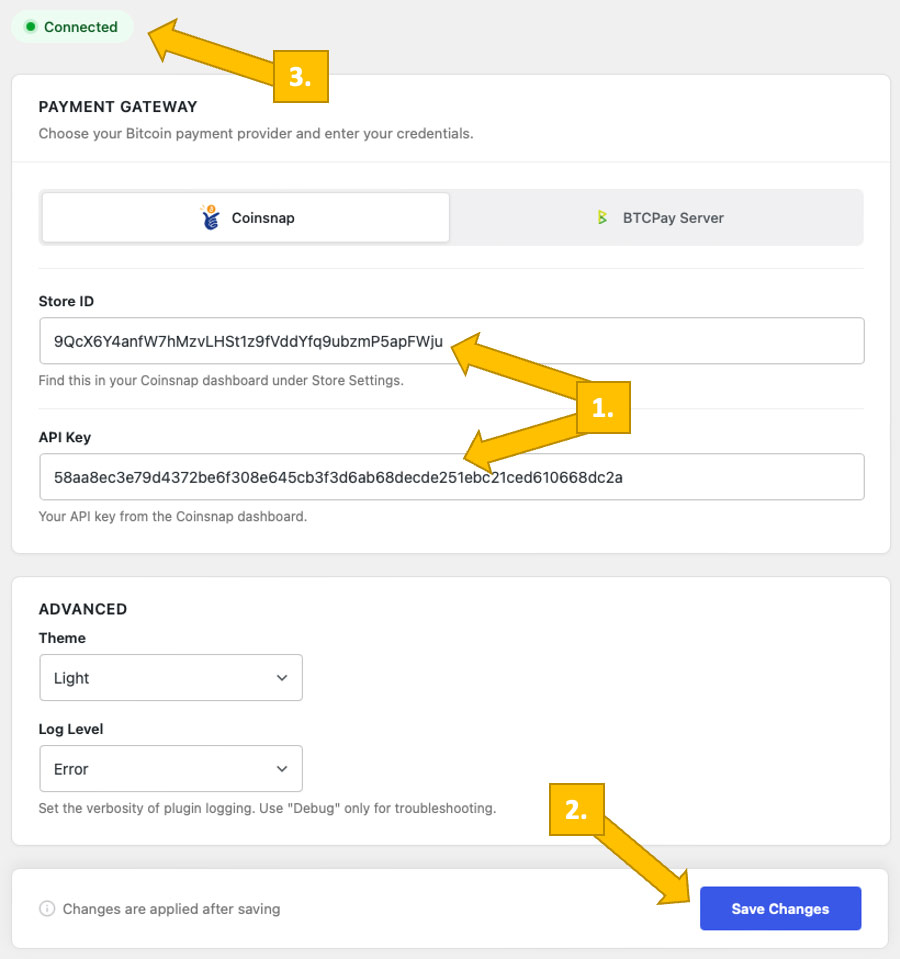
Step 5: Paste Store ID and API Key into plugin settings
After copying the Store ID and API Key paste them into the respective fields in your plugin [1], then click Save [2]. After a few seconds, a small green success notice will appear [3].
Next Steps
Your Coinsnap plugin is now connected to your payment gateway and ready to forward Bitcoin payments directly from your customer’s wallet to your own wallet.
We explain all additional settings—such as labels, texts, colors, and other customization options—in the user guides for the respective plugins.