Shopify Bitcoin User Guide
This User Guide shows you how to accept Bitcoin and Lightning payments in Shopify with the Shopify Bitcoin module. It explains how to install and connect the Coinsnap module, how to configure all relevant settings, and how to enable Bitcoin payments at checkout so customers can pay instantly via Bitcoin (on-chain + Lightning).
Add Bitcoin + Lightning to your Shopify checkout — fast setup, no complex integration.


get started - Requirements
To enable Bitcoin payments with Coinsnap in your Shopify store, you must meet the following requirements:
- A Shopify website with administrator access, as well as administrator access to the Shopify Partner Portal
- An active Coinsnap account
- The Coinsnap for Shopify extension from the Shopify App Store.
Note:
If your Shopify Partner and Shopify Store use the same account, you can start directly with Step 1.
If you plan to use different accounts, you must first prepare the Shopify Store by adding the Partner account as a Store User. This must be done by the Shopify store administrator before installing the app!
Step 1 - add our dev team to your Shopify
Add Coinsnap (dev@coinsnap.io) as a user to your Shopify admin to allow app installation and configuration
Open your Shopify Store:
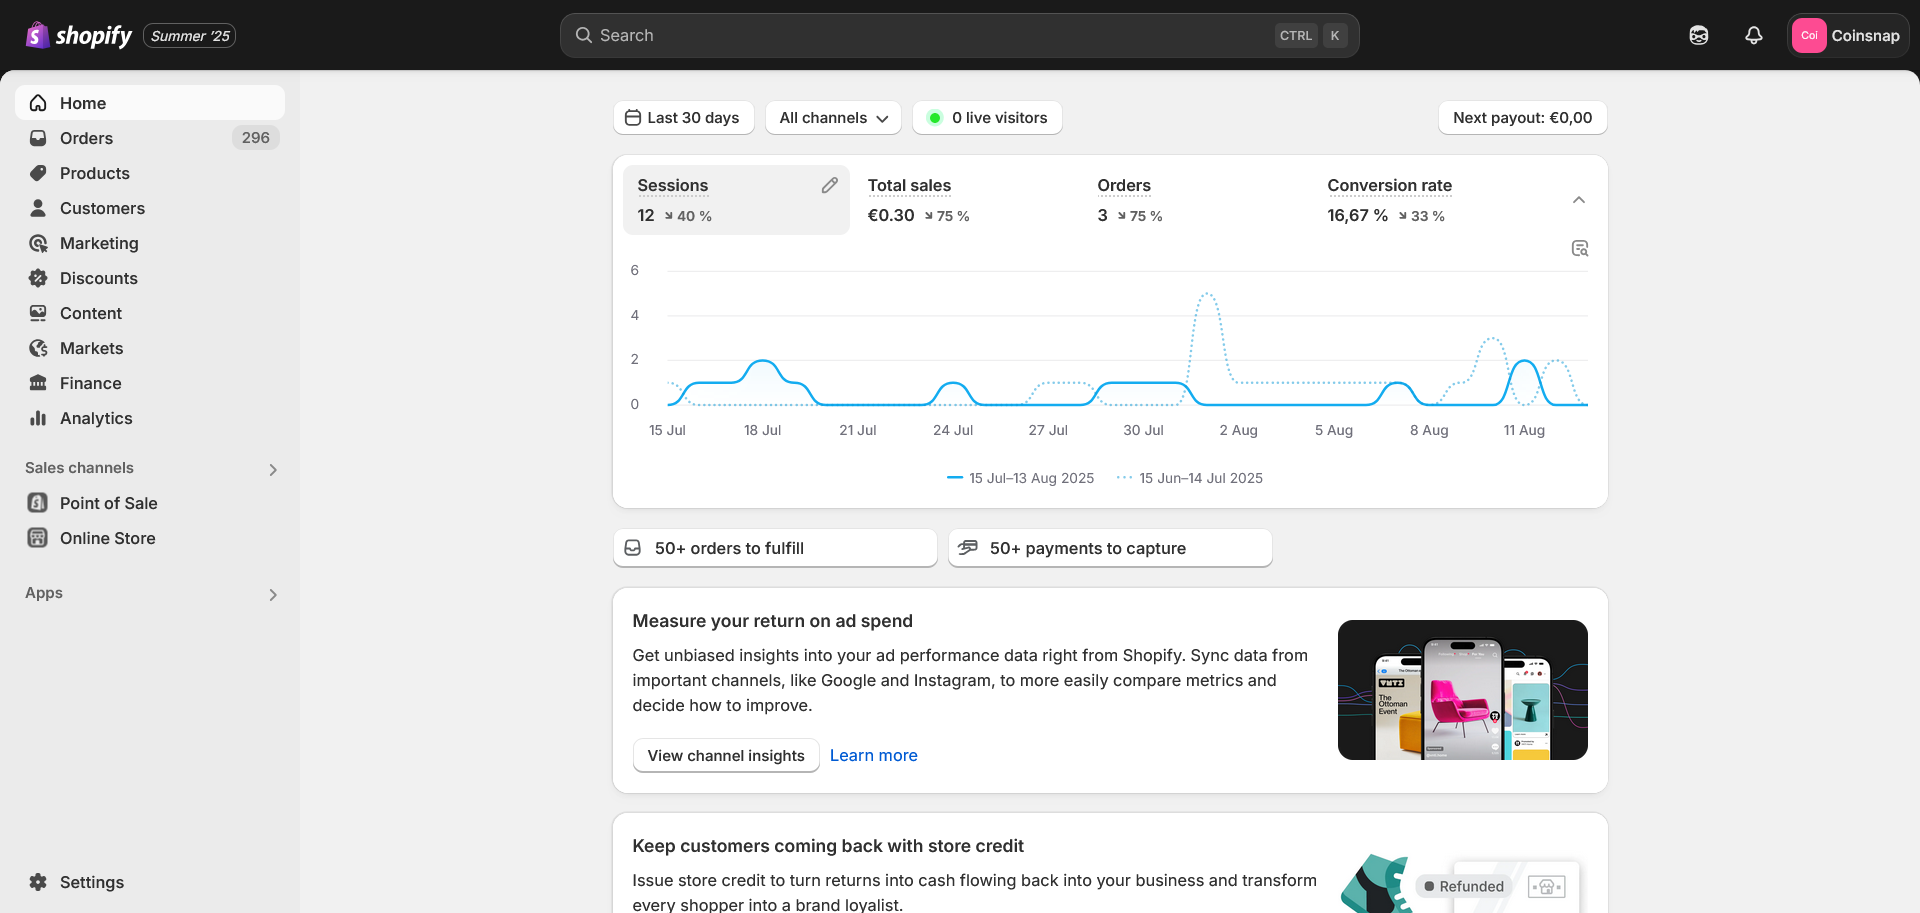
Go to Settings and then open the Users section.
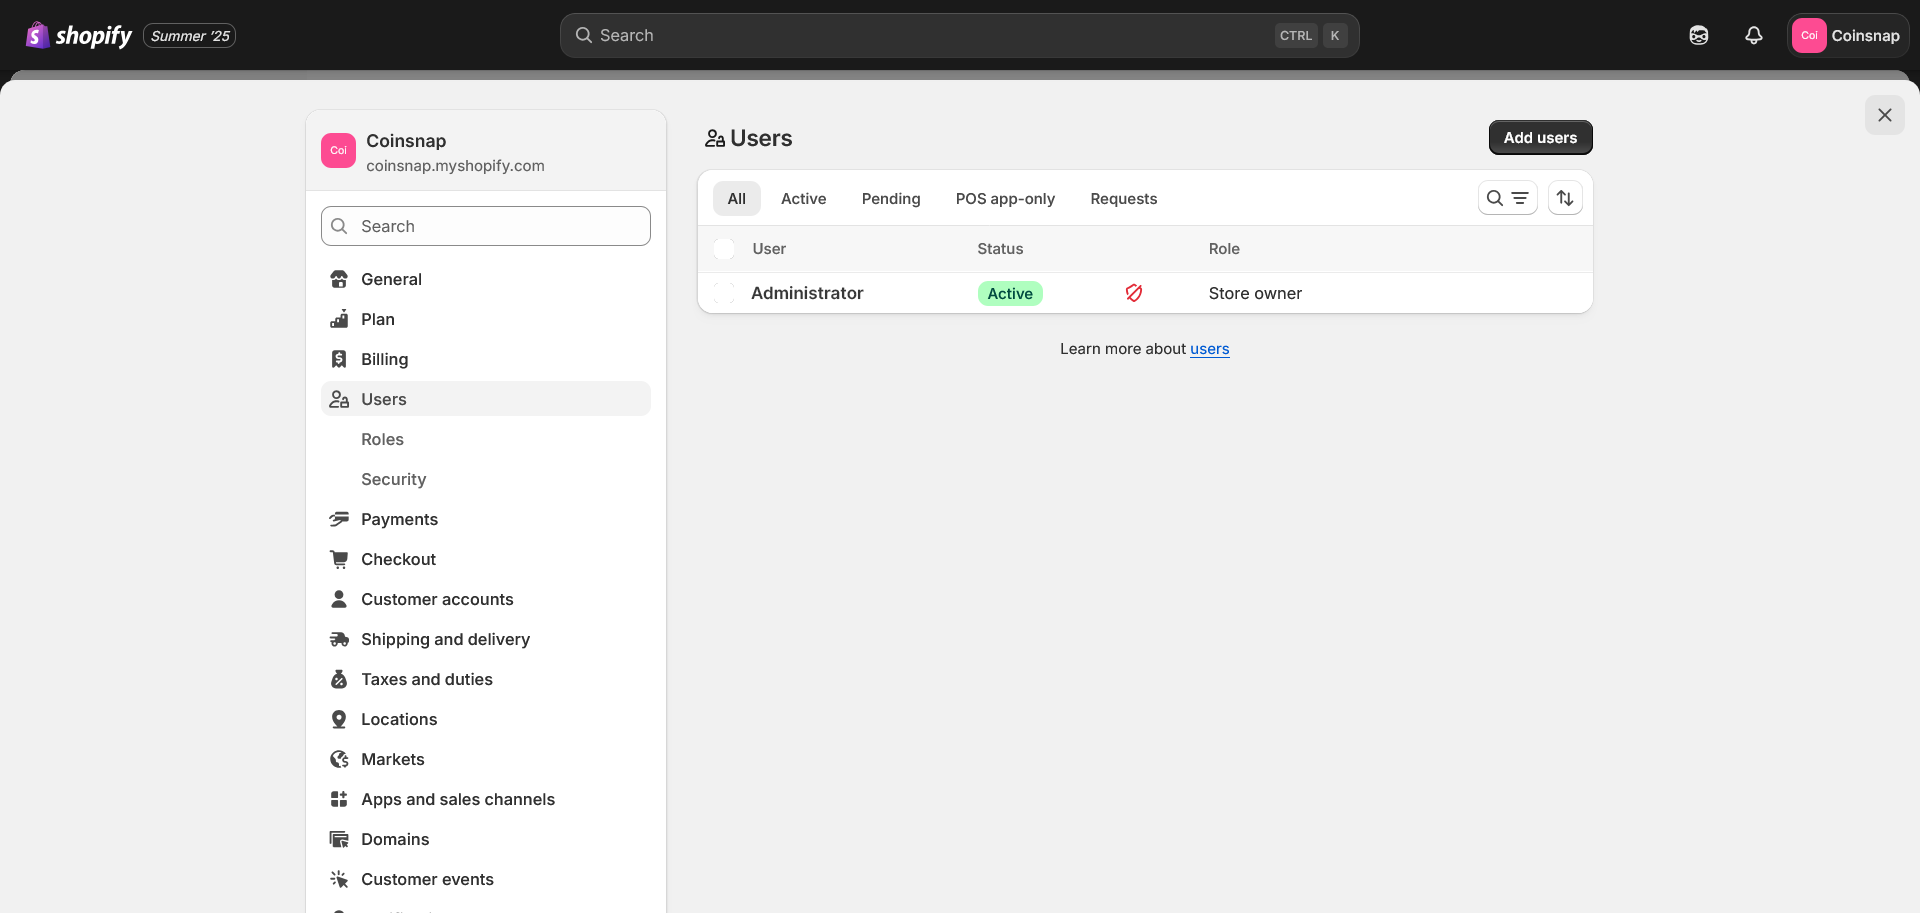
Click the Add users button and add a new user.
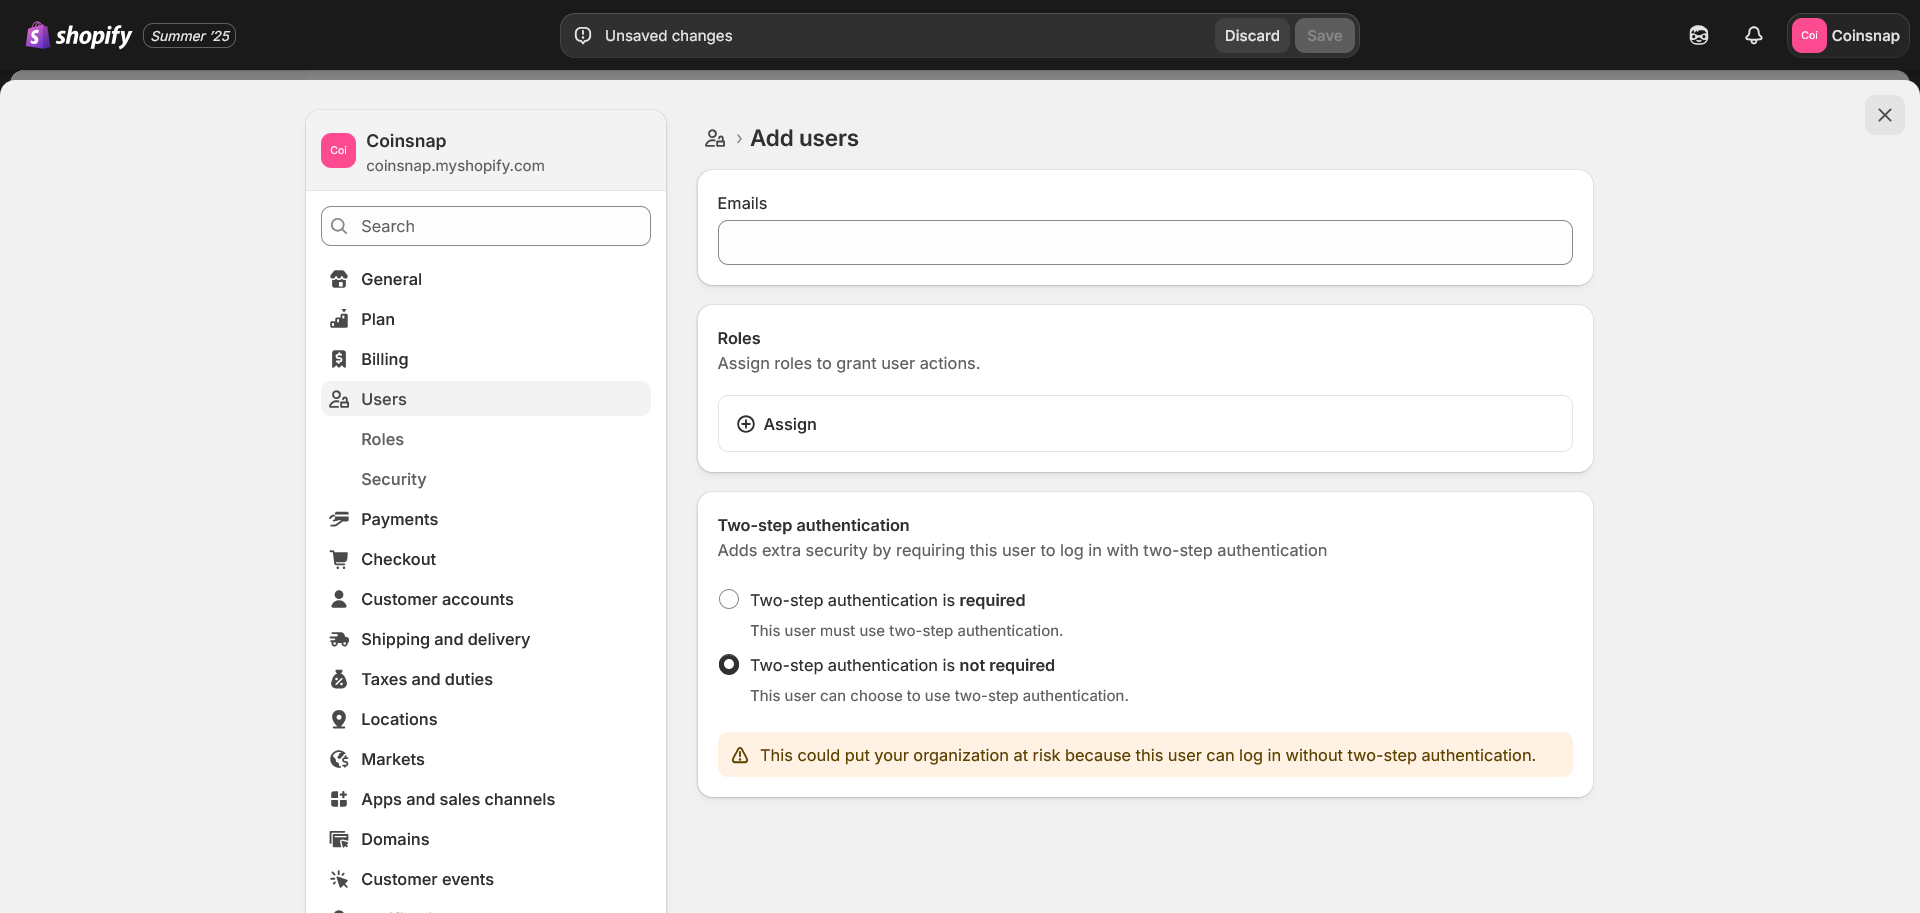
Enter the dev@coinsnap.io email address and assign the role (Auto-generated) Orders, Settings ….
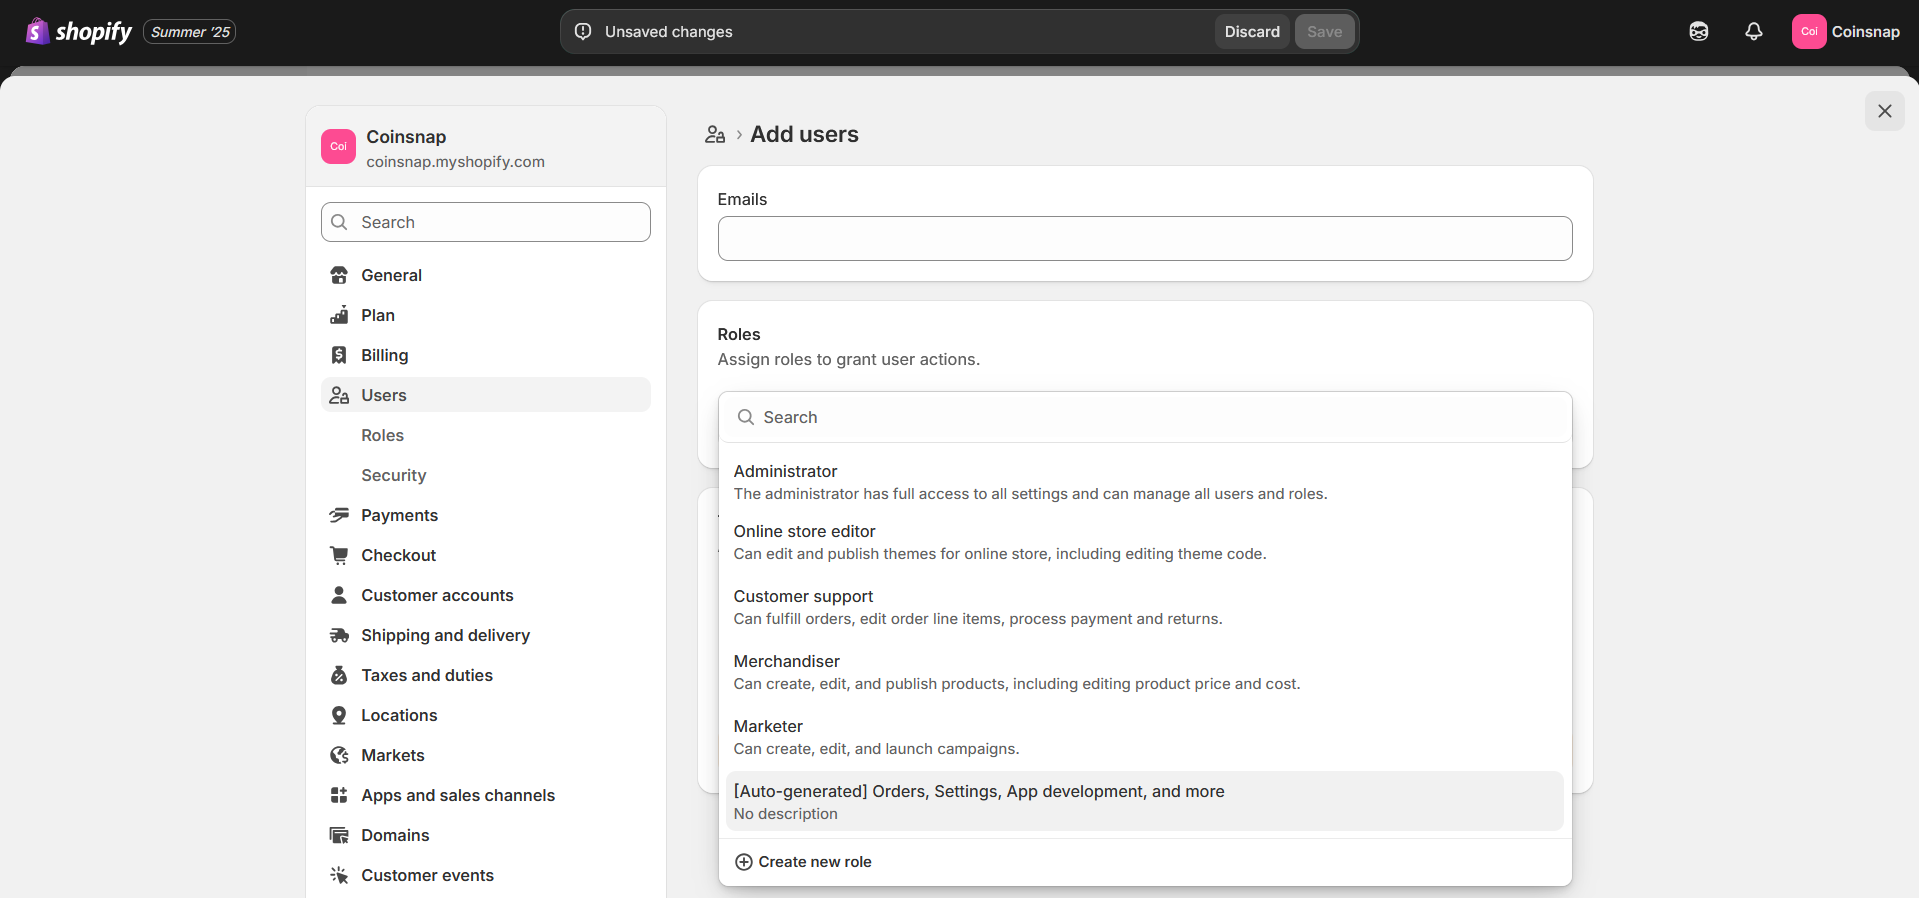
After assigning the role, you will see a screen like this:
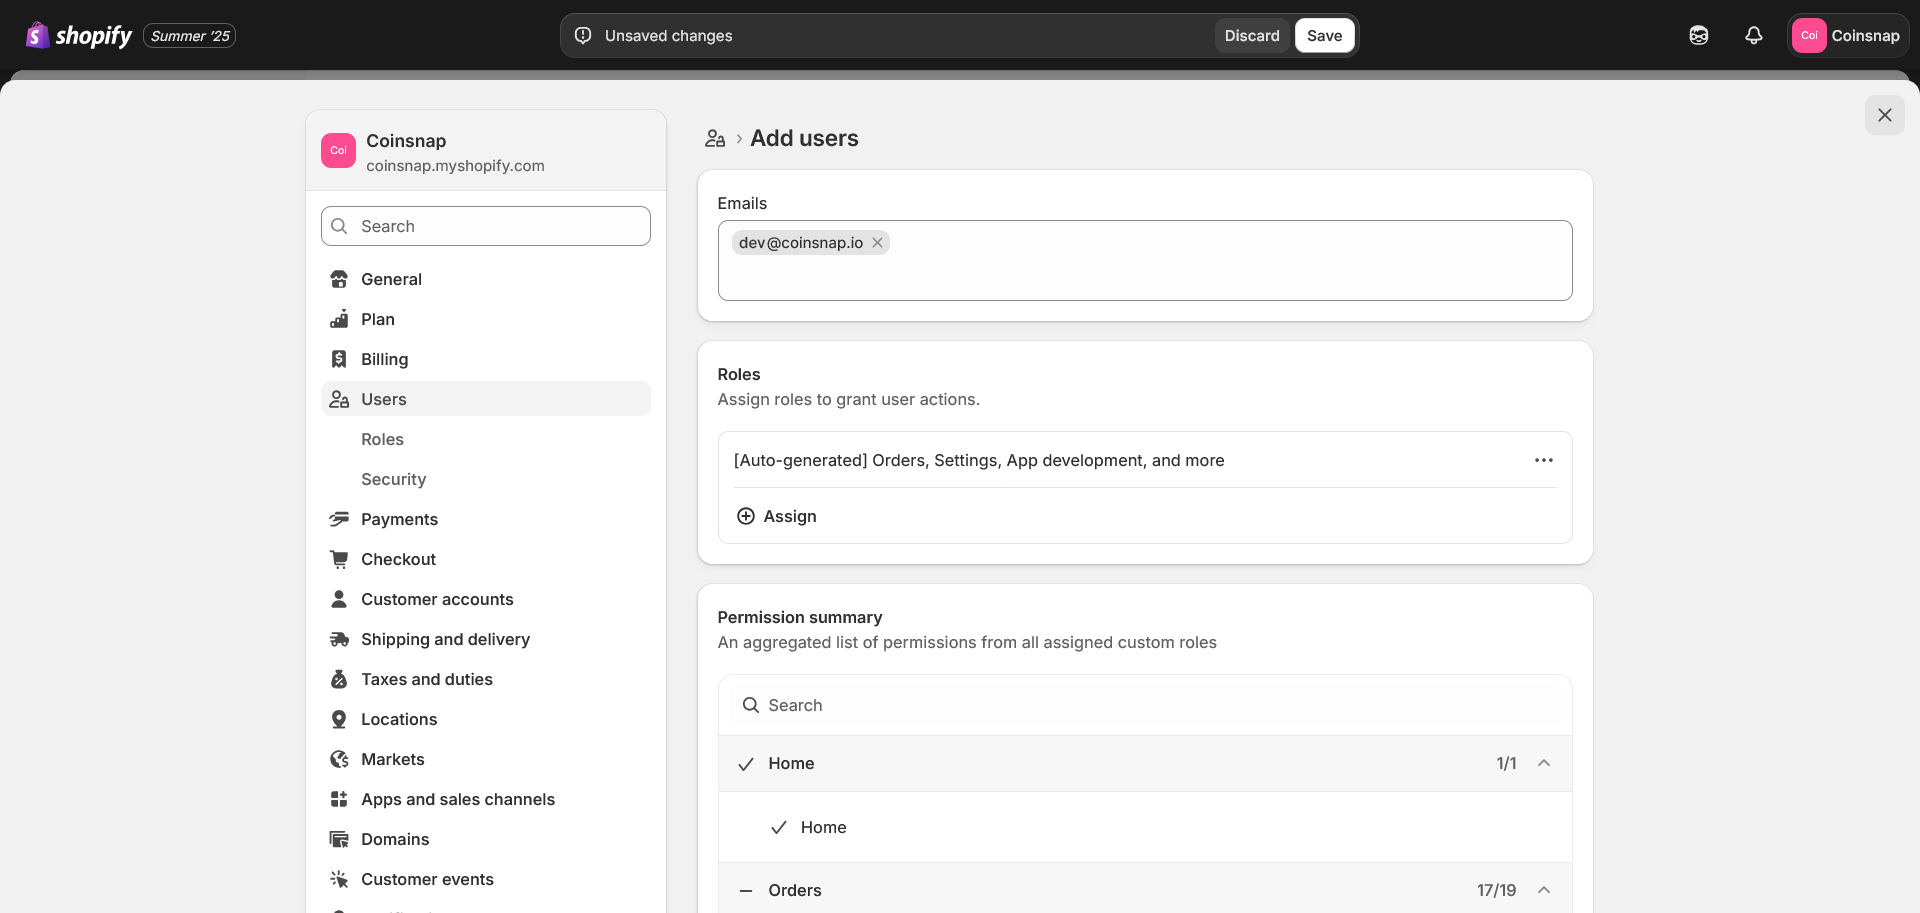
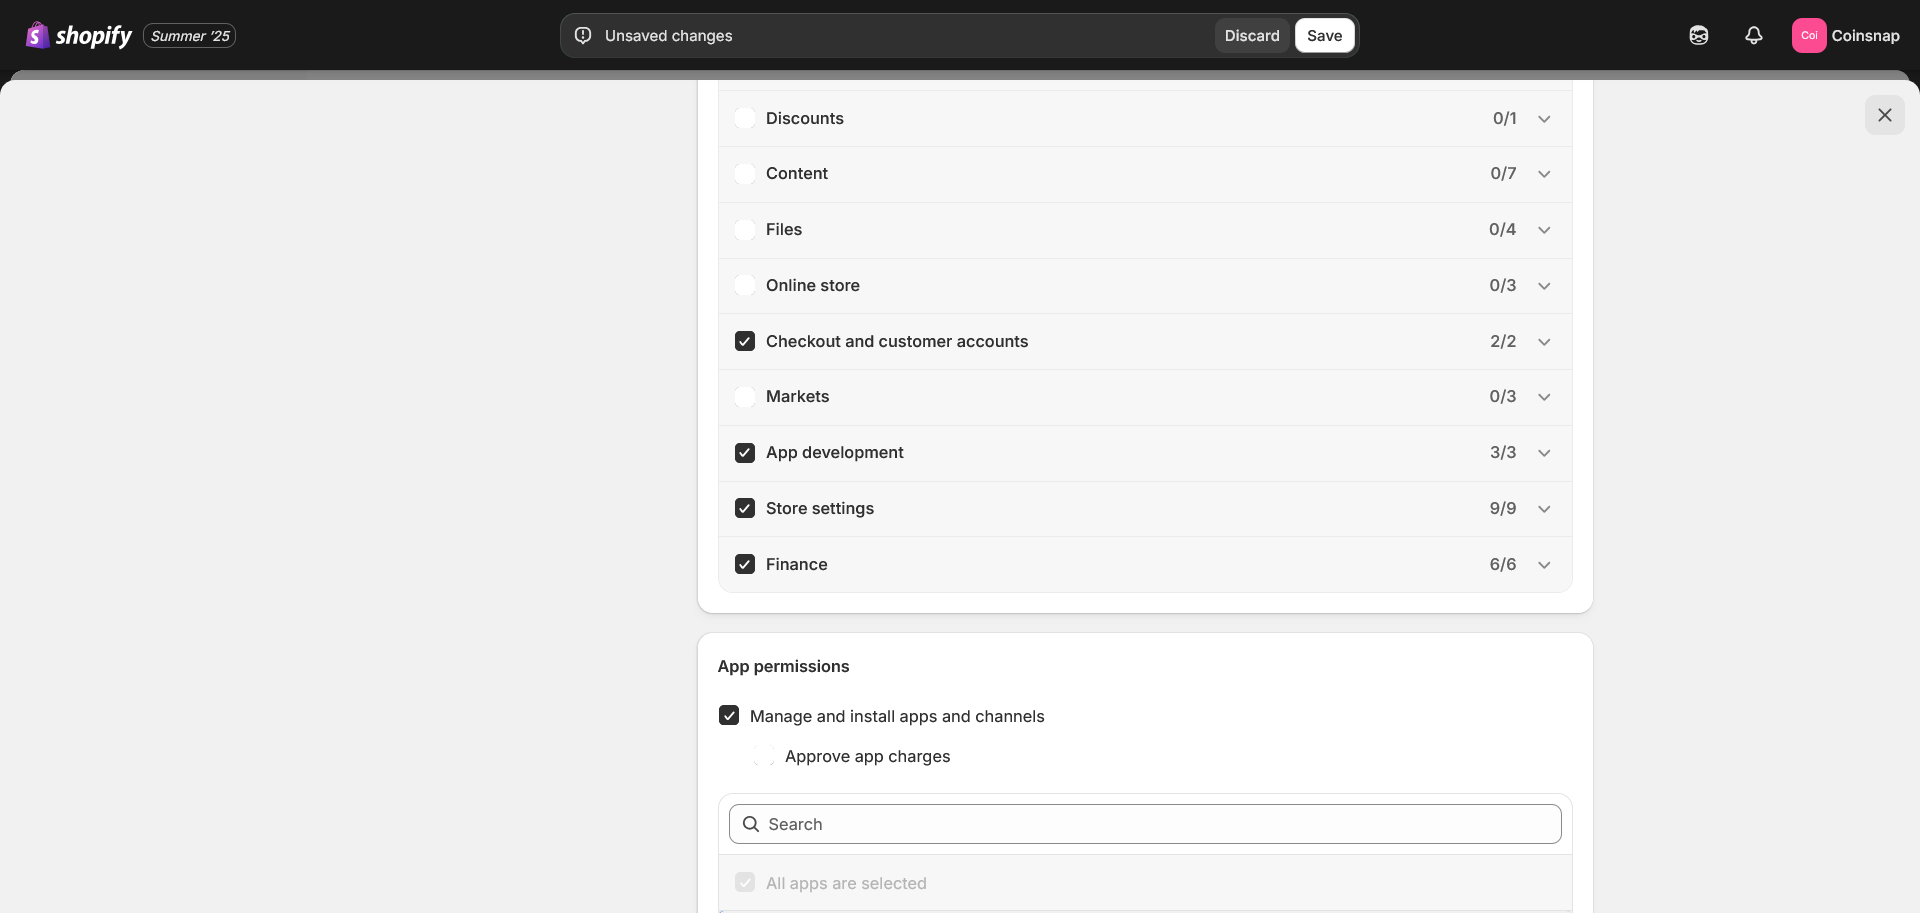
Grant the Partner Checkout and customer accounts and Finance permissions. These permissions are required to configure the payment method and the Thank You page.
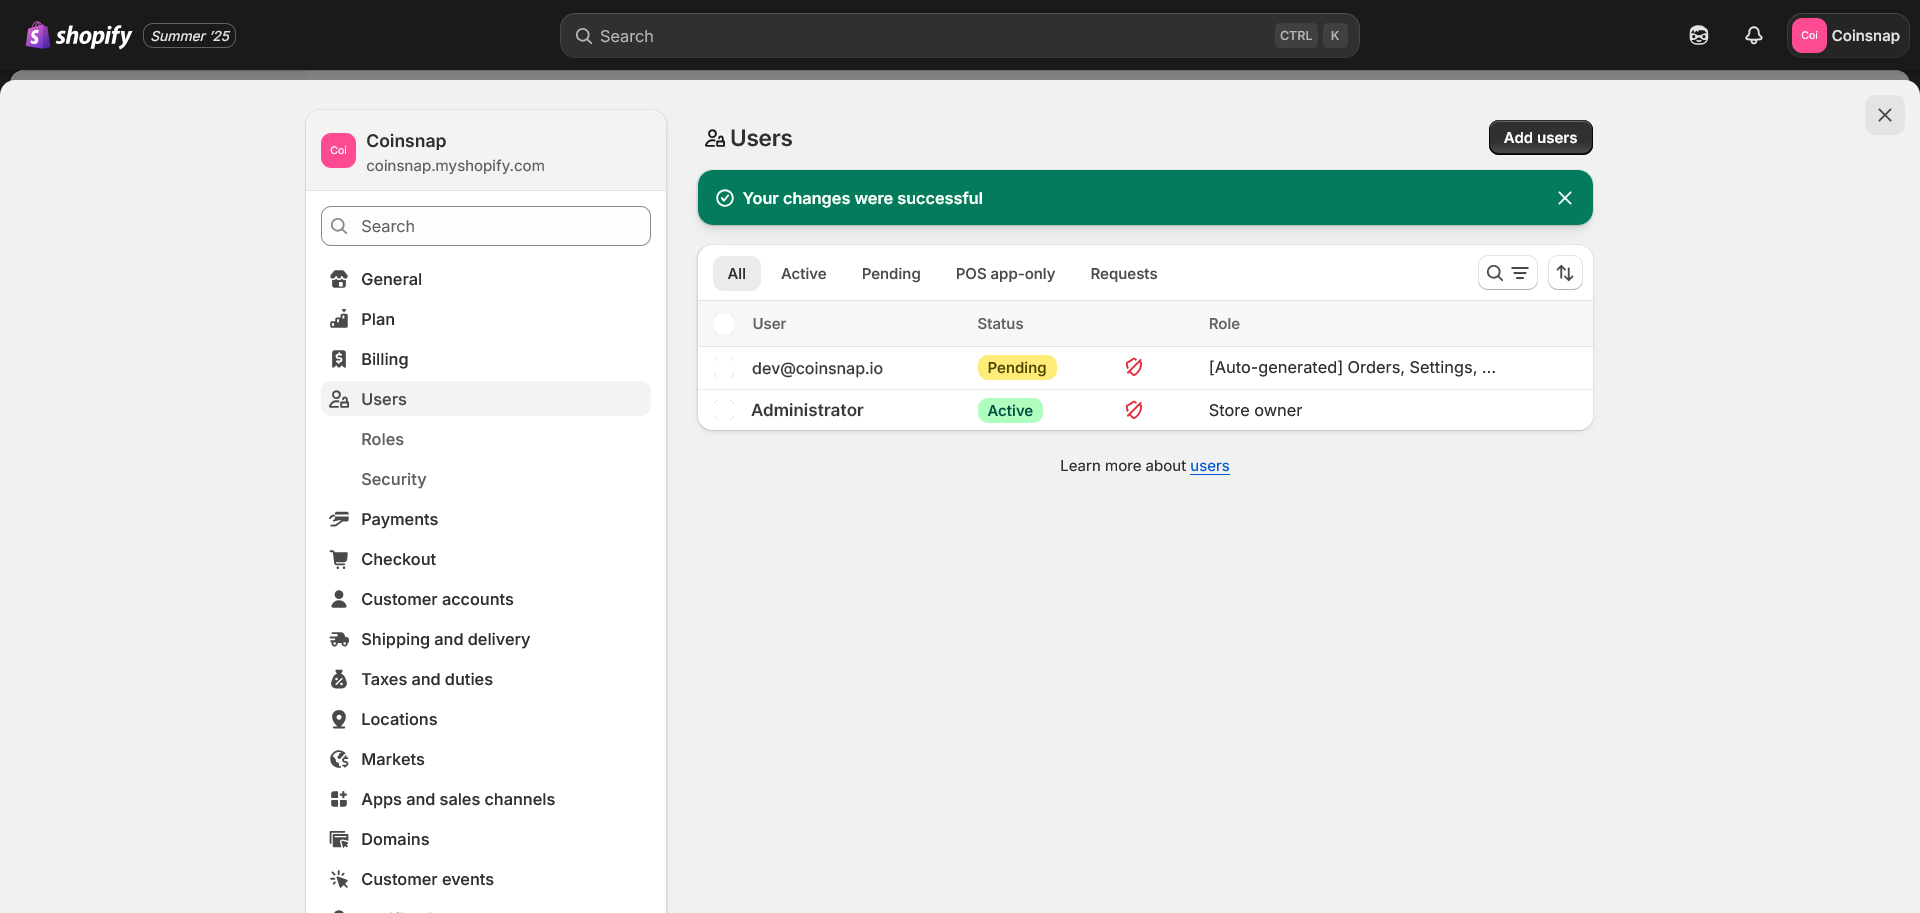
This is the final result after adding the user. The Partner only needs to confirm the invitation.
Step 2 - configure the Shopify Partner Portal
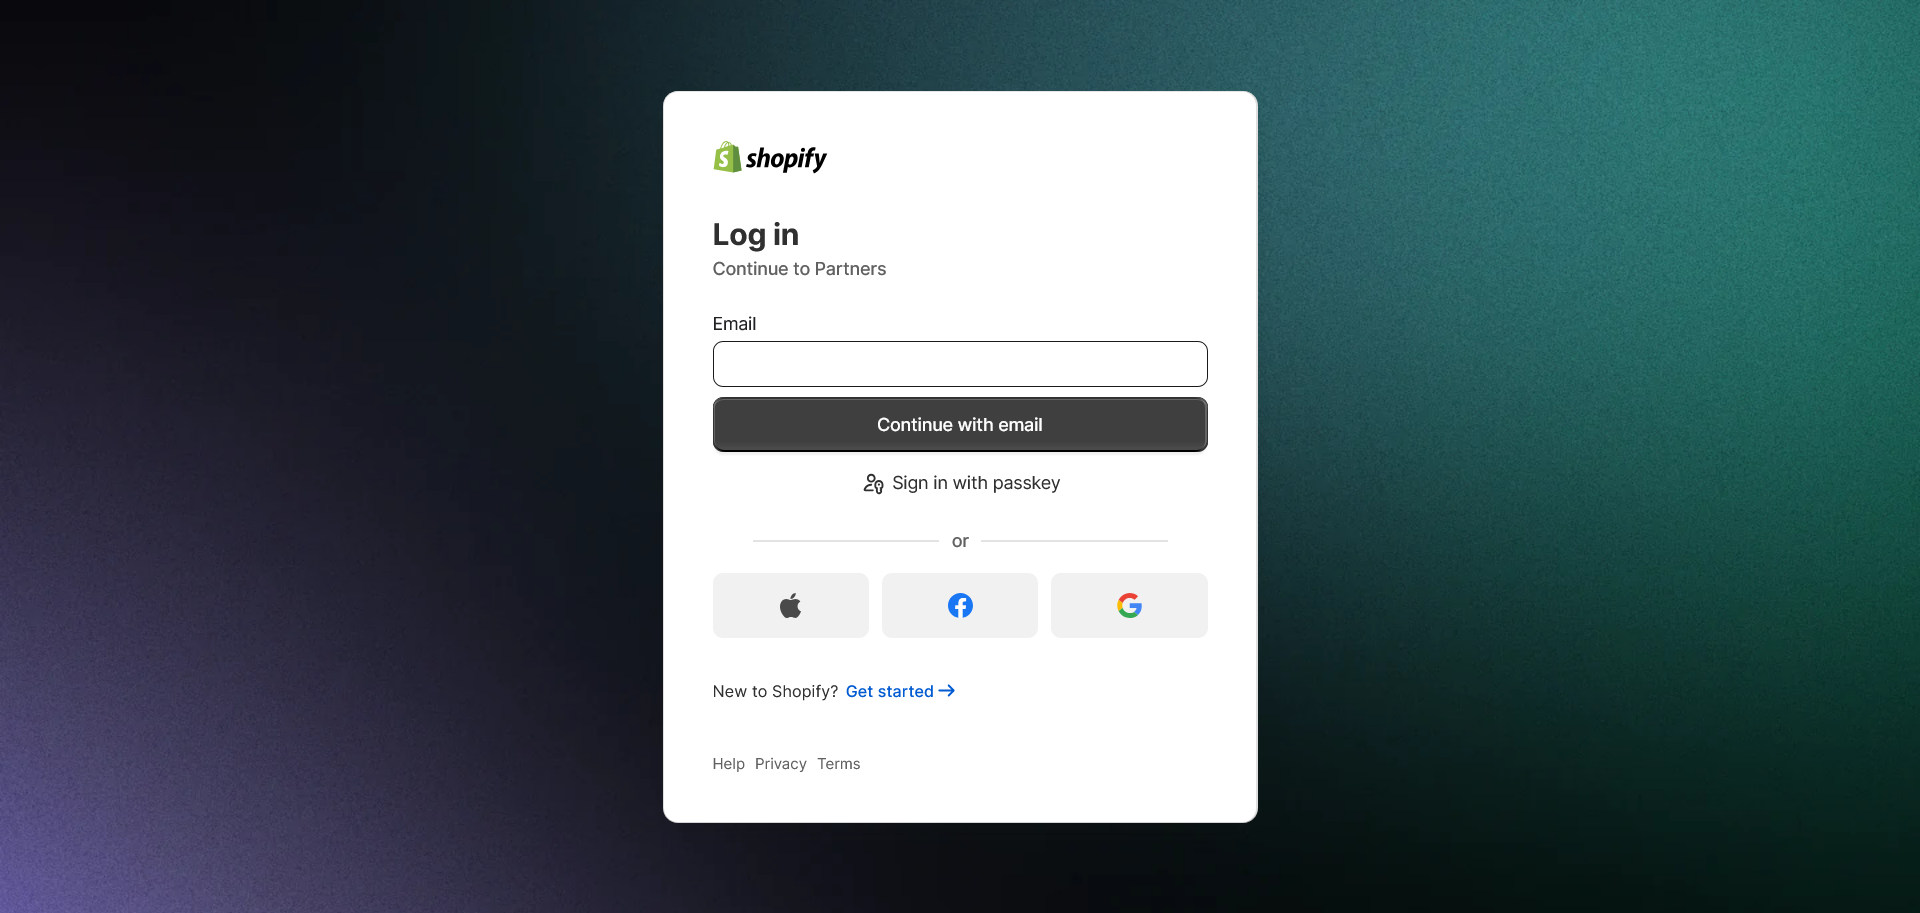
2.1. Log in to the Shopify Partner Portal:
https://www.shopify.com/partners

2.2. Register or log in as a Shopify Partner.
2.3. In the Shopify Partner dashboard, click on App distribution in the menu.
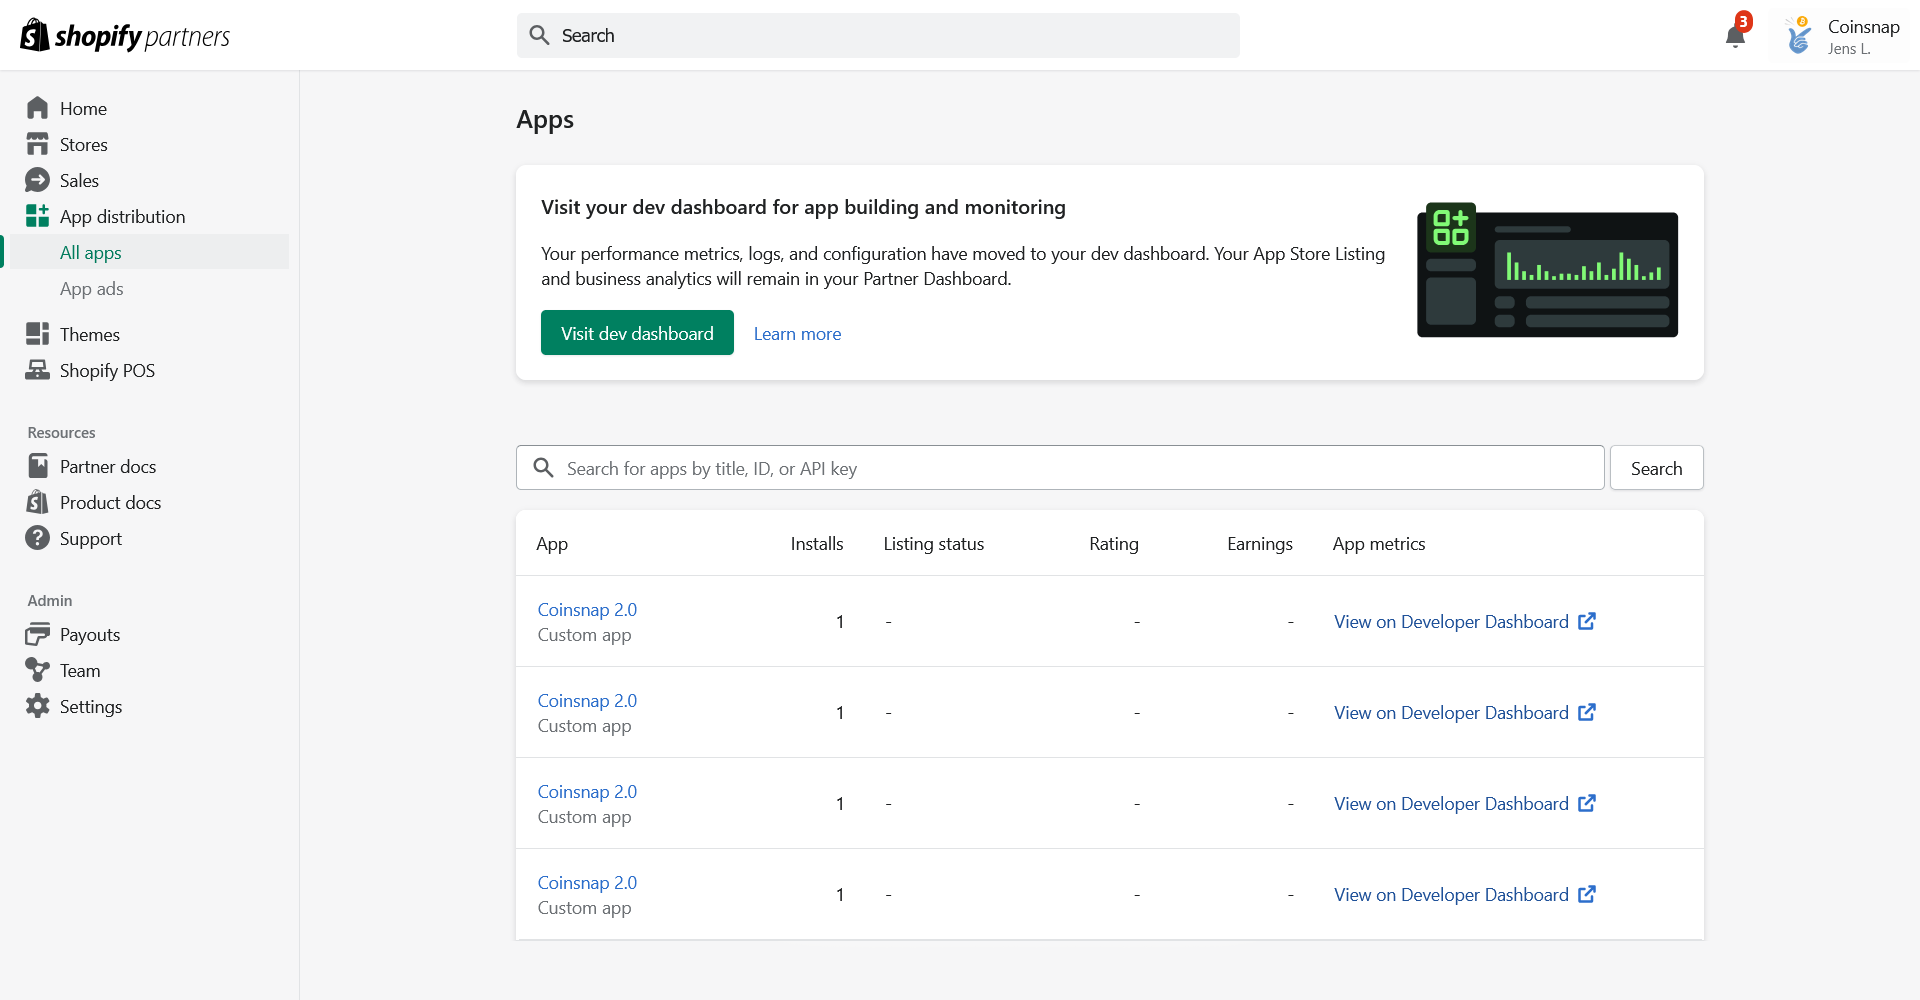
Click the Visit dev dashboard button to open your App Developer dashboard.
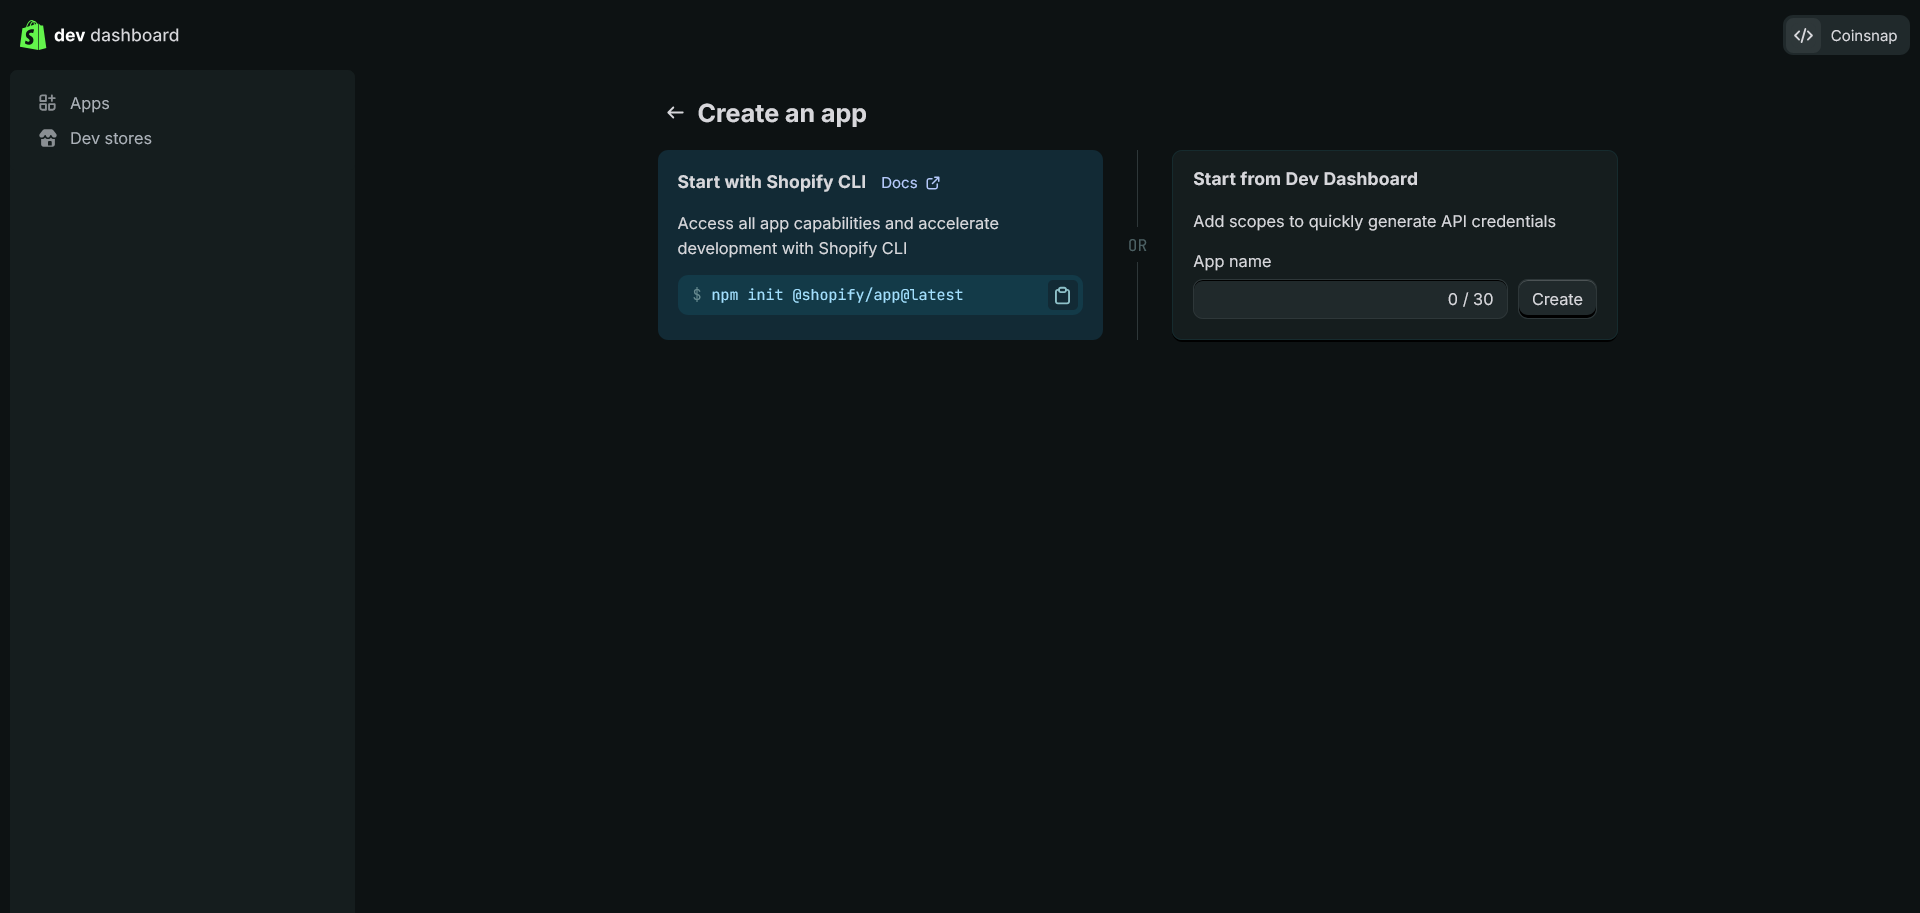
2.4. Go to Create app.
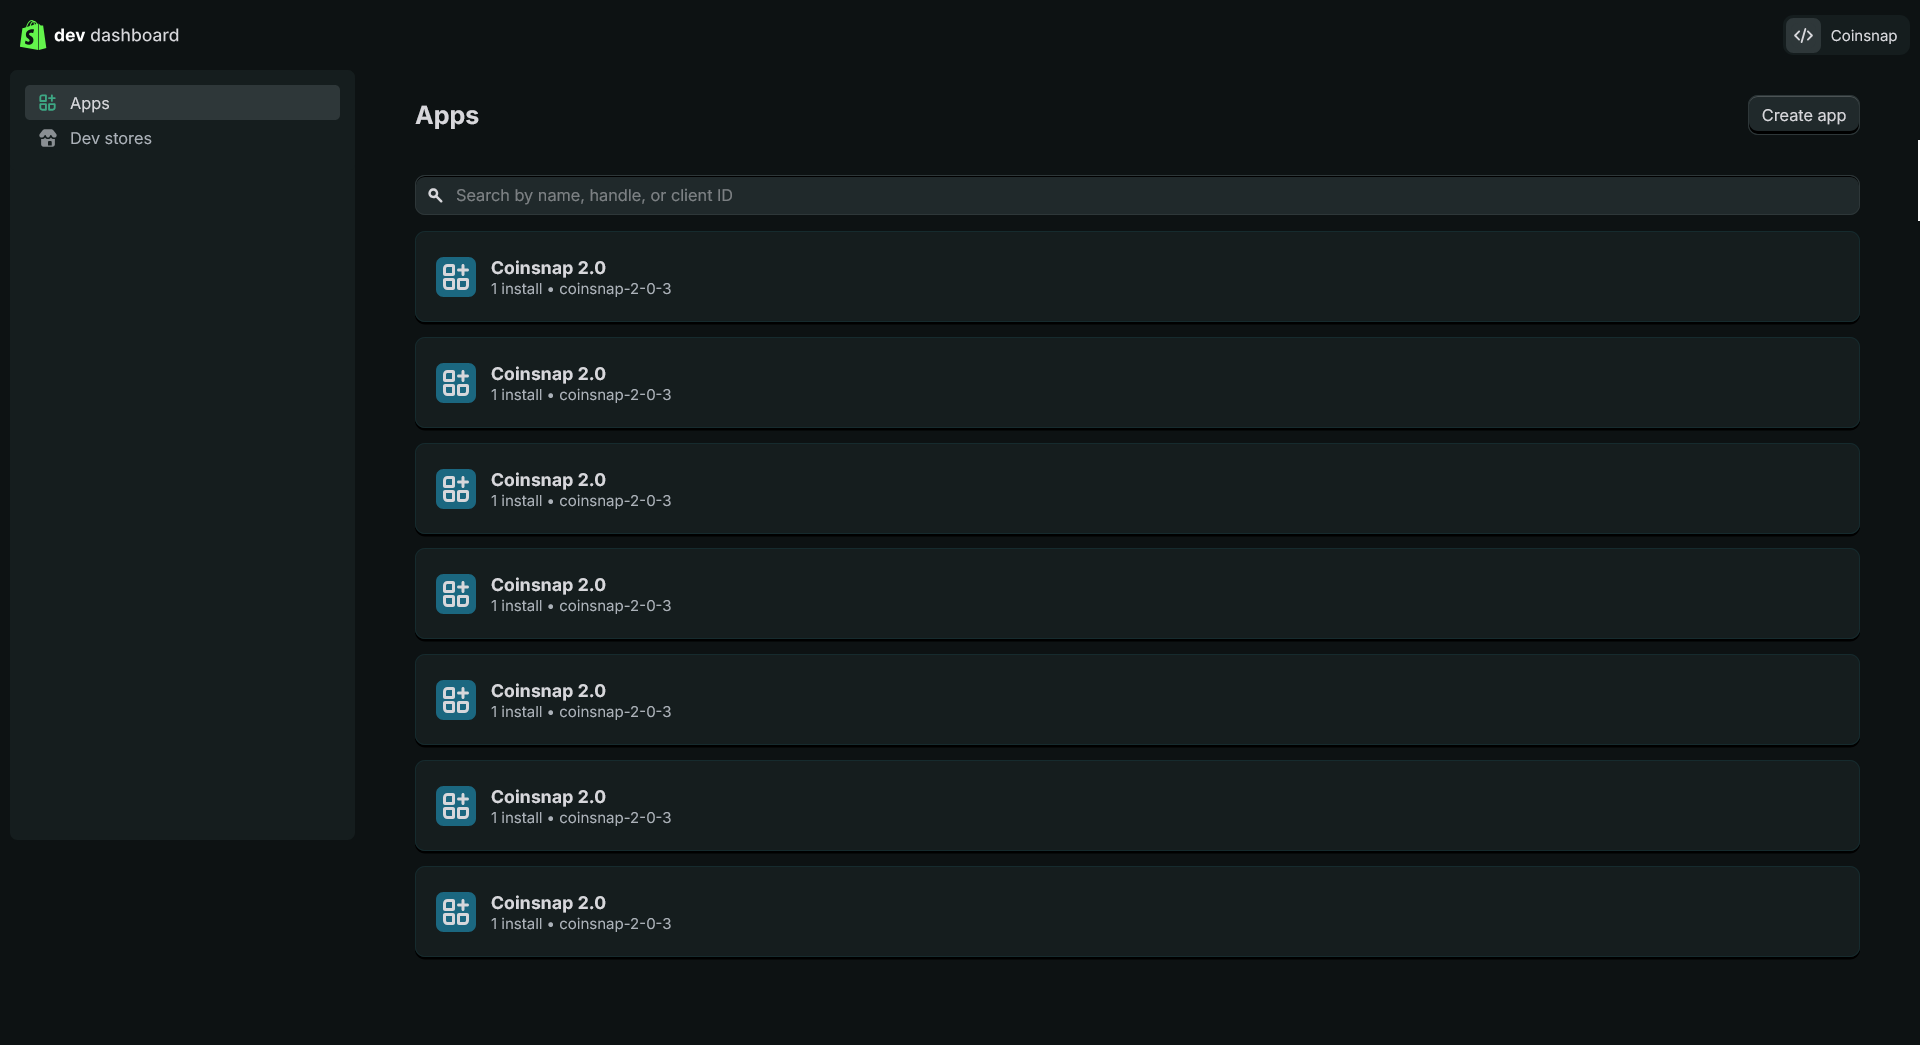
2.5. Click Create app manually. Enter the app name (for example, Coinsnap) and click Create.
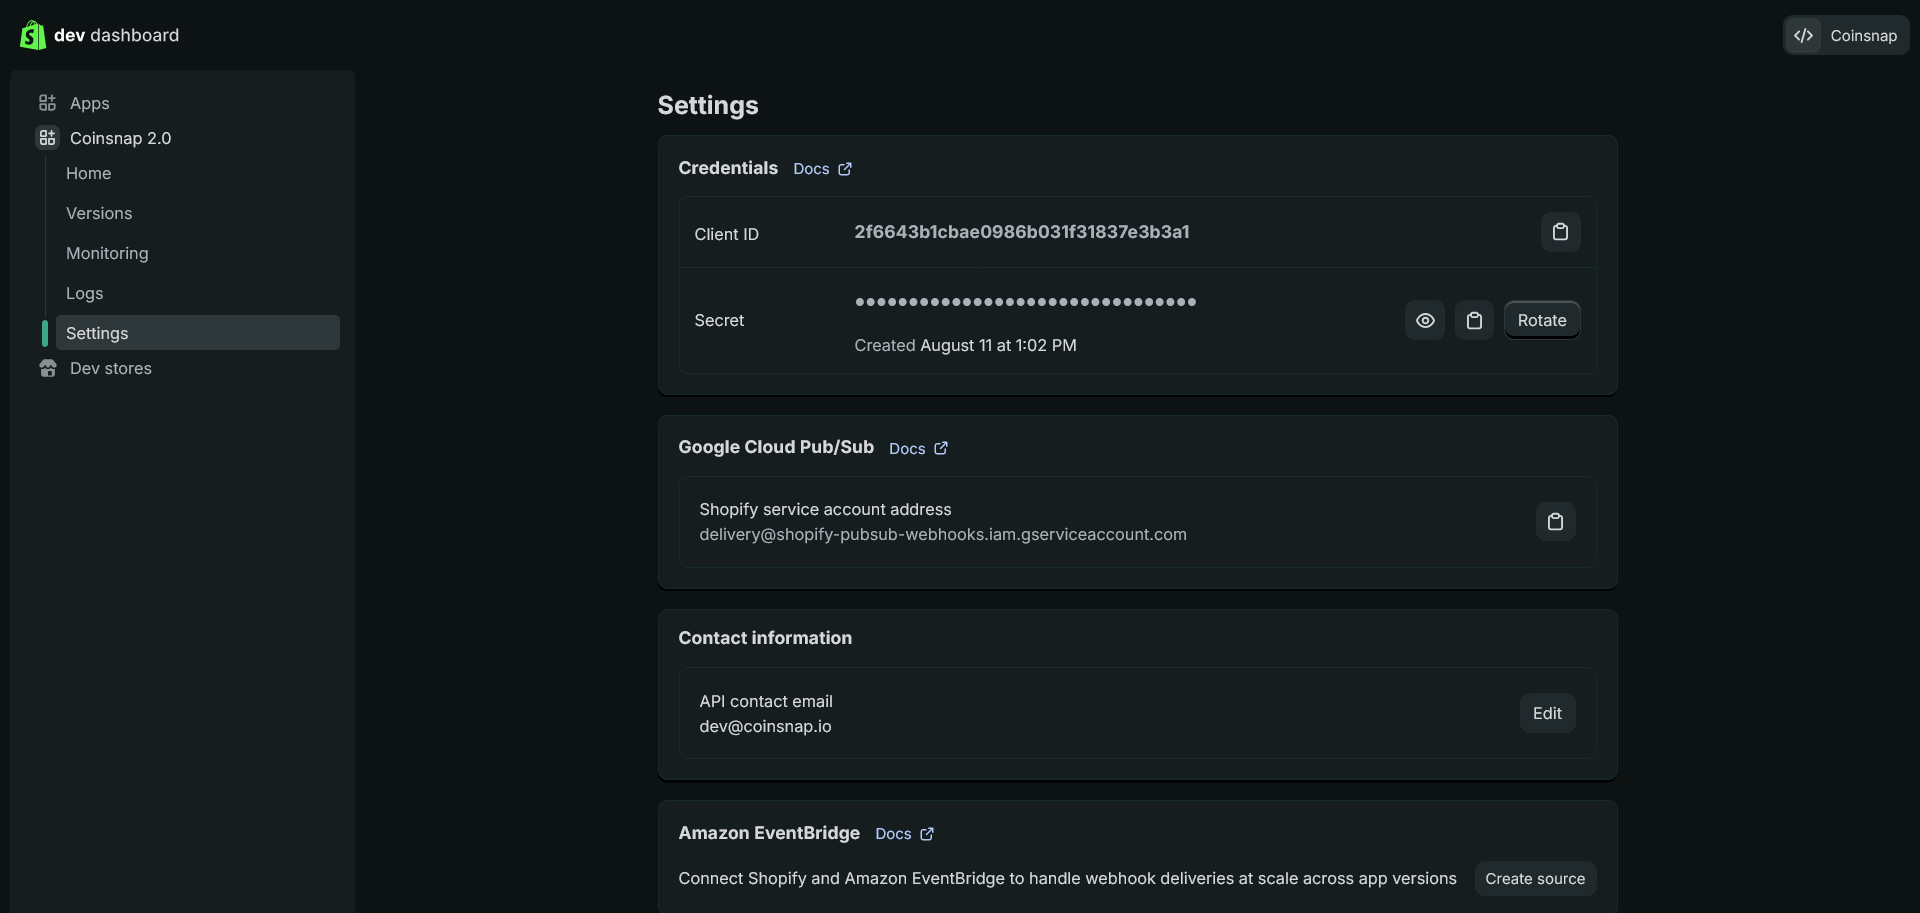
2.6. The new app is created. Open Settings in the app submenu and save the app credentials: Client ID and Client Secret.
2.7. Go to the Home submenu, find the Distribution section on the right, and click View details.

You will be redirected back to the Partner Portal in a new tab.
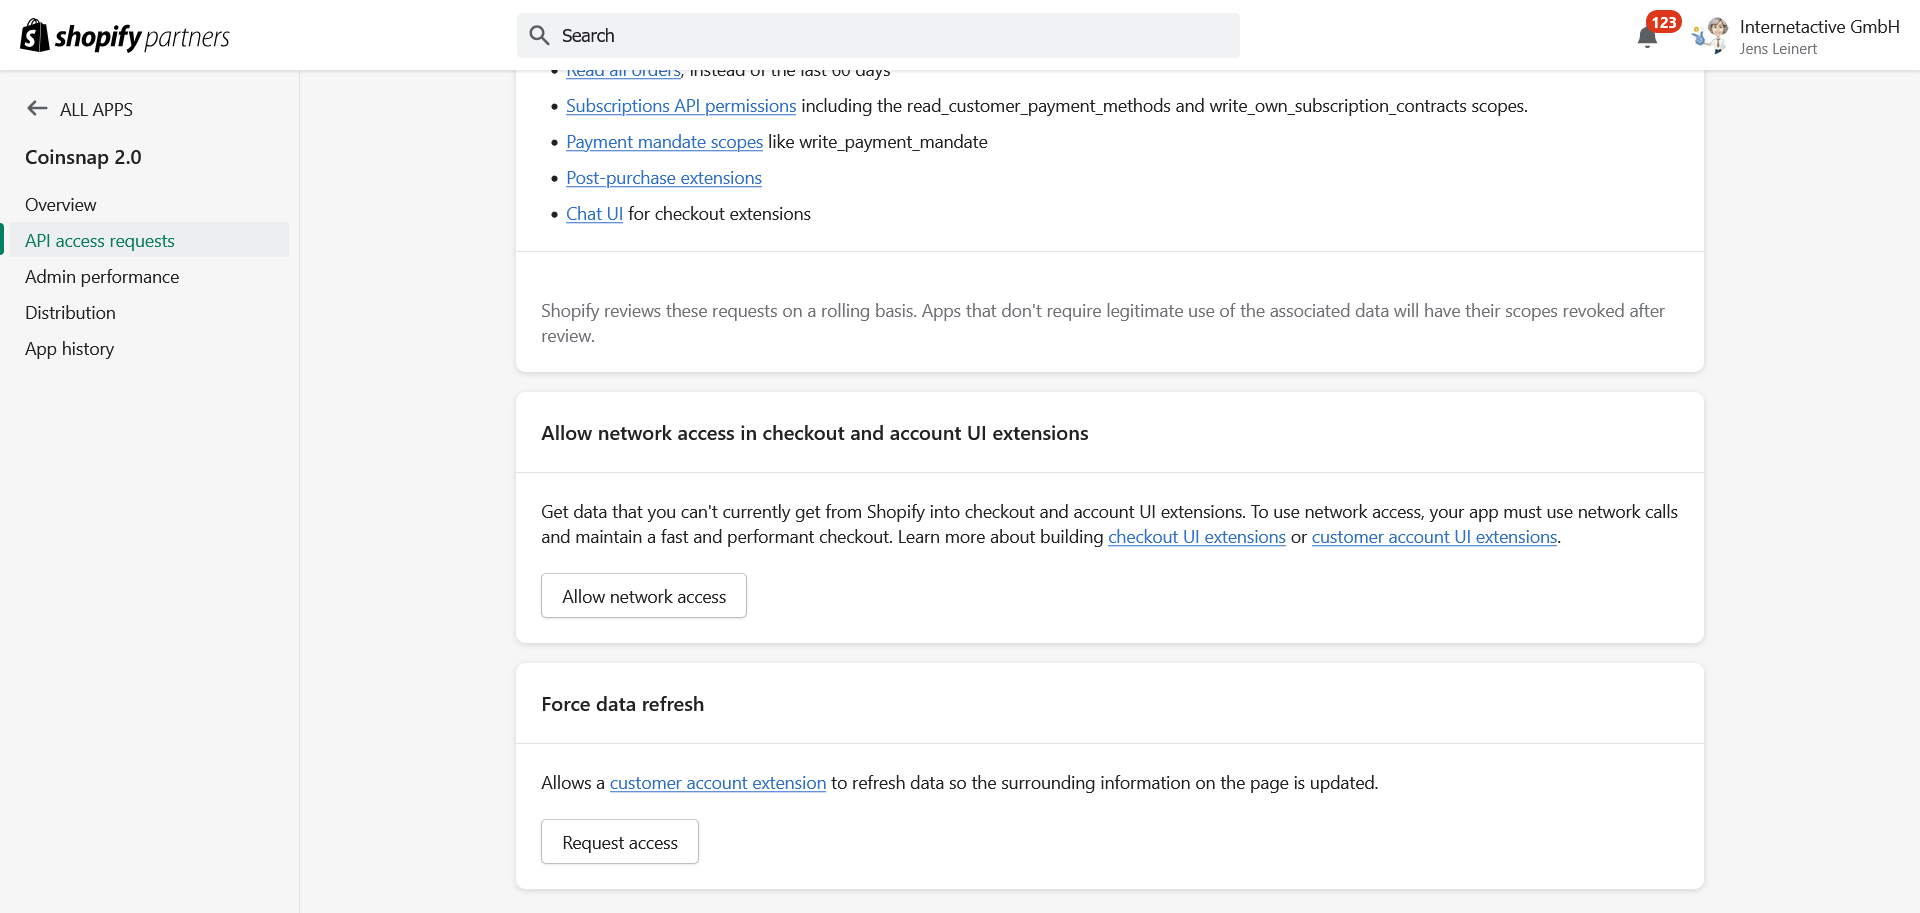
2.8. Select API access request from the left menu. Scroll down to Allow network access in checkout and account UI extensions and grant network access.
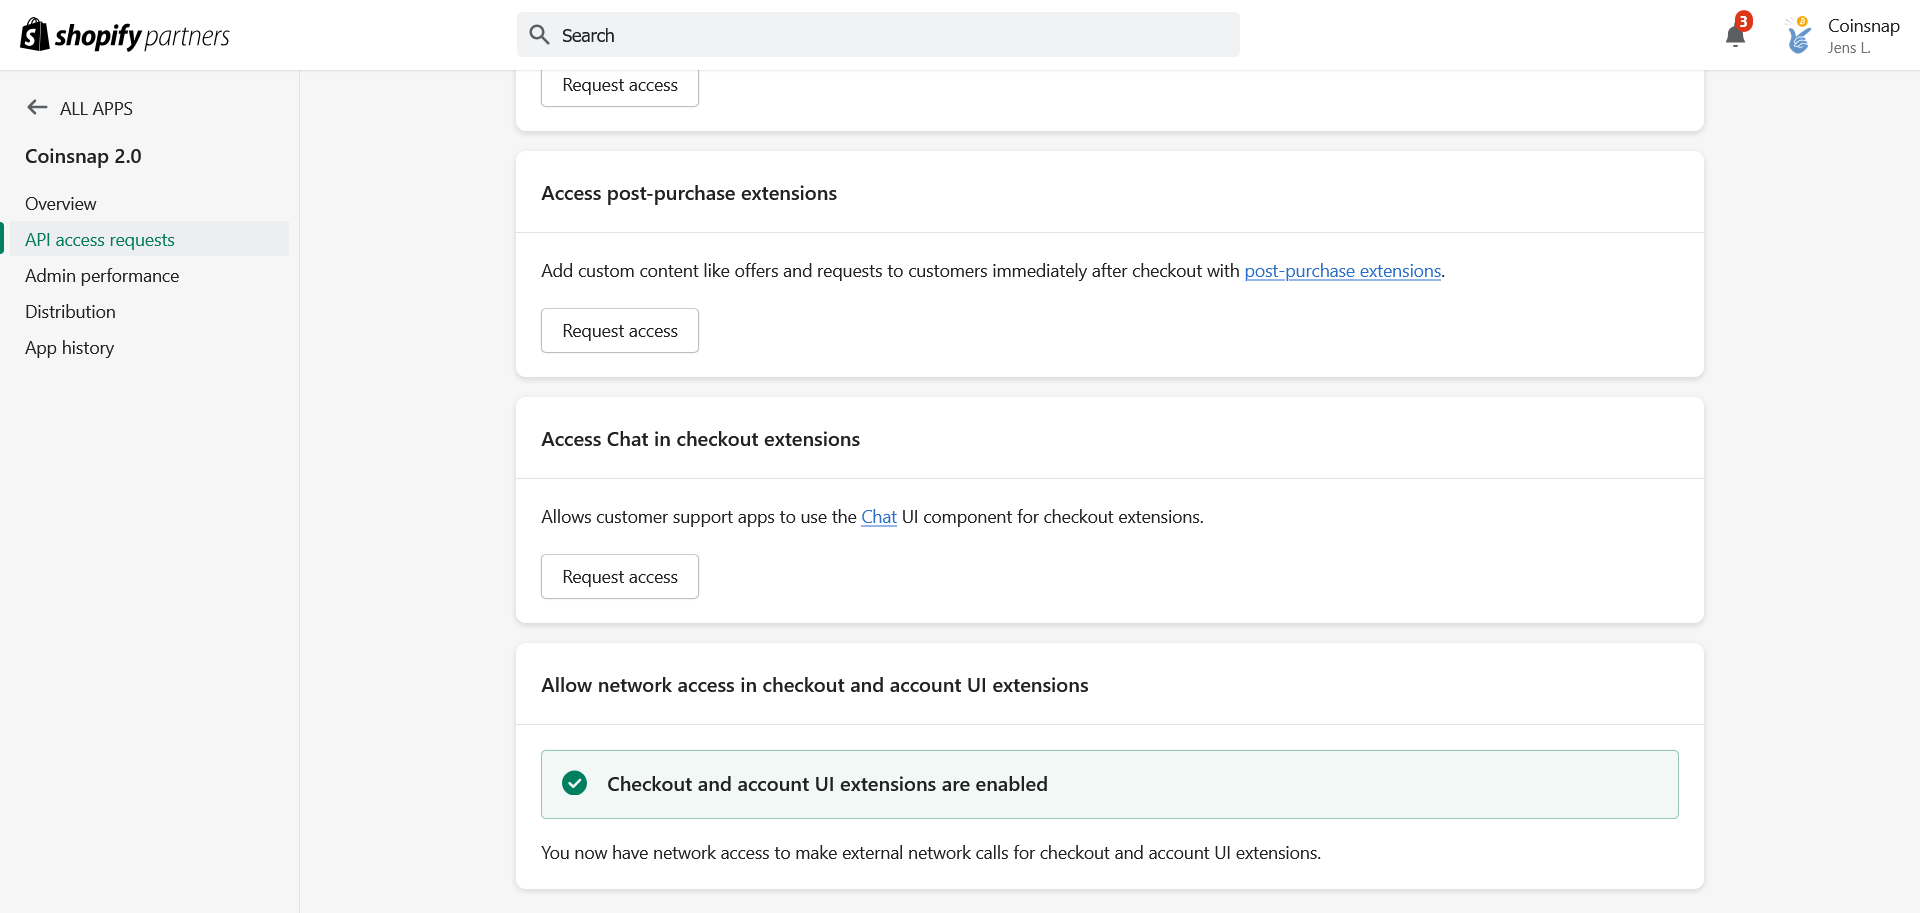
2.9. Make sure Checkout and Account UI extensions are enabled.
Step 3 - connect the Shopify Coinsnap App with your Coinsnap account
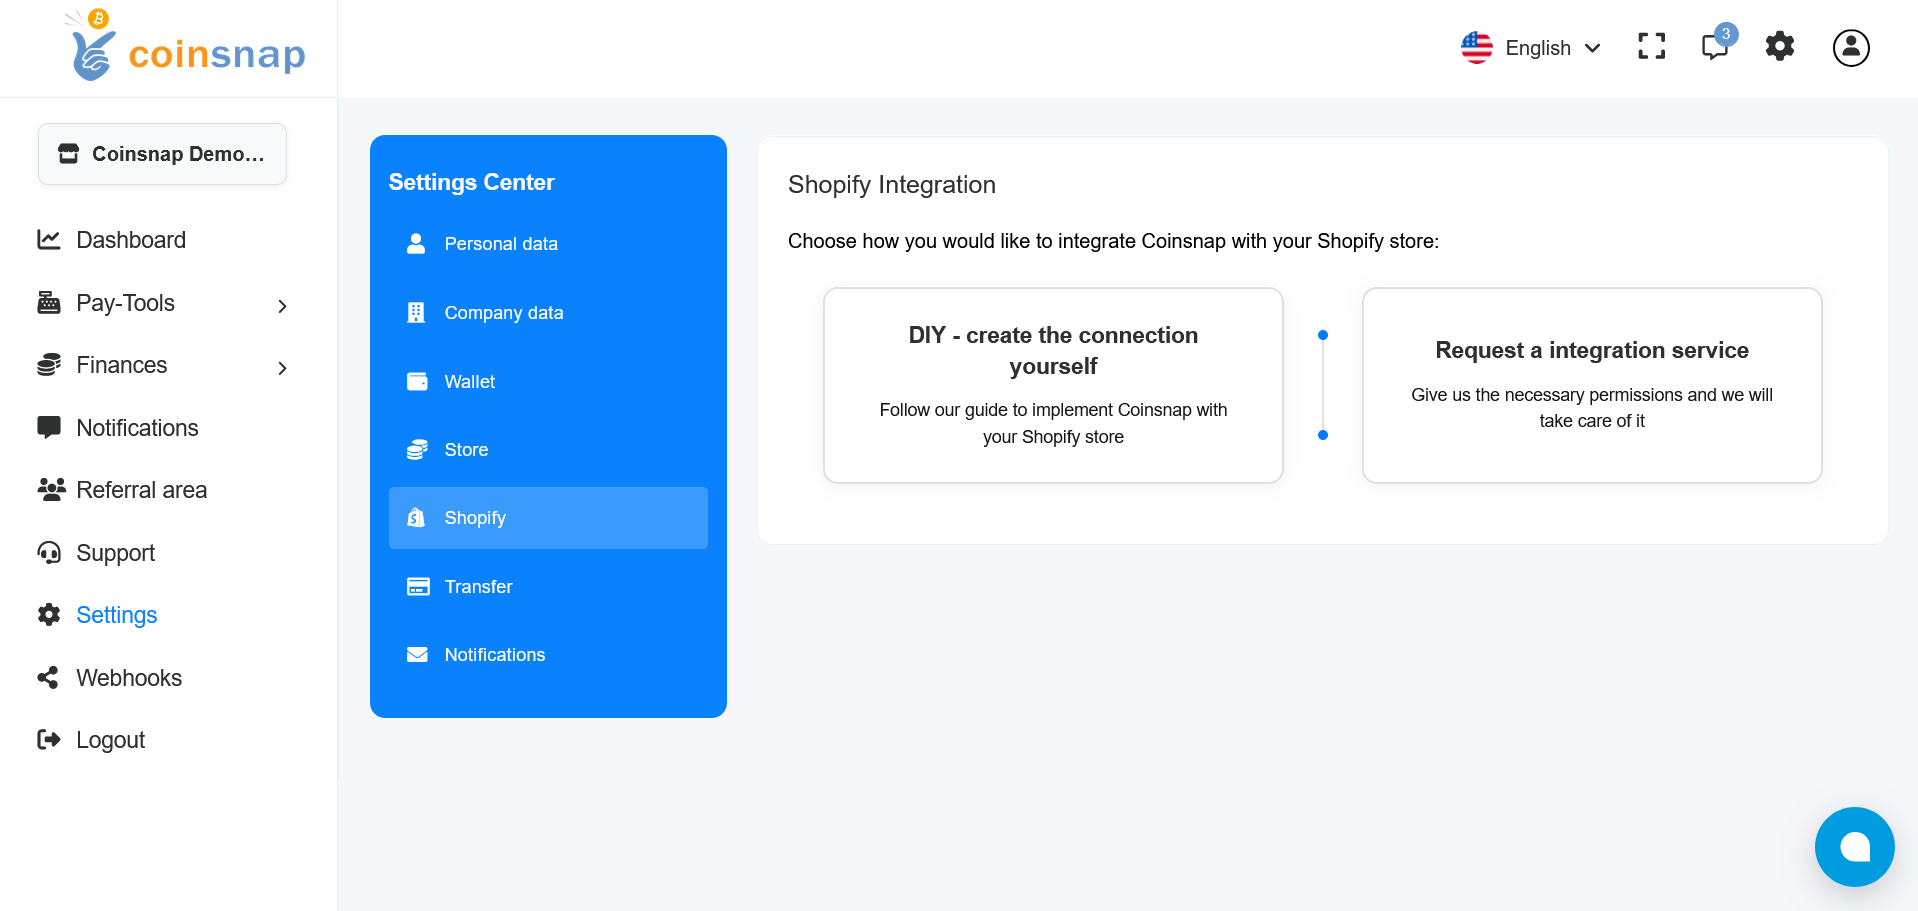
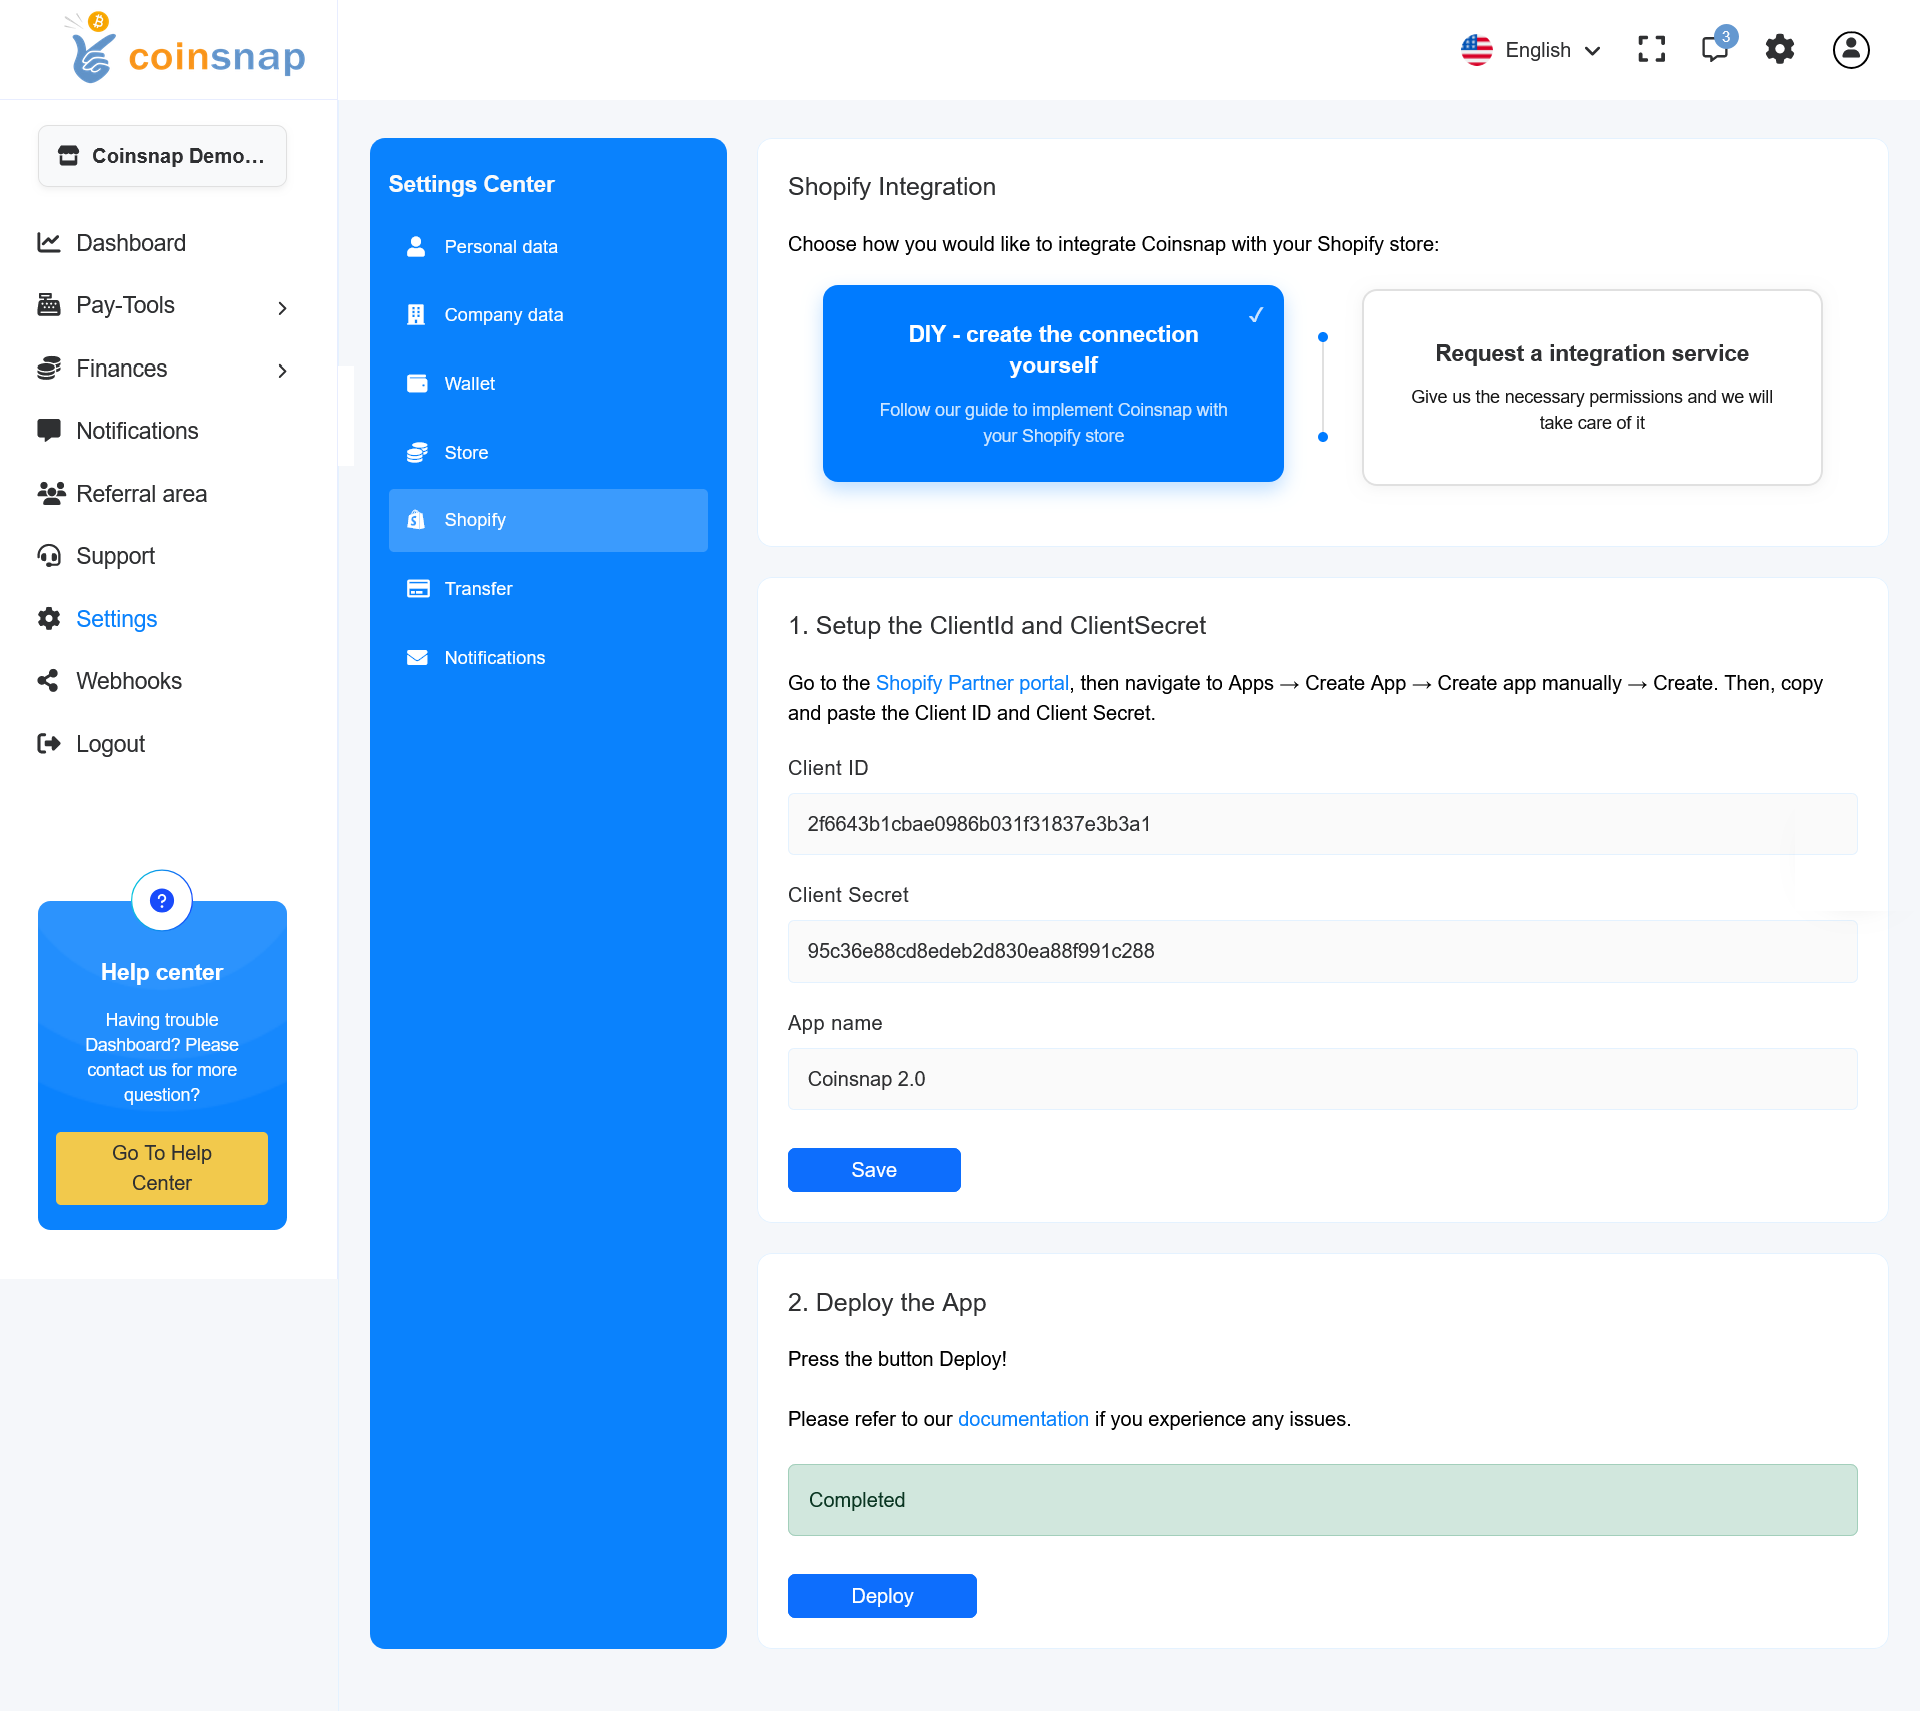
3.1. Go to your Coinsnap App.
Open Settings → Shopify and choose DIY – create the connection yourself.
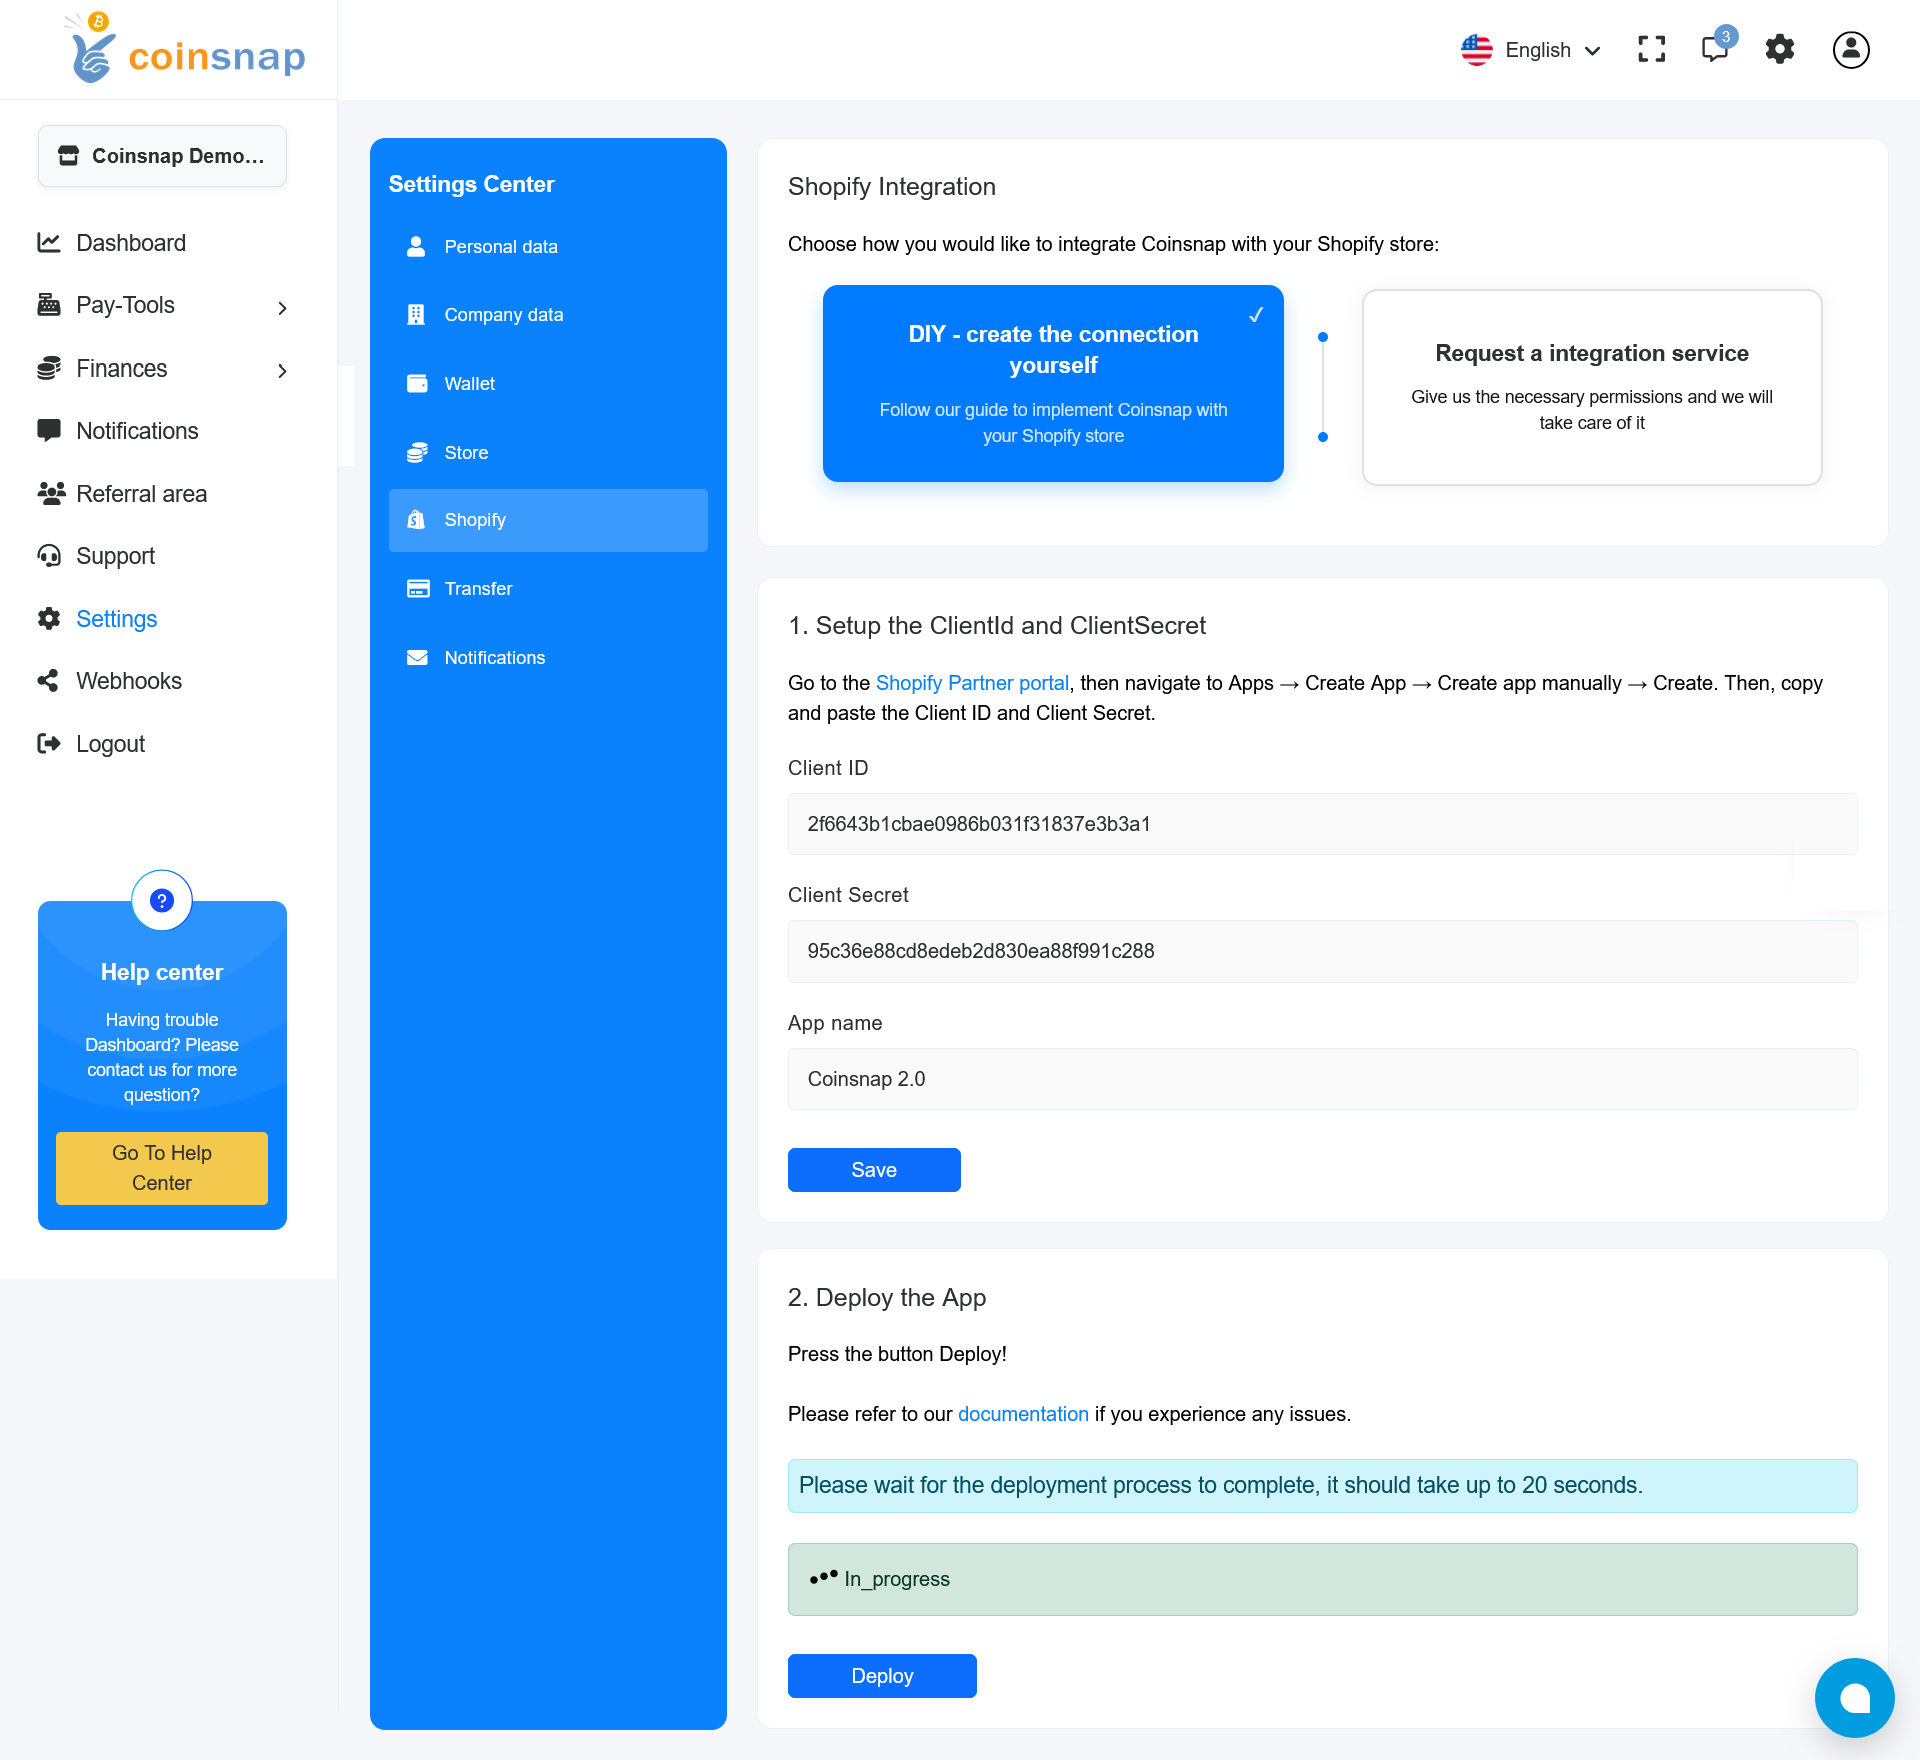
3.2. Paste the Client ID, Client Secret, and App name, then click Save.

3.3. Click the Deploy button.
If everything is correct, the message Please wait for the deployment process to complete, it should take up to 20 seconds will appear.
Follow the deployment status in the light-green bar above the Deploy button.
3.4. The system will ask for Shopify authorization. Click Open Shopify authorization.
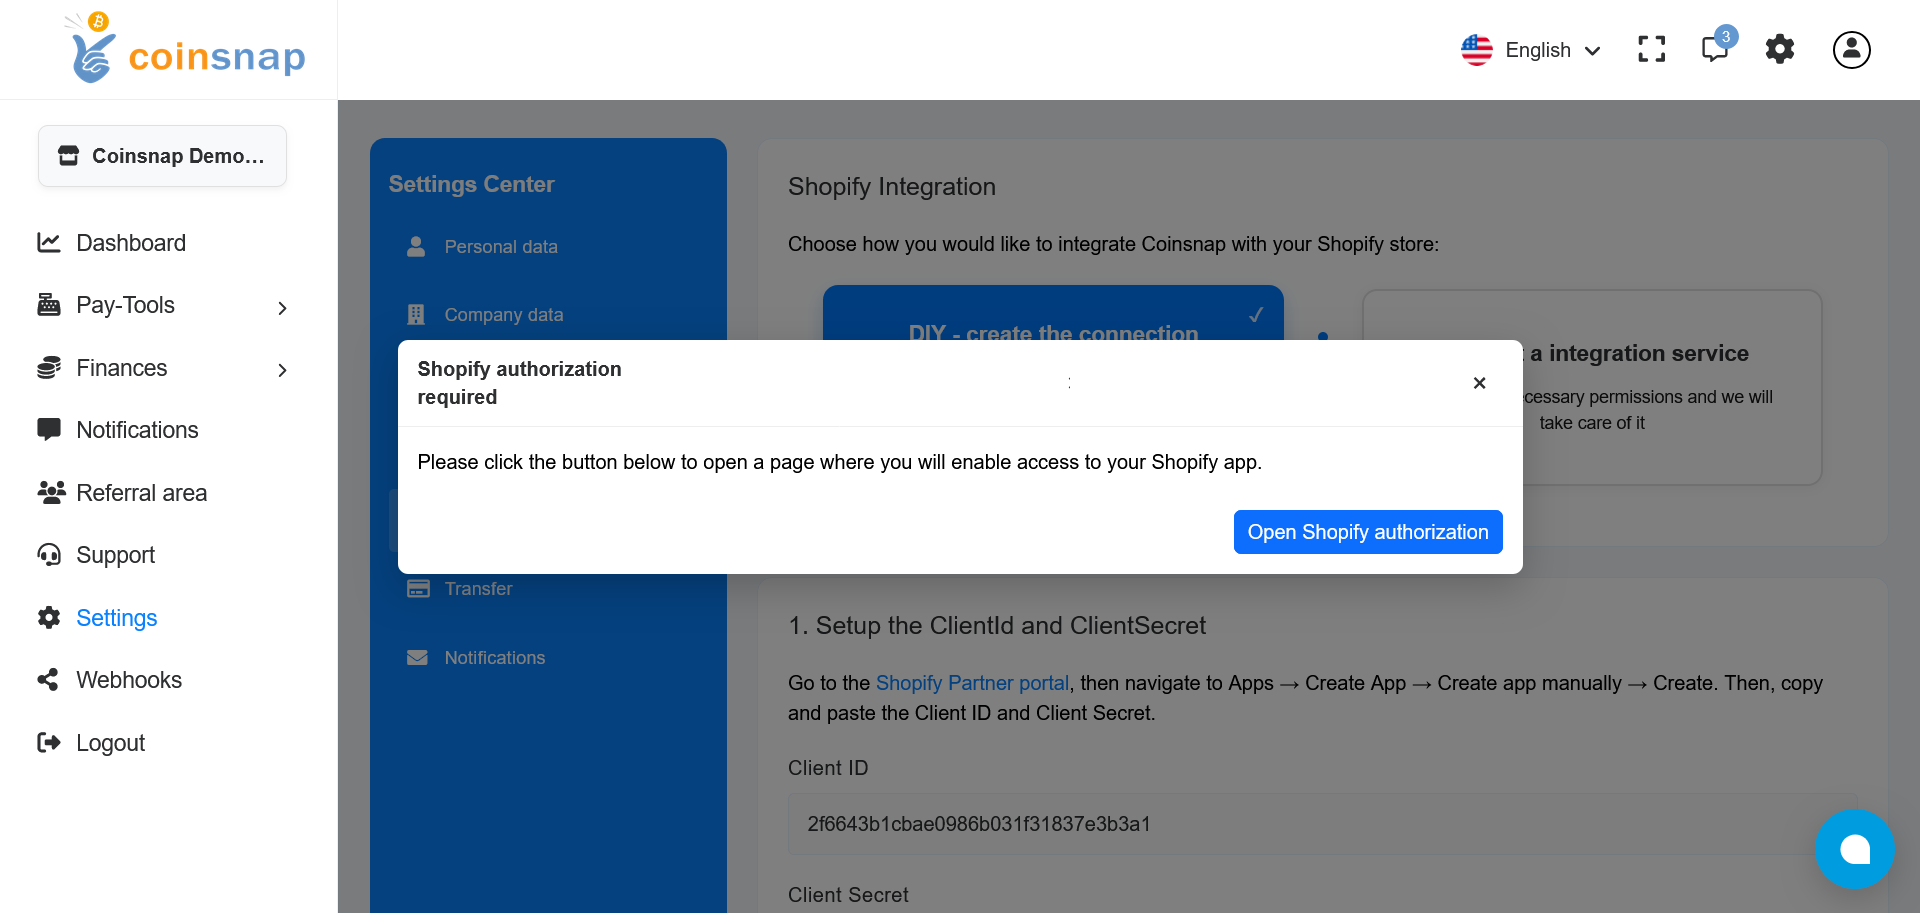
After clicking the button, a new tab will open and Shopify will ask you to log in.
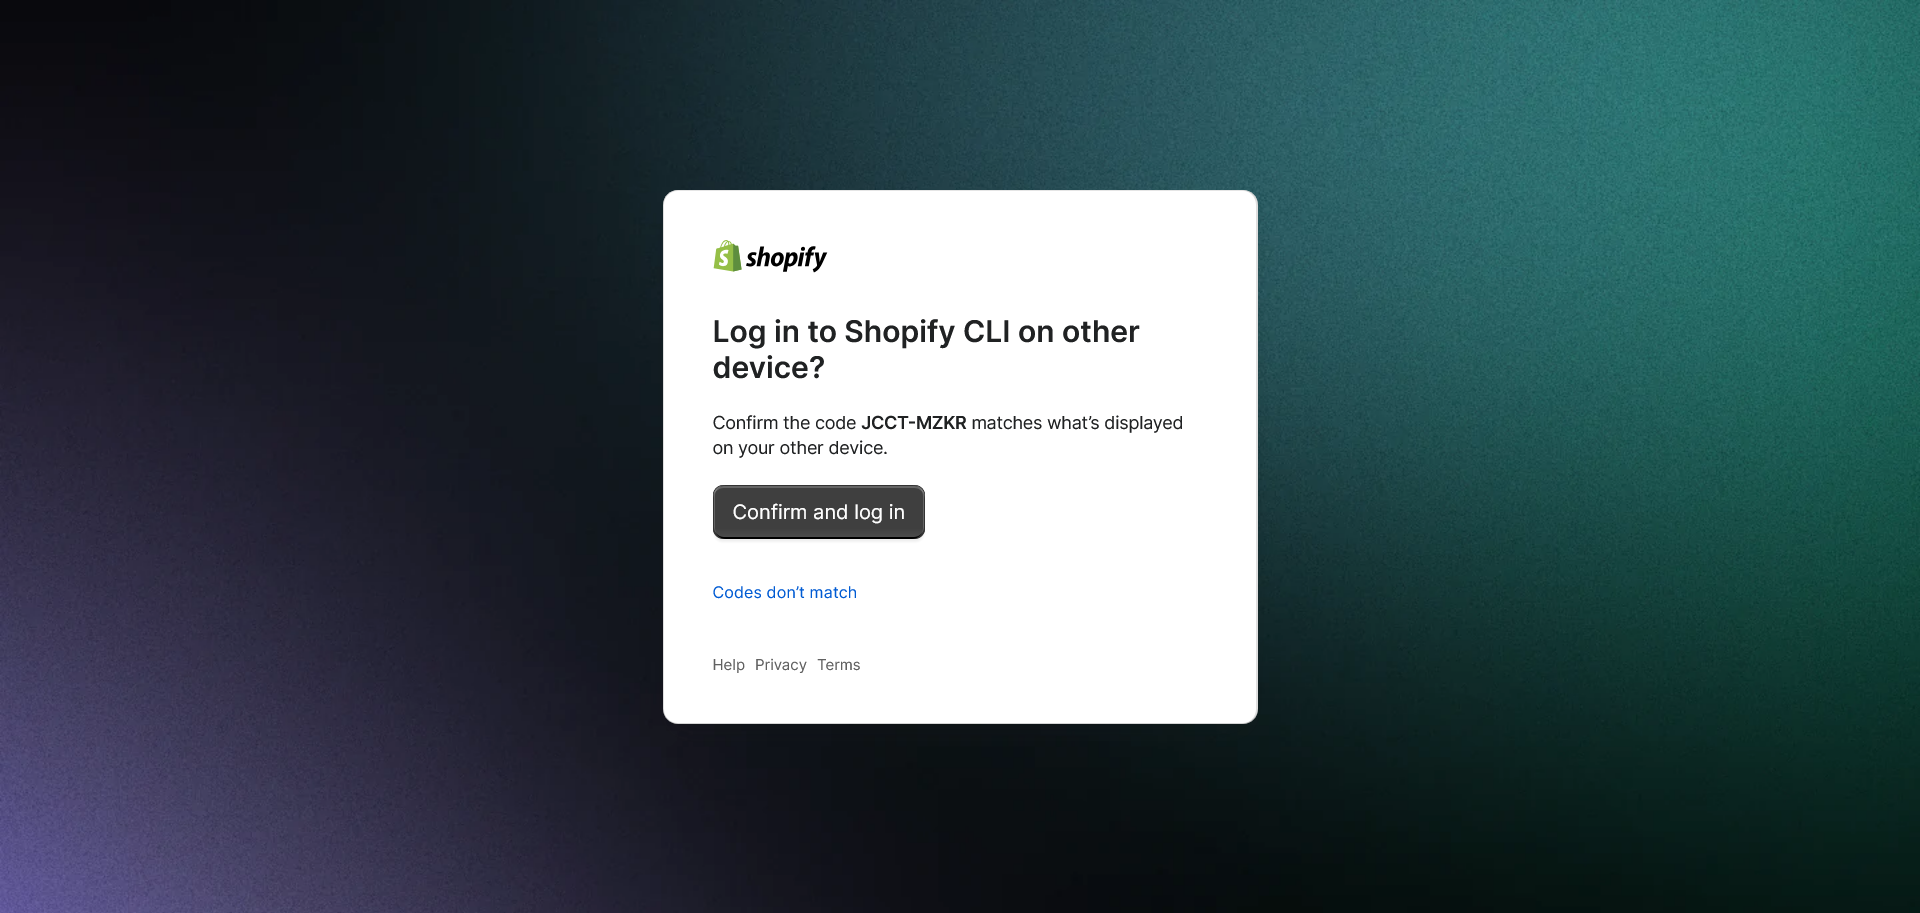
3.5. Shopify will ask you to confirm login to the Coinsnap App. Click Confirm and log-in.
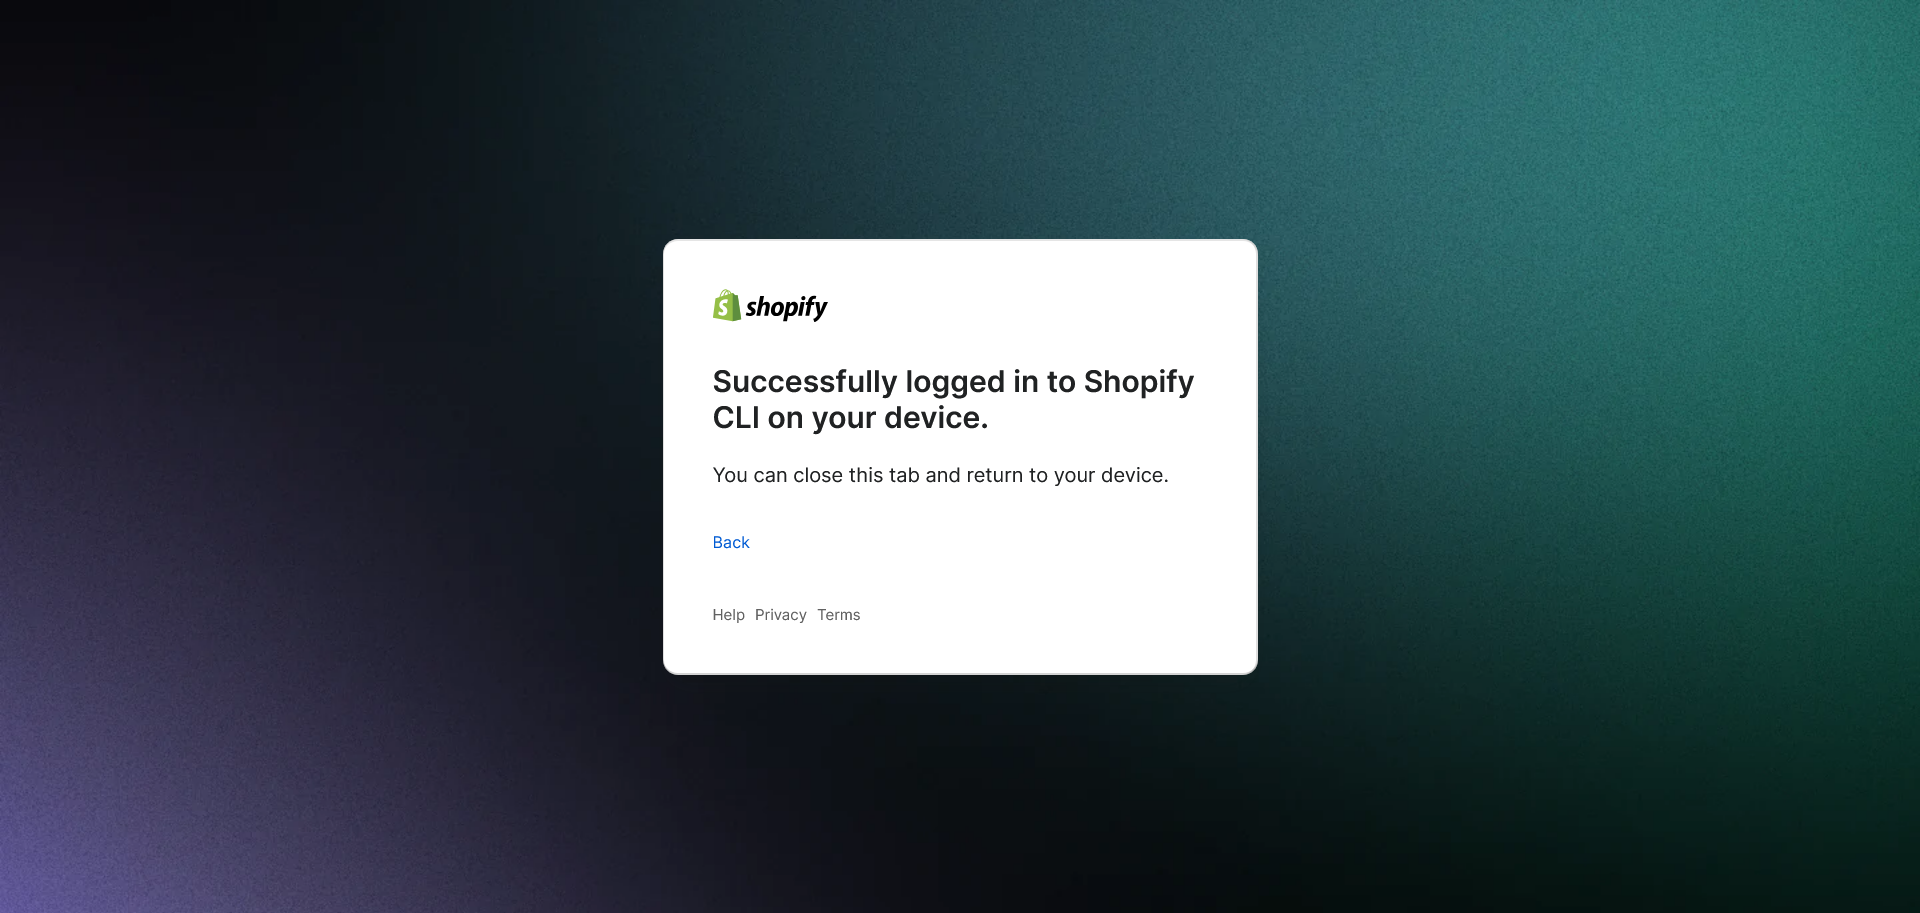
3.6. You will see a message confirming that you successfully logged in to Shopify CLI on the Coinsnap App. You can close the current tab.
3.7. Open the app’s page in the Shopify Developer Portal to verify the successful deployment. You will see a new app version as a result.
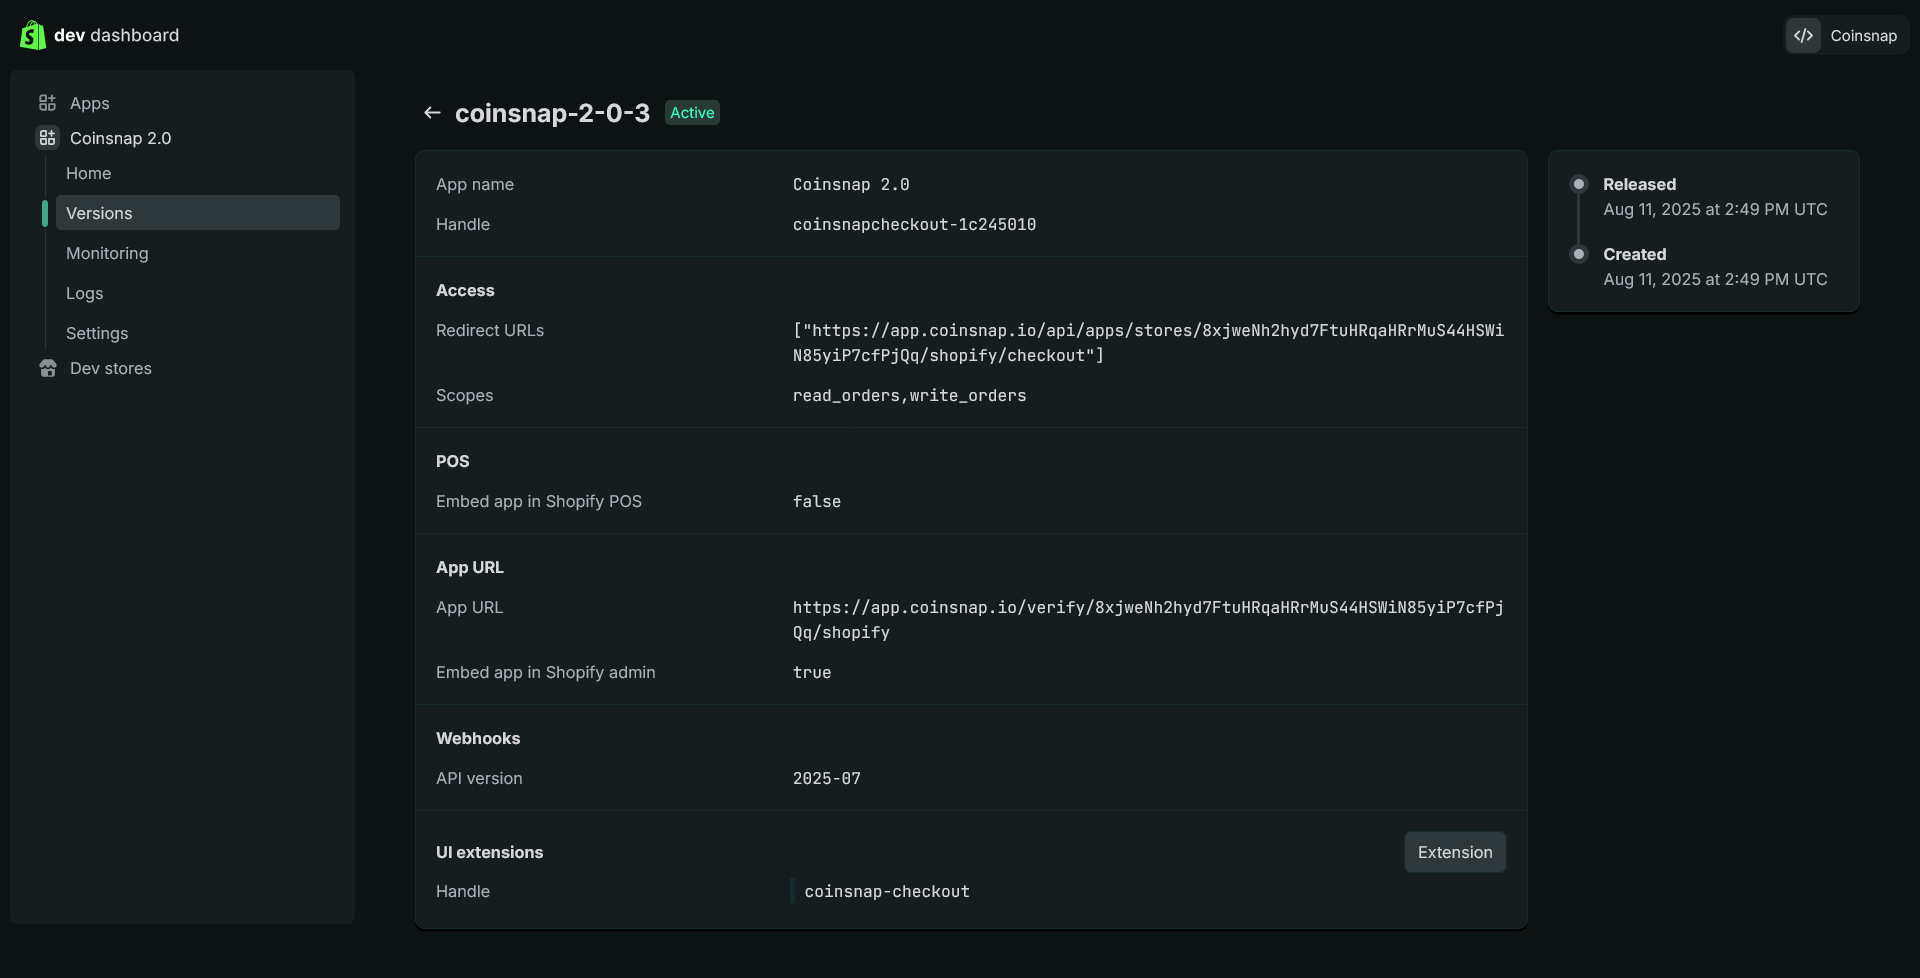
After successful login to Shopify CLI on the Coinsnap App, the deployment process is complete.
Step 4 - Coinsnnap account settings
4.1. Go to your Coinsnap App. Open Settings → Shopify and choose DIY – create the connection yourself.
4.2. Paste the Client ID, Client Secret, and App name from your Shopify Partner Portal, then click Save.
4.3. Click the Deploy button. If everything is correct, the message Please wait for the deployment process to complete, it should take up to 20 seconds will appear.
Follow the deployment status in the light-green bar above the Deploy button.
4.4. The system will ask for Shopify authorization. Click Open Shopify authorization.
After clicking the button, a new tab will open and Shopify will ask you to log in.
4.5. Shopify will ask you to confirm login to the Coinsnap App. Click Confirm and log-in.
4.6. You will see a message confirming that you successfully logged in to Shopify CLI on the Coinsnap App. You can close the current tab.
4.7. Open the app’s page in the Shopify Developer Portal to verify the successful deployment. You will see a new app version as a result.
After successful login to Shopify CLI on the Coinsnap App, the deployment process is complete.
Step 5 - customize Bitcoin checkout in Shopify
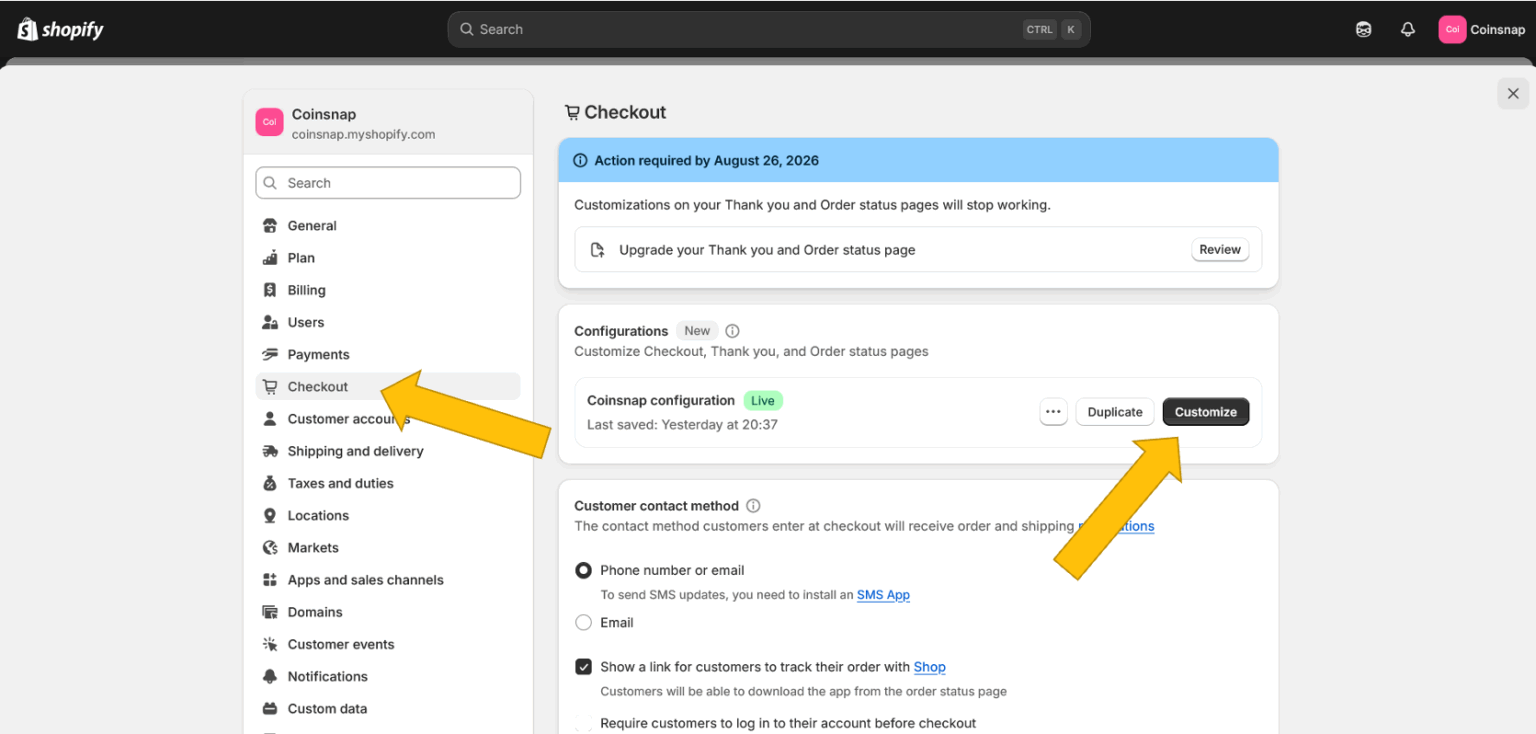
5.1. On your Shopify dashboard, click on Settings (located at the bottom of the left navigation panel), select Checkout, and then click Customize.
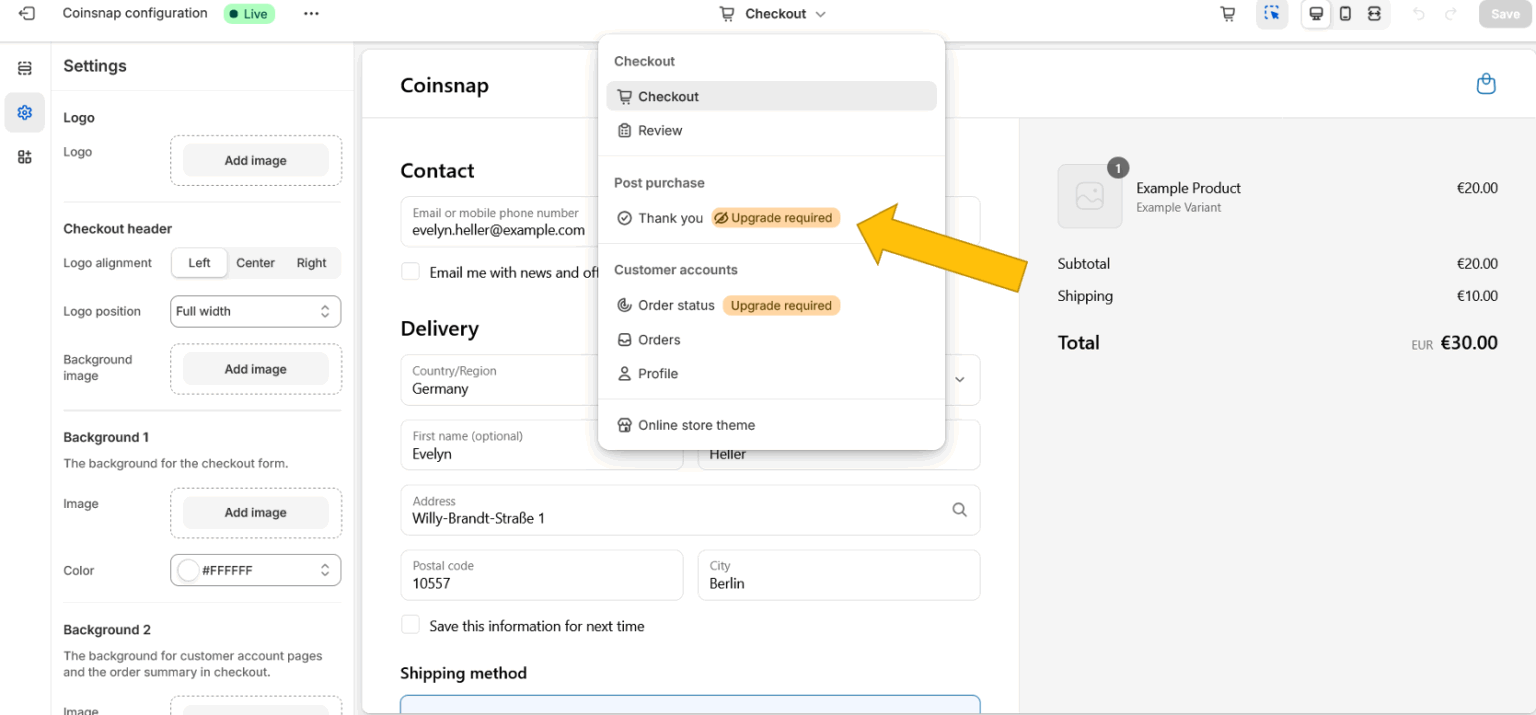
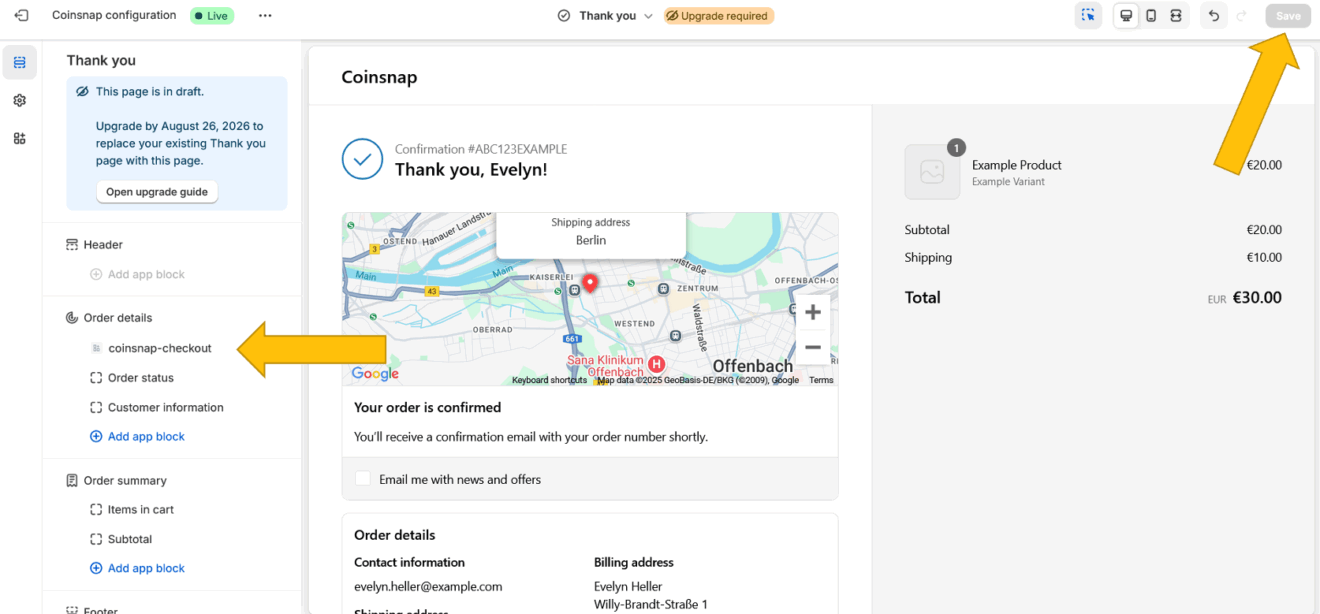
5.2. In the editor, change the selected page to the Thank you page.
5.3. Click the Apps icon in the left panel and add the app to coinsnap-checkout by clicking the (+) sign. The extension will be added to your Thank you page.
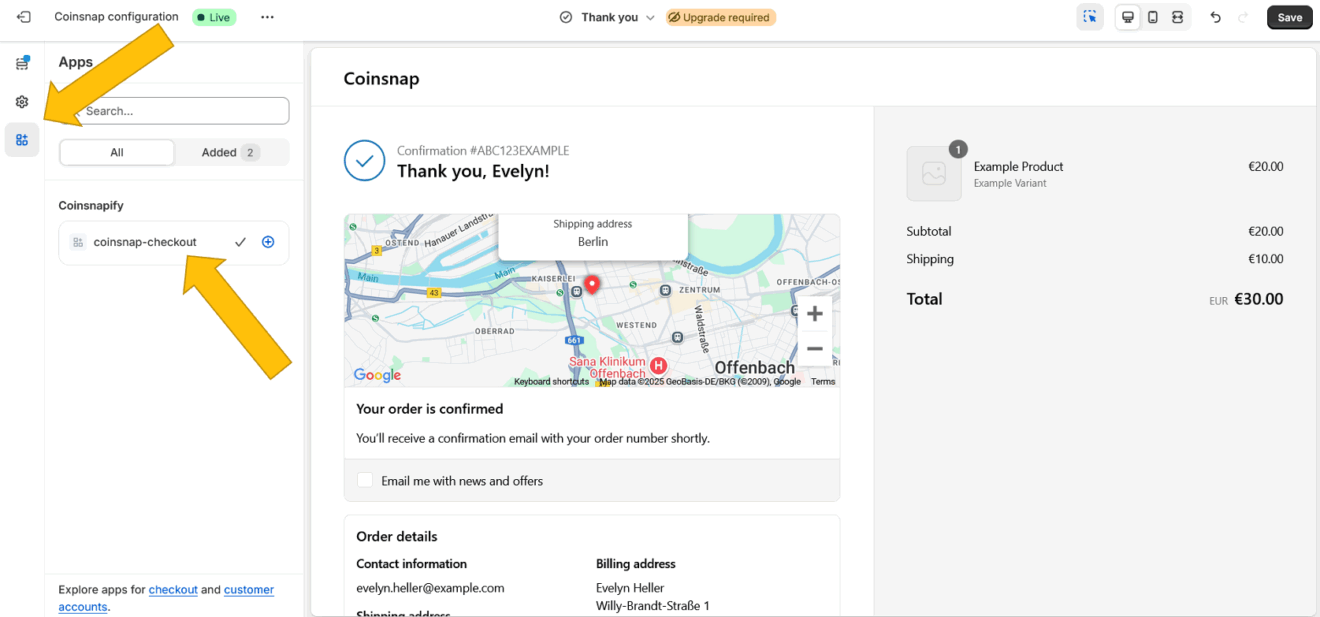
Important: Click Save in the top-right corner.
To double-check that everything is working, click the left arrow < next to the app name and verify that it is listed in the Order details section.
Step 6- enable Bitcoin payment in Shopify
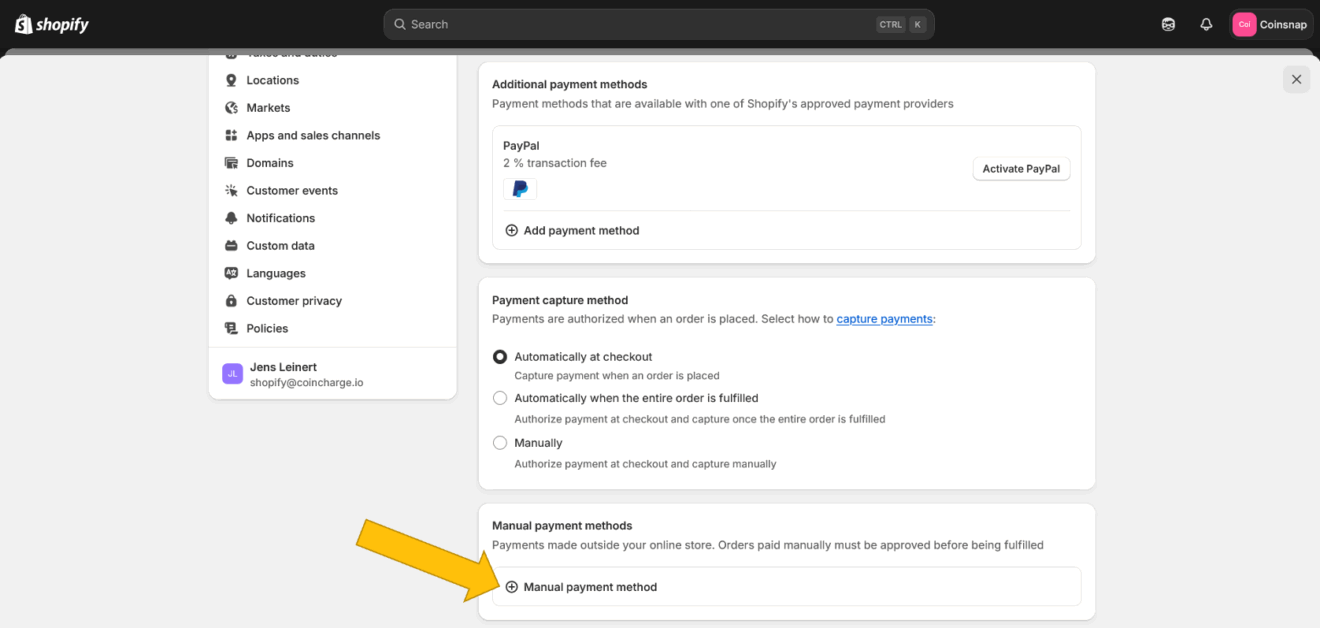
6.1. Go back to your dashboard and click Settings >> Payments in the left sidebar.
Scroll down to Manual payment methods and click
(+) Manual payment method.
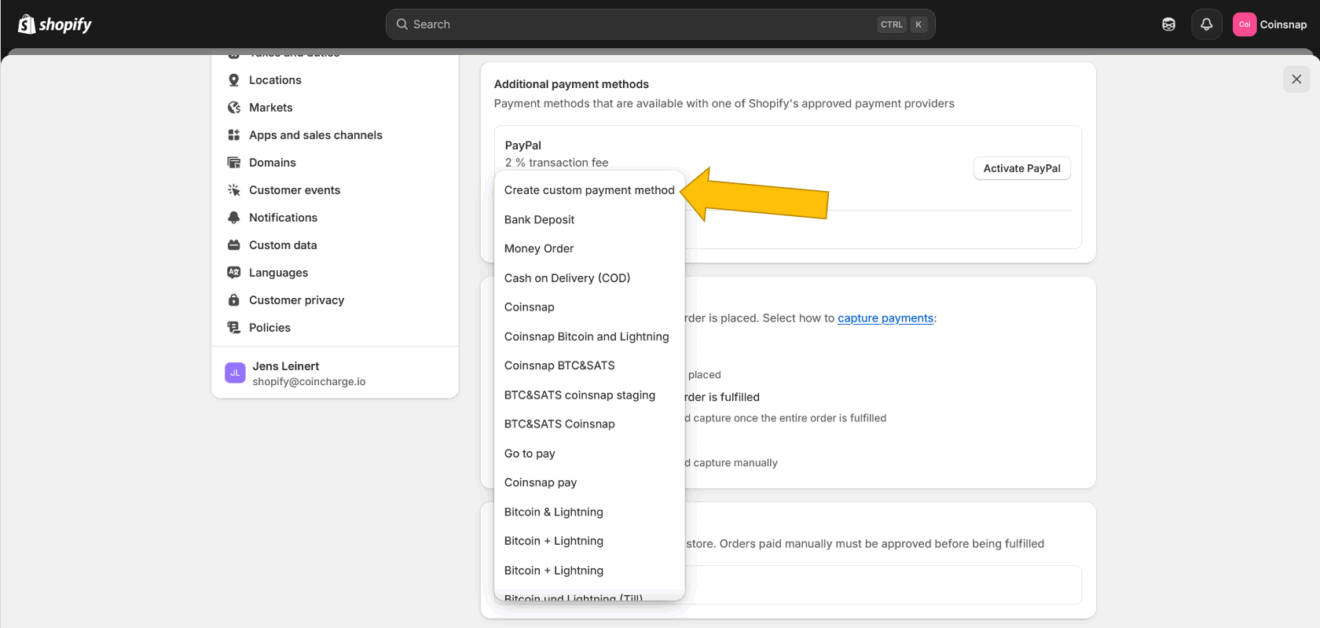
6.2. Select Create custom payment method
from the dropdown menu.
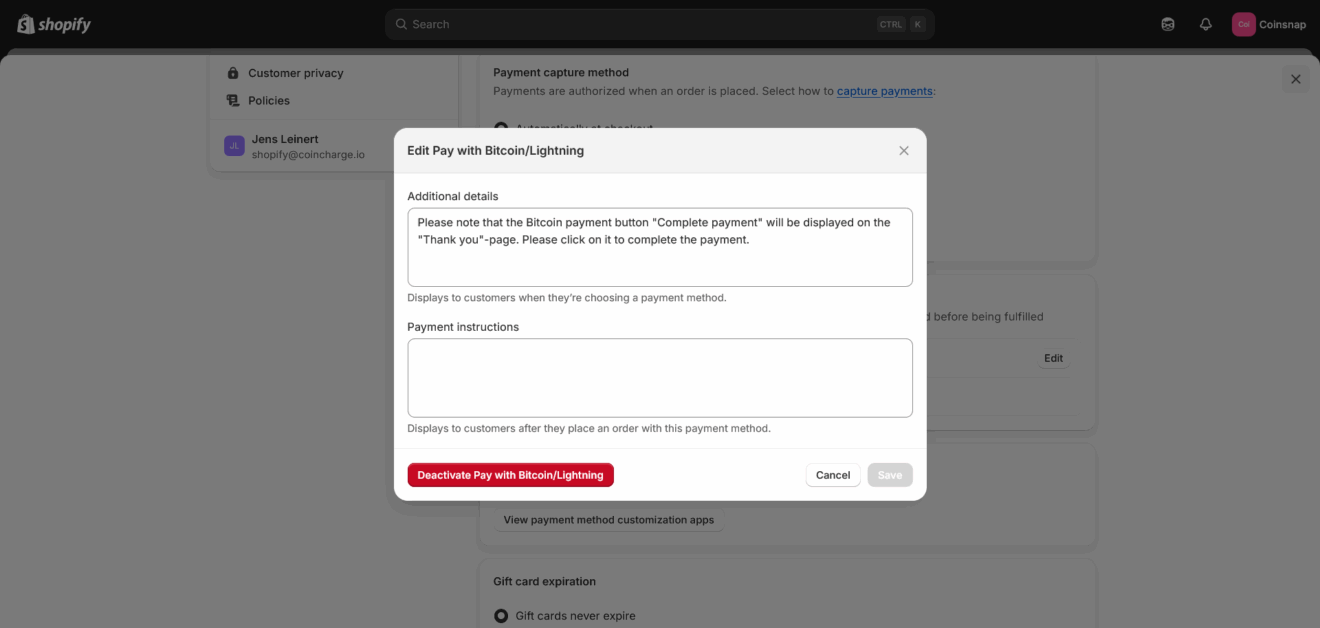
6.3. You can now edit your payment method.
Step 7 - make a test purchase
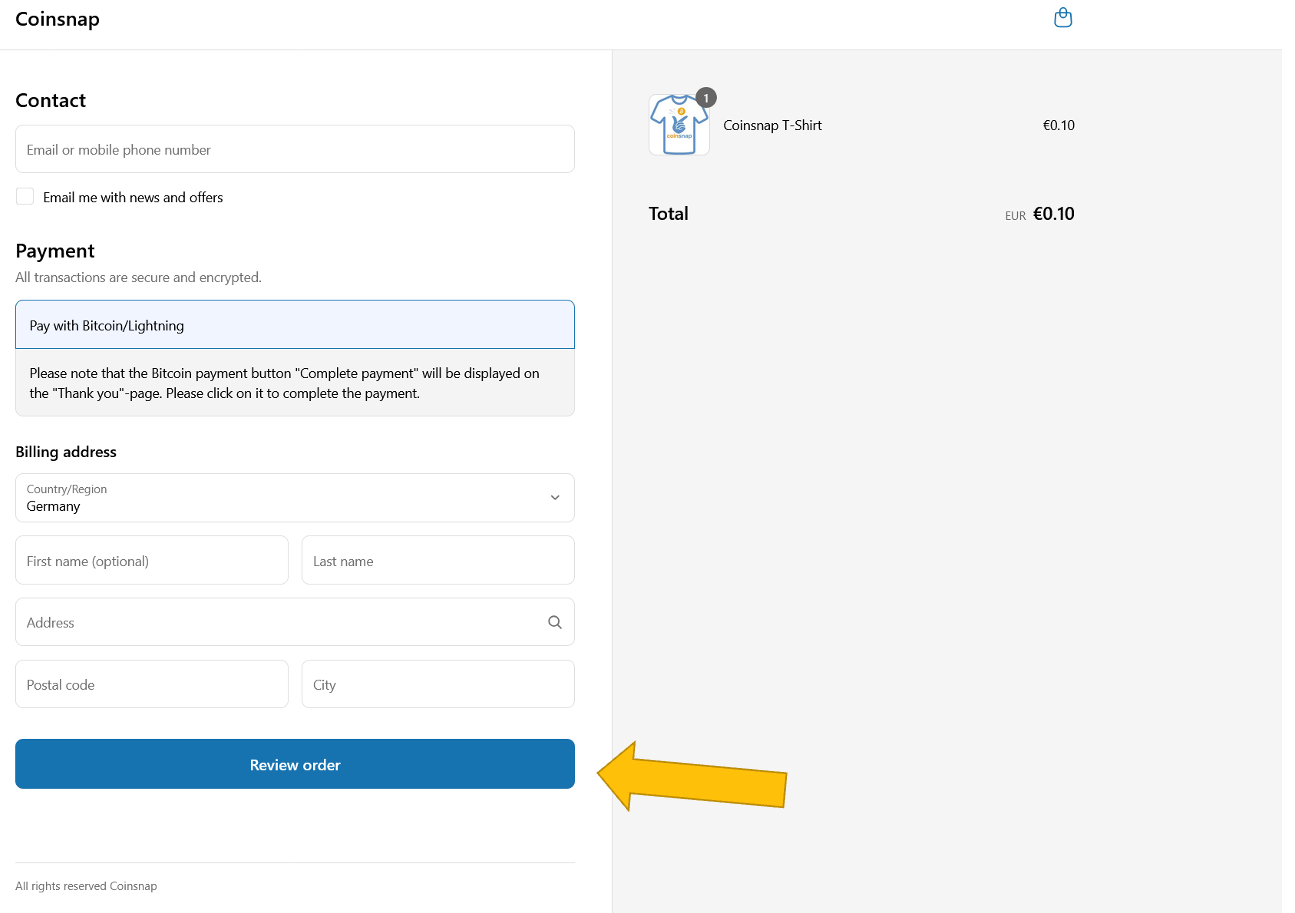
7.1. Fill out the necessary fields and click Review order.
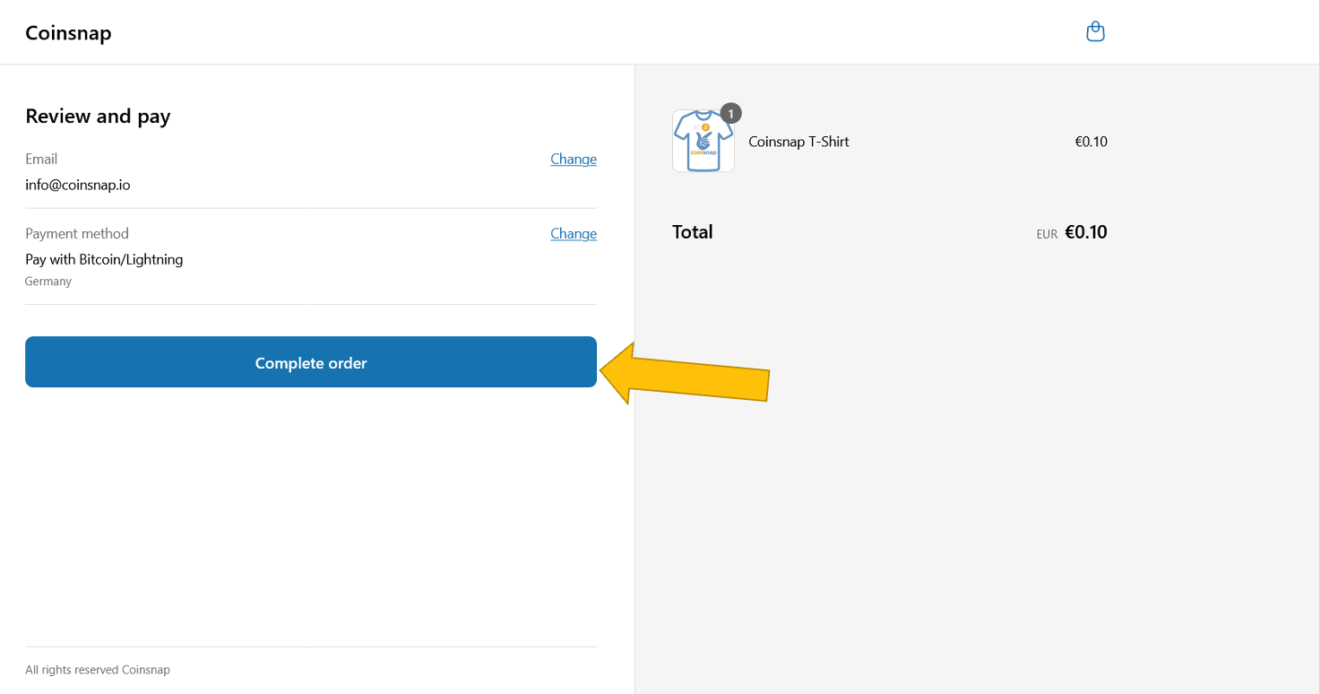
7.2. Check the order information under Review and pay and click Complete order.
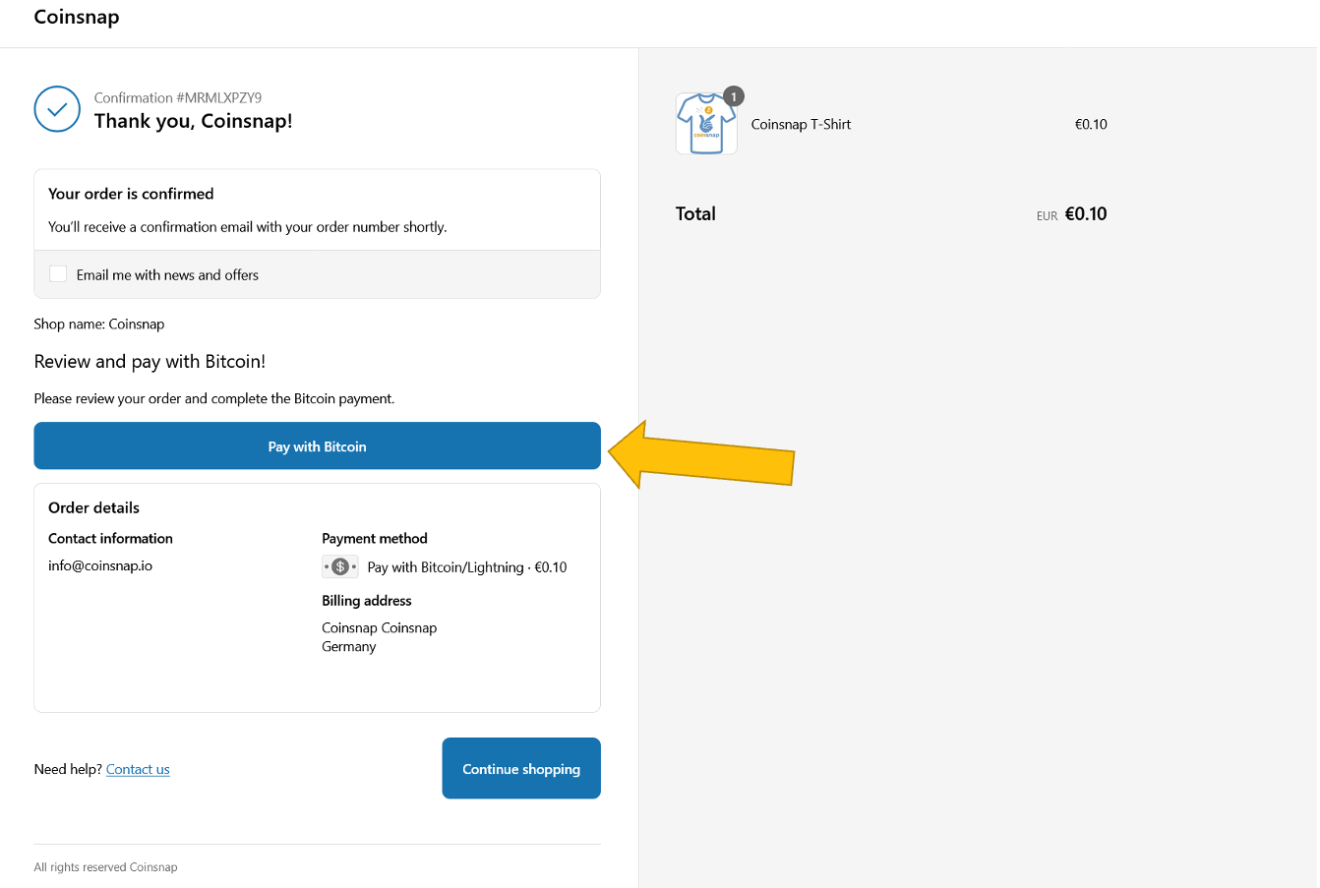
7.3. On the order confirmation page, click Pay with Bitcoin.
Now the QR code for the Bitcoin Lightning payment will appear.
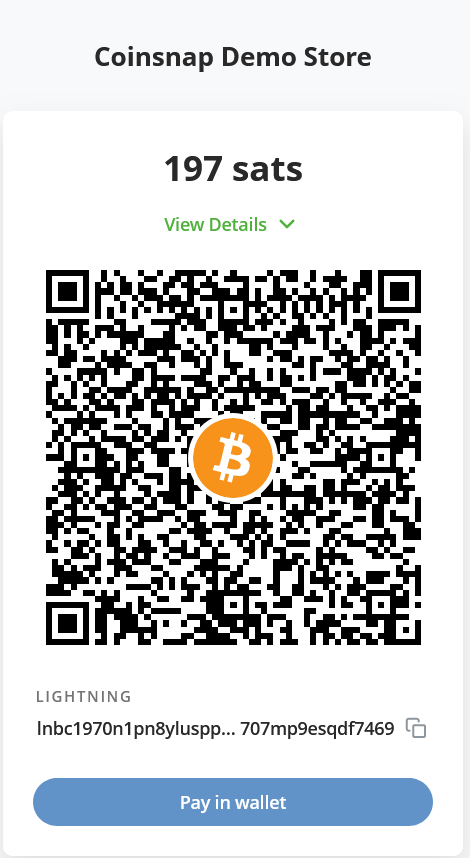
Scan this QR code with your Bitcoin Lightning wallet and authorize the payment. The payment will be immediately credited to the wallet specified in your Coinsnap account.
So – now you have Bitcoin payment in your Shopify store!
Request the free Shopify installation service
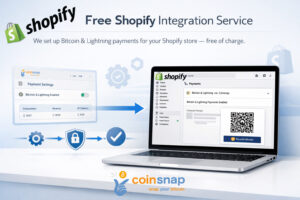 If you don’t want to go to the trouble of connecting Coinsnap for Shopify with your Shopify store, we’ll be happy to do it for you – free of charge and reliably.
To take advantage of this free Shopify integration service, just complete these two small tasks:
- Create a new admin-user as an administrator in Shopify
- instruct us to install Coinsnap for Shopify in your Shopify store for free
-> Learn more about our freee Shopify installation service
Frequently Asked Questions
What Users Ask About This plugin
Do I need a Coinsnap account to use the Shopify Bitcoin module?
No. To accept Bitcoin and Lightning payments in Shopify, you either need a Coinsnap account or a compatible BTCPay Server to process payments.
Can customers pay with both Bitcoin on-chain and Lightning?
Yes. The Shopify Bitcoin module supports both Bitcoin on-chain and Lightning payments through a single payment option at checkout.
Is the Shopify Bitcoin payment method compatible with all Shopify themes?
Yes. The Bitcoin payment method is integrated at the Shopify checkout level and works independently of the active Shopify theme.
Do I need to install additional hardware or external apps?
No. Bitcoin and Lightning payments are handled entirely through the Coinsnap integration and the Shopify checkout.
How are payments credited after a successful transaction?
Payments are credited directly to your connected Bitcoin wallet or BTCPay Server according to your Coinsnap configuration.
Can I test Bitcoin payments before going live?
Yes. You can create test transactions with small amounts to verify the setup before enabling Bitcoin payments for customers.
Can Coinsnap set up the Shopify integration for me?
Yes. Coinsnap offers a free Shopify Integration Service that installs and configures Bitcoin and Lightning payments for your Shopify store on request. -> more
