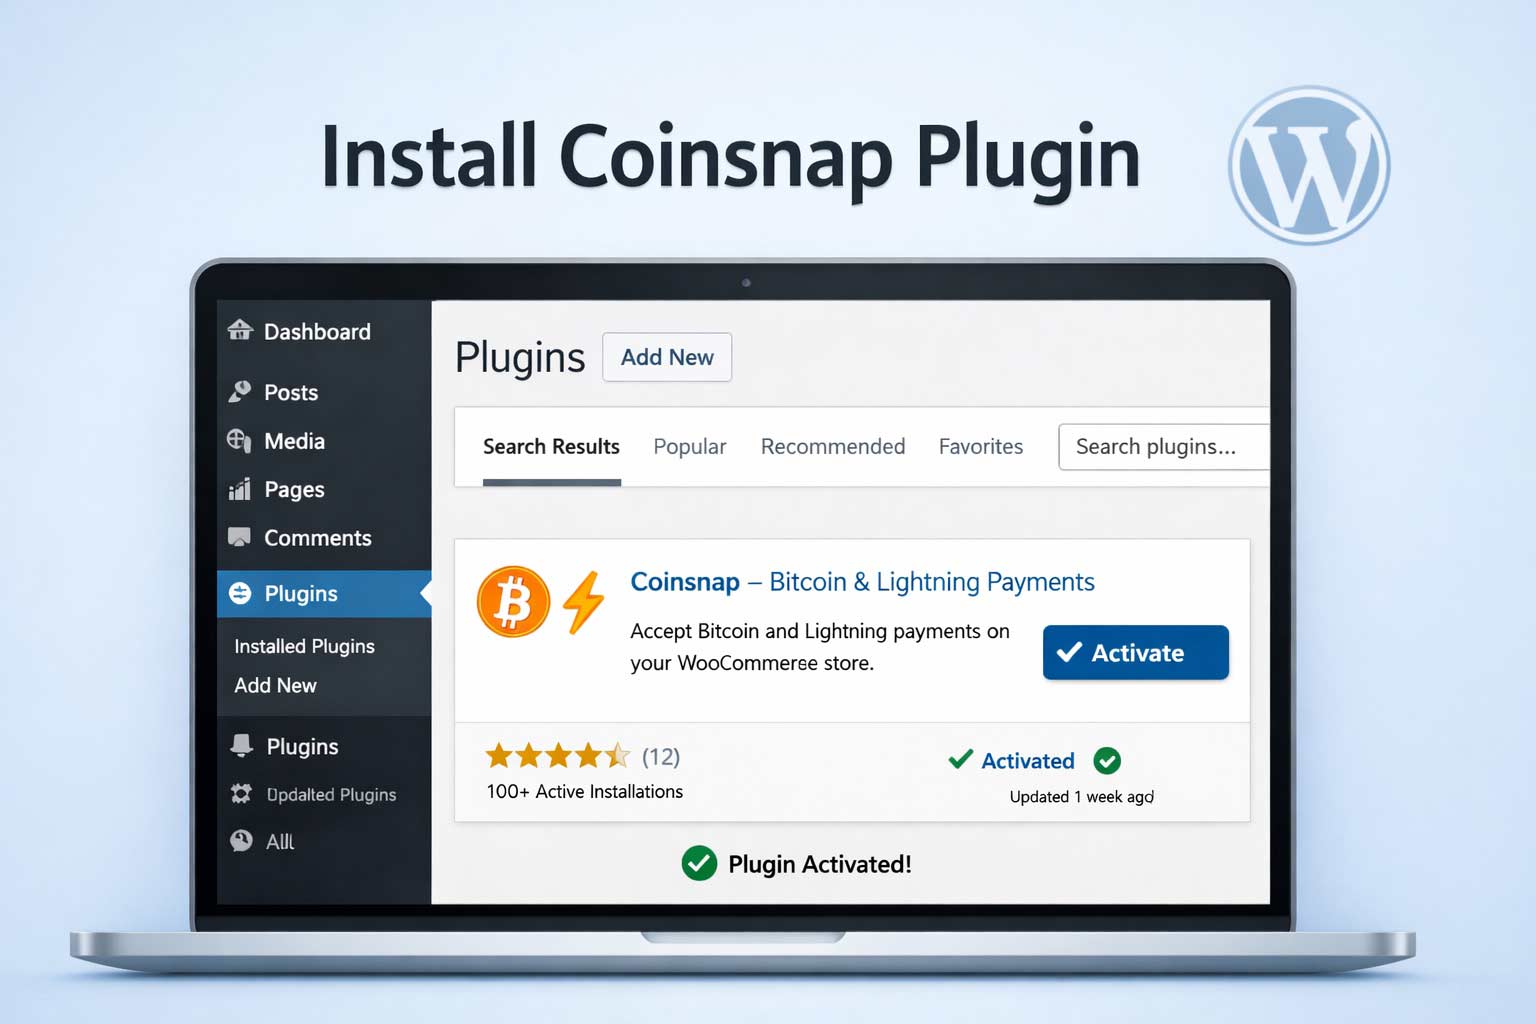
How to Install a Coinsnap Plugin or Add-On in WordPress (General Description)
Learn how to install and activate any Coinsnap WordPress plugin or add-on, so you can start accepting Bitcoin & Lightning payments in minutes — including installing the plugin in WordPress, connecting it with a Coinsnap account, or connecting it with a BTCPay Server.


Step 1: How to Install a Coinsnap Plugin or Add-on in WordPress
Here’s what you need to do:
- Go to Plugins → Add New and search for “Coinsnap”. You will see all available Coinsnap plugins and add-ons listed.
- Click Install Now on the Coinsnap plugin or add-on of your choice.
- Click Activate.
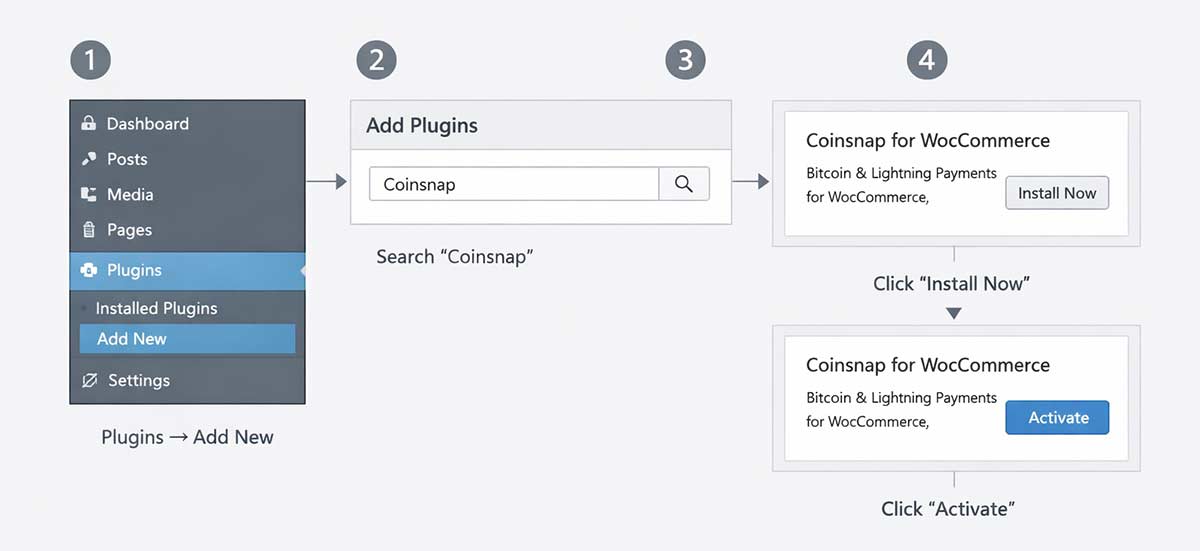
Coinsnap plugin installation in WordPress (example: Coinsnap for WordPress).
Step-by-step instruction (example: Bitcoin Donation):
STEP 1: OPEN THE PLUGIN INSTALLER
Log in to your WordPress admin area and navigate to Plugins → Add Plugin.

This opens the built-in WordPress Plugin Directory, where all verified WordPress plugins are listed.
STEP 2: SEARCH AND INSTALL THE COINSNAP PLUGIN
Use the search field in the top right and enter Coinsnap or the specific plugin name you want to install (e.g. Bitcoin Donation, Bitcoin Invoice, Bitcoin Voting). Choose the one you want to install, and click Install Now.
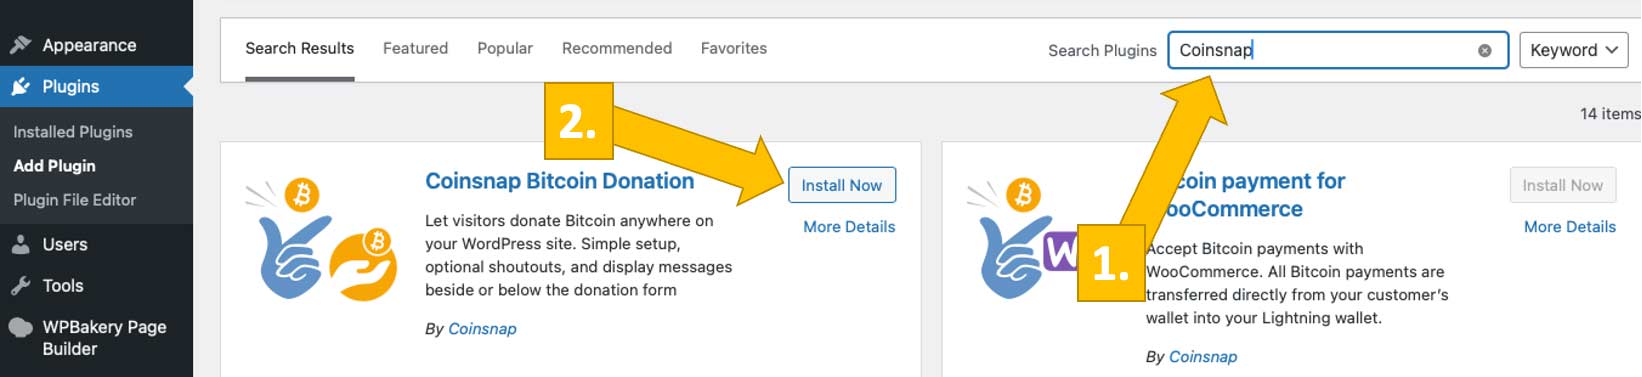
STEP 3: ACTIVATE THE PLUGIN
Once installation is complete, click Activate.

The plugin is now enabled and immediately available in your WordPress backend.
Step 2: How to Connect Your Plugin With Your Coinsnap Account

Once you have installed the plugin, you need to connect it to your Coinsnap account in order to receive Bitcoin Lightning payments. This process is simple and straightforward.
Here is what you need to do:
- Go to the plugin you installed, or to the plugin for which you installed an add-on (in this example, Coinsnap for WooCommerce), and click Settings.
- Enter your Coinsnap Store ID.
- Enter your Coinsnap API Key.
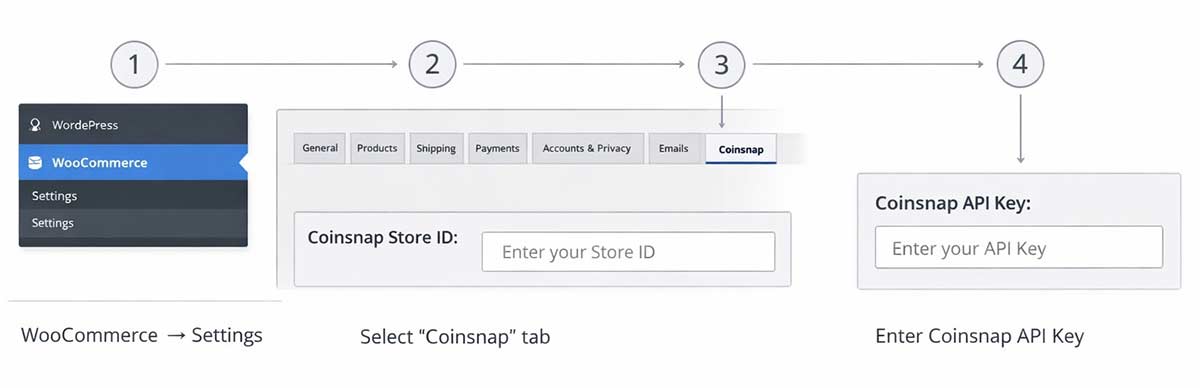
Connect the plugin with your account (example: Coinsnap for WordPress).
Step-by-step instruction (example: Bitcoin Donation):
STEP 1: LOG IN TO YOUR WORDPRESS ADMIN AREA
Open your WordPress backend and navigate to Plugins to ensure the Coinsnap plugin you want to use is installed and activated.
Once activated, you’ll find a new Coinsnap entry in your WordPress menu or under the settings section of the specific plugin (for example: Donation, Invoice, Voting, Paywall, or Web POS).
STEP 2: OPEN THE COINSNAP PLUGIN SETTINGS
Note: This guide applies to WordPress plugins only. If you use a different website platform, please refer to the relevant installation guide.
Find the plugin in the left sidebar of your WordPress dashboard and click Settings.
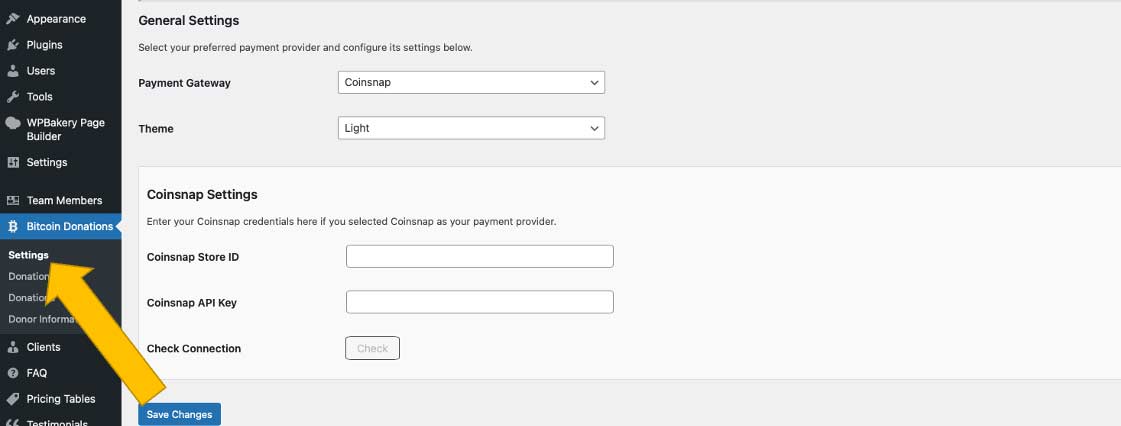
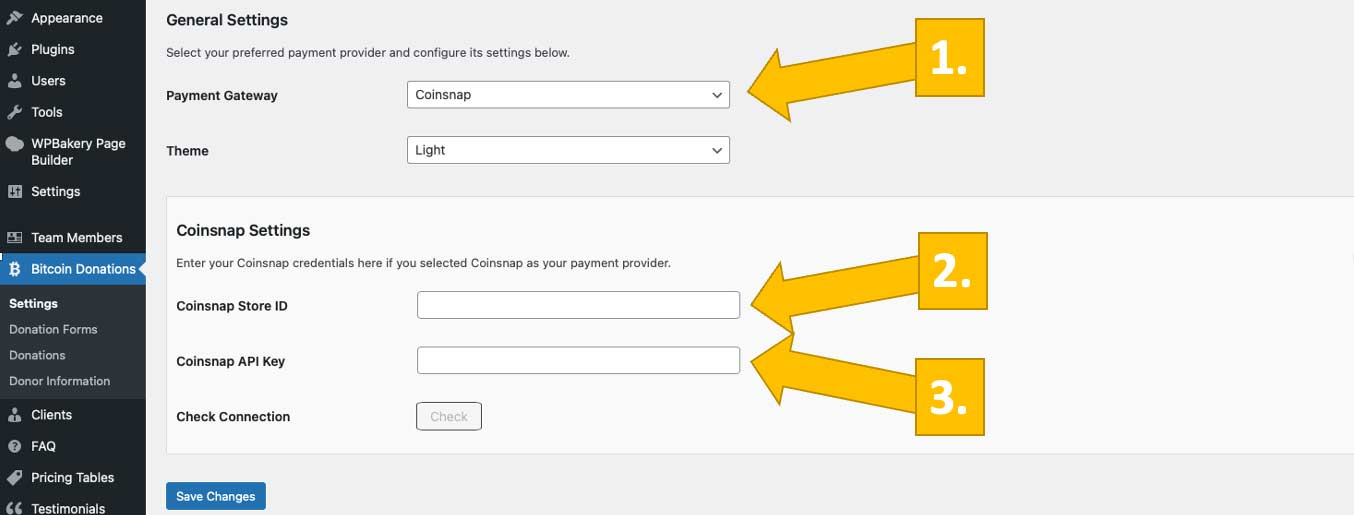
STEP 3: CONNECT THE PLUGIN TO YOUR COINSNAP ACCOUNT
To connect your plugin to your Coinsnap account, select Coinsnap as your payment gateway, then enter your Coinsnap Store ID and your Coinsnap API Key.
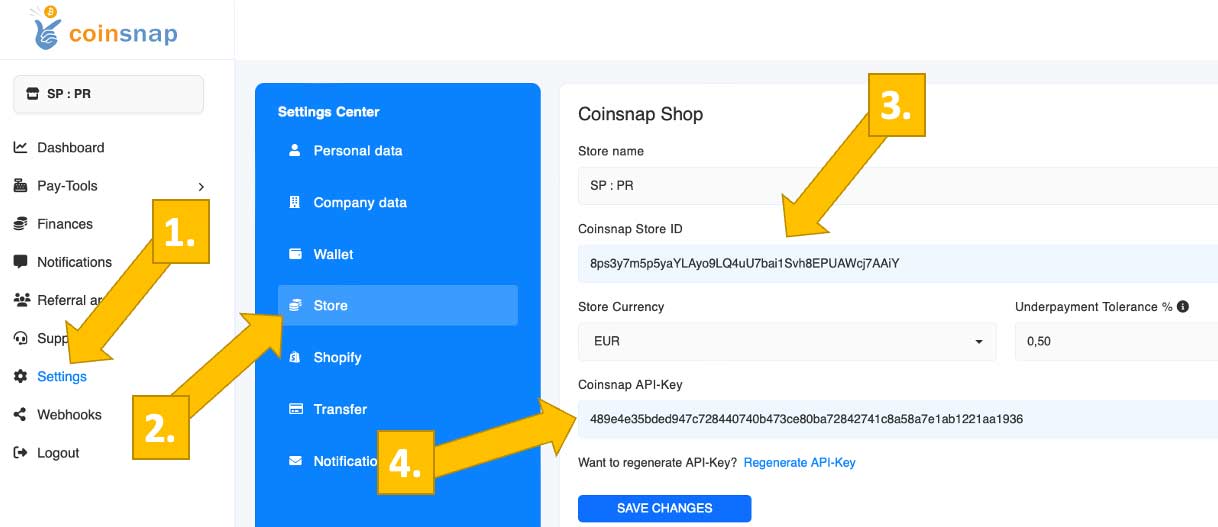
STEP 4: HOW TO RETRIEVE YOUR COINSNAP STORE ID AND YOUR API KEY
Log in to your Coinsnap account and in the Coinsnap dashboard, click on Settings, then Store. Now you can copy your Store ID and API Key. (If you do not yet have a Coinsnap account, here is how you can open one in just a minute.)
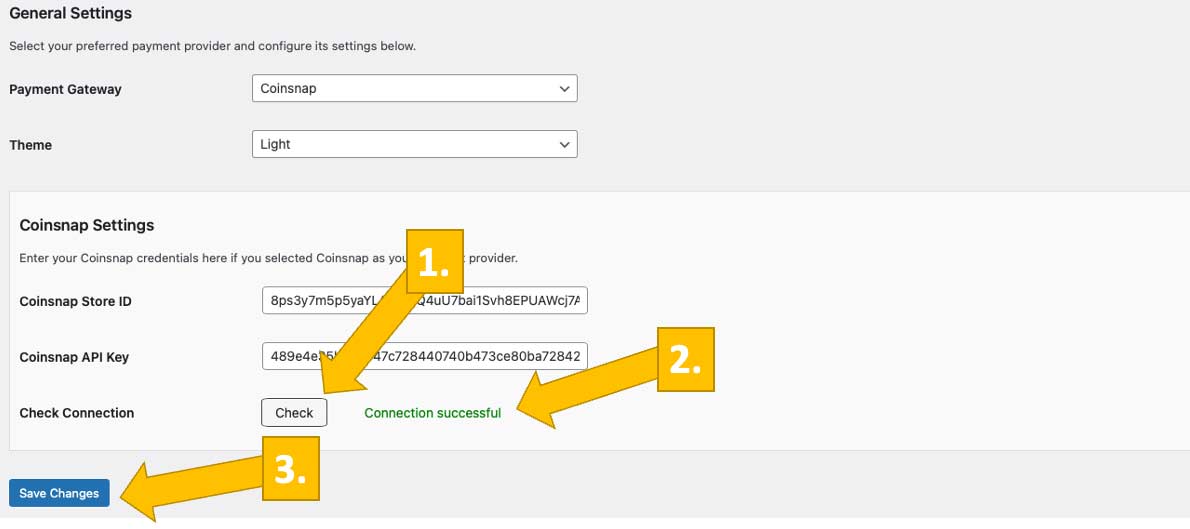
STEP 5: SAVE SETTINGS AND START ACCEPTING BITCOIN
After copying the Store ID and API Key into their respective fields, click Check. A small green success notice will appear. Save the changes, and from then on you can accept Bitcoin Lightning payments.
Your Coinsnap plugin is now connected and fully operational. You can start placing payment forms, buttons, or widgets on your website using shortcodes or blocks. Advanced configuration options, analytics, and account-level settings are covered in separate guides.
Step 2 (optional): How to Connect Your Plugin With Your BTCPay Server
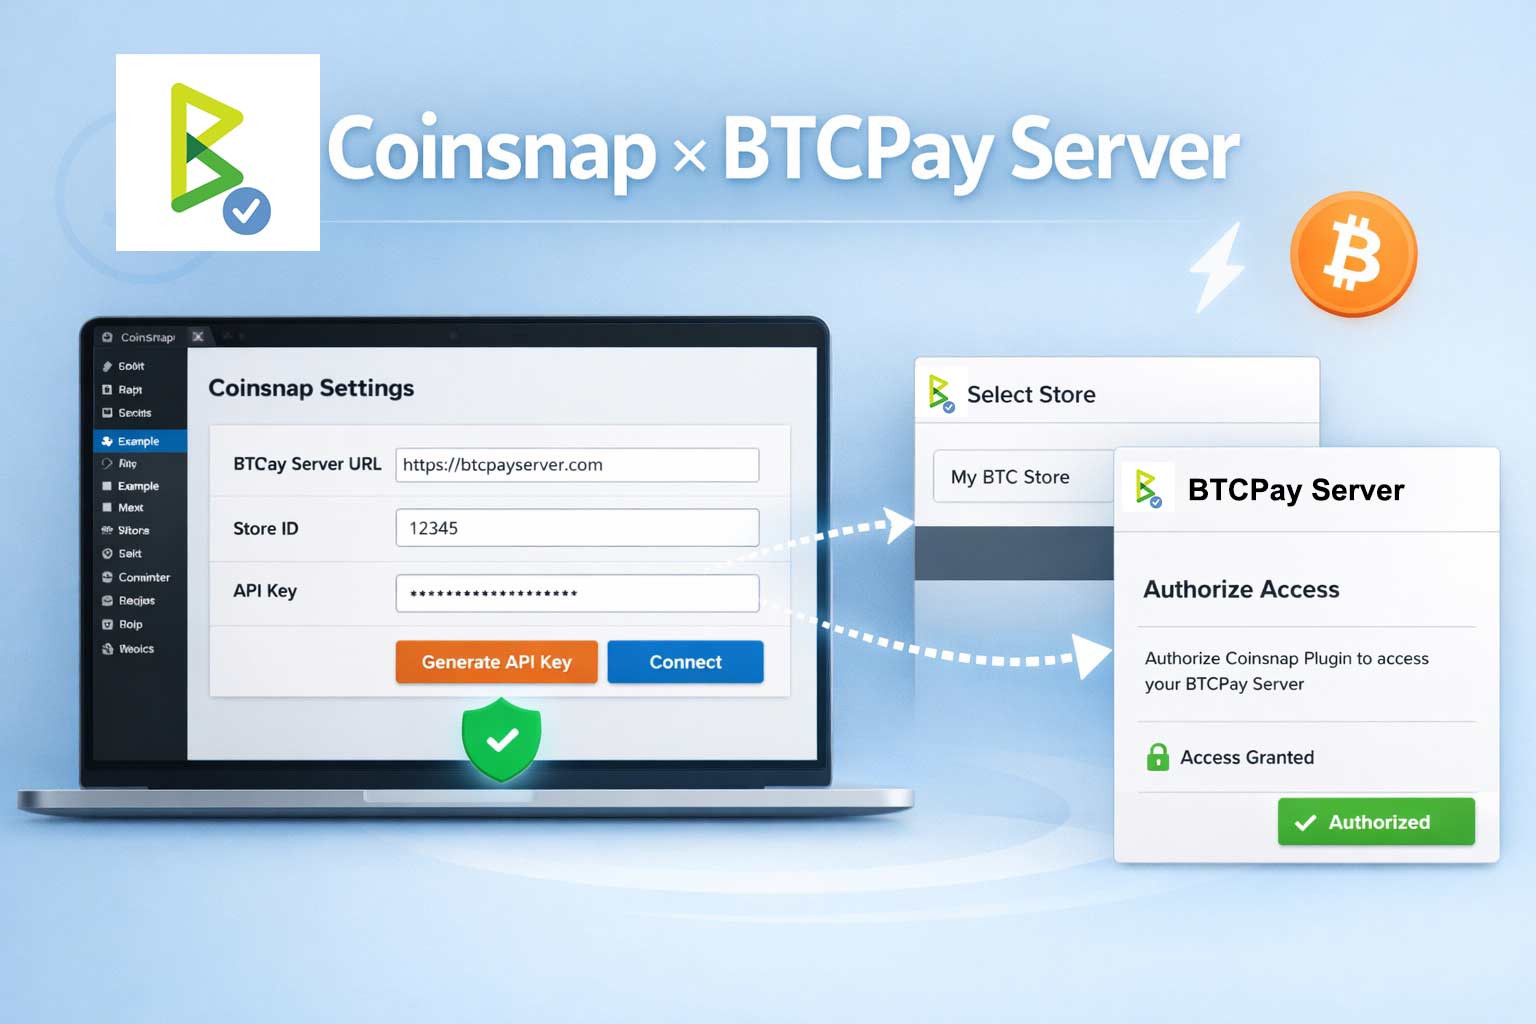
As an alternative to using a Coinsnap account, you can connect the plugin to your own BTCPay Server as the payment processor and retain full custodial control.
Here is what you need to do:
- Select BTCPay Server as the payment provider in the Coinsnap plugin settings.
- Log in to your BTCPay Server account.
- Click Generate API Key in the plugin settings.
- Follow the on-screen instructions in BTCPay Server to complete the connection.
Connect any Coinsnap plugin with your BTCPay Server.
Step-by-step instruction (example: Bitcoin Donation):
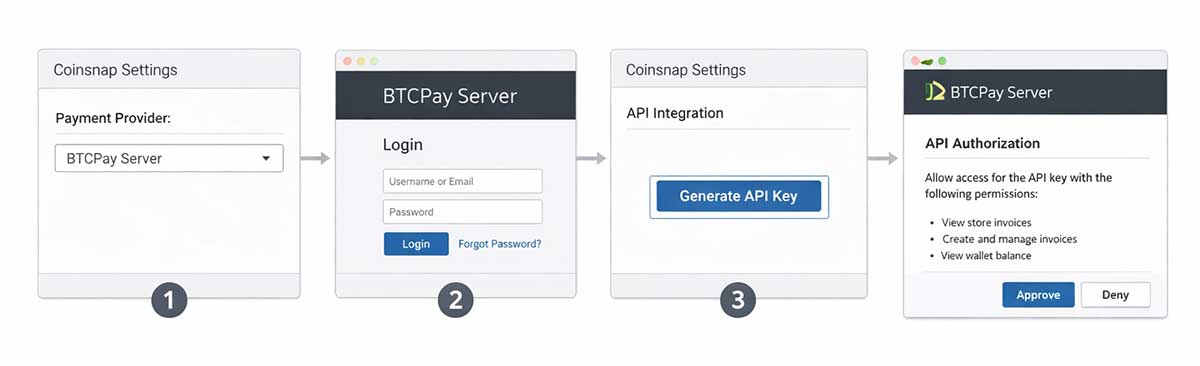
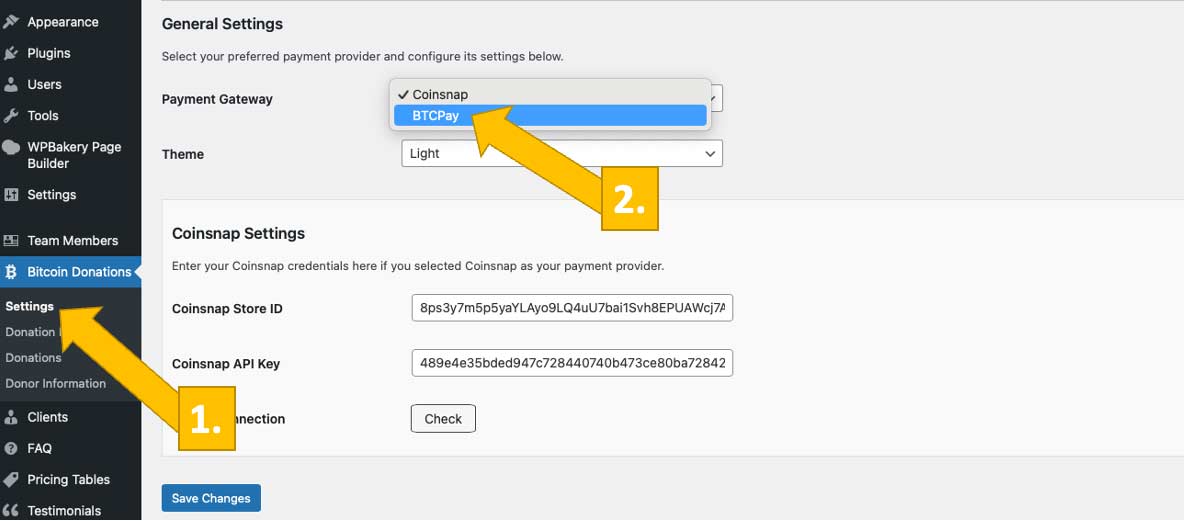
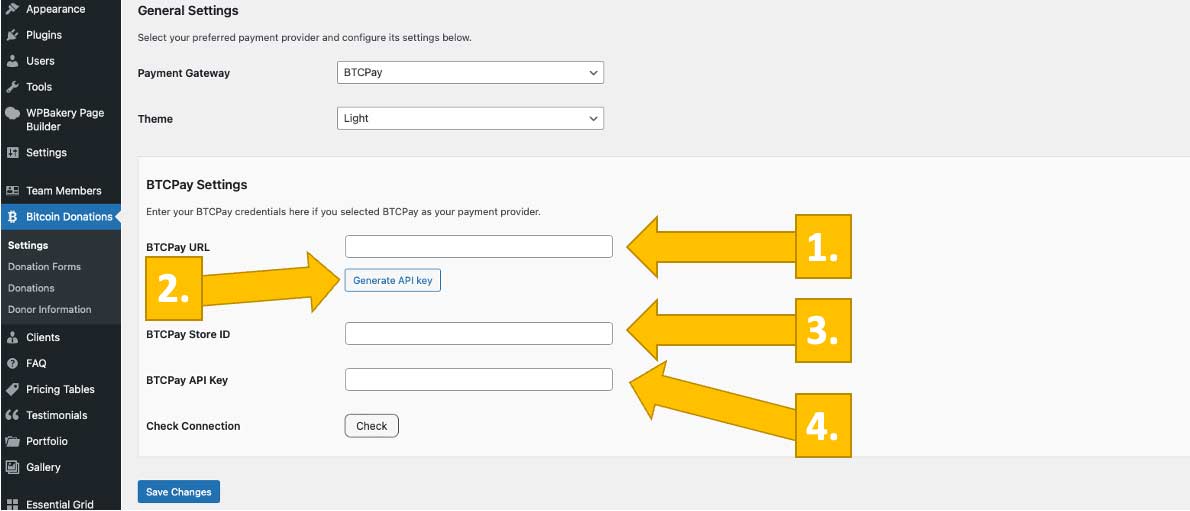
STEP 1: CHOOSE BTCPAY SERVER AS YOUR PAYMENT GATEWAY
Go to your plugin Settings and choose BTCPay Server as your payment gateway.
You will now see this screen:
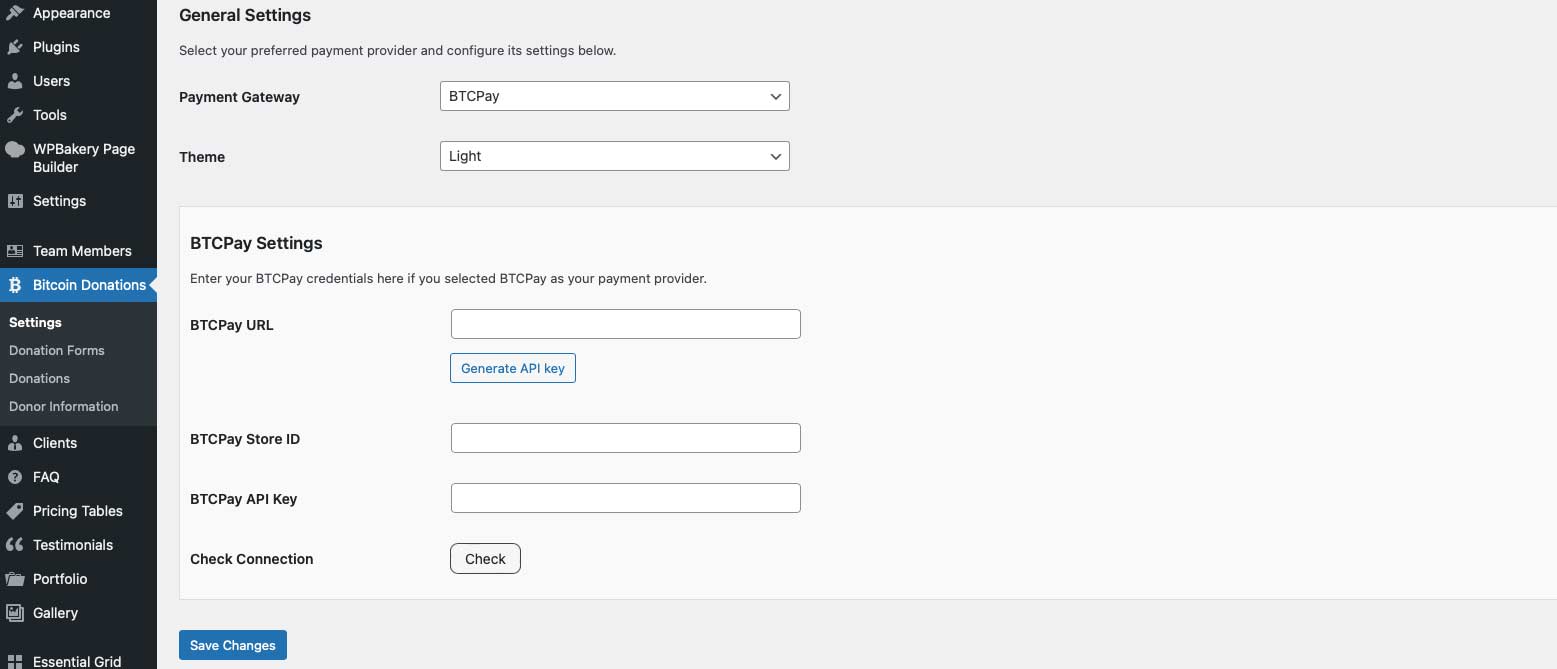
STEP 2: ENTER THE REQUIRED BTCPAY SERVER CREDENTIALS
Enter your BTCPay Server URL, generate an API Key, and provide your BTCPay Store ID and API Key. If you follow the next step, Coinsnap’s BTCPay Server wizard will complete the final steps for you.
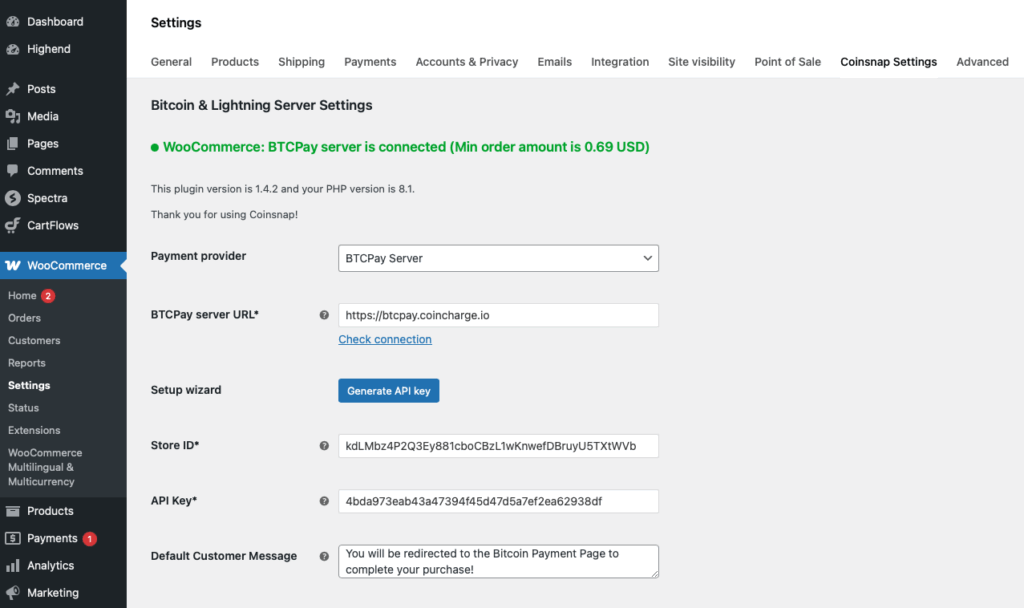
STEP 3: GET YOUR BTCPAY STORE ID AND YOUR BTCPAY API KEY FILLED IN
Log in to your BTCPay Server.
Enter the URL of your BTCPay Server in the BTCPay URL field and click Generate API Key. This starts the BTCPay wizard, which automatically retrieves your Store ID and API Key and fills them into your plugin settings.
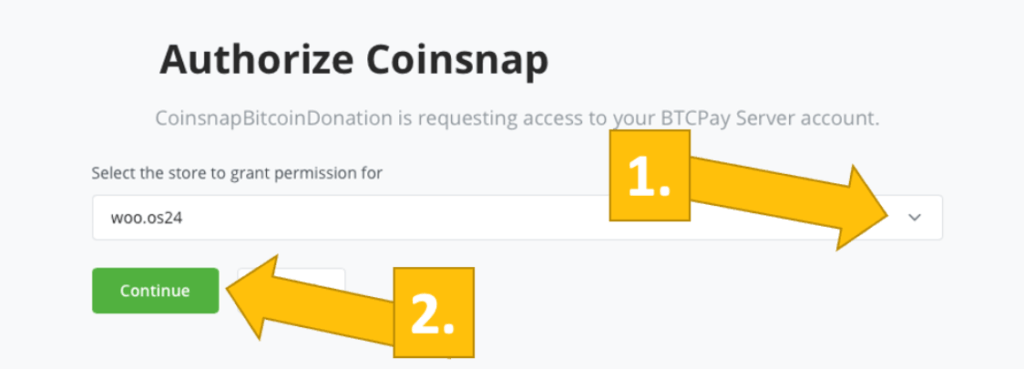
You will be redirected to your BTCPay Server. Select your Store and click Continue.
Enter the name of your store and click Authorize App.
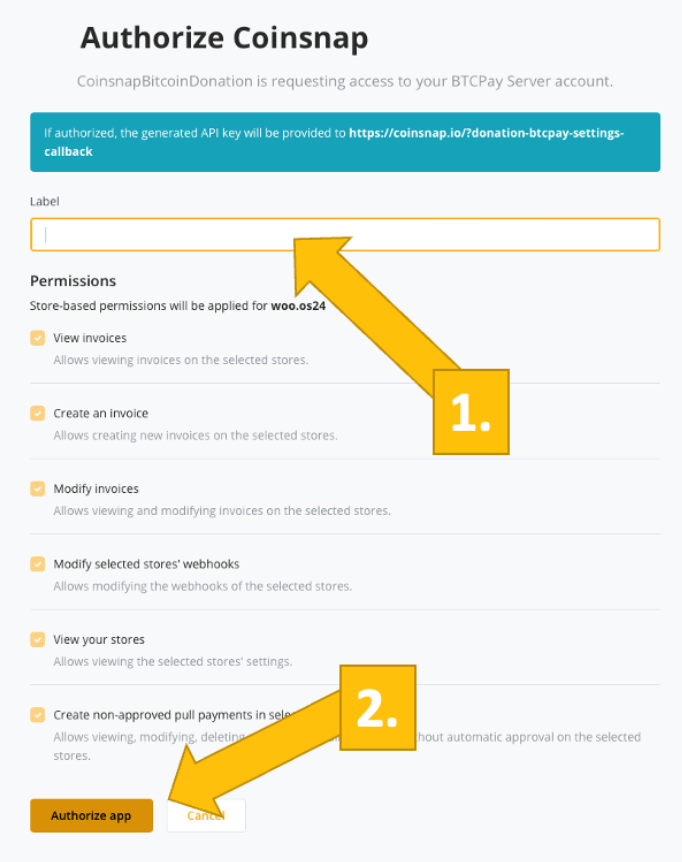
DONE
Your BTCPay Server is now successfully connected to your online store via the Coinsnap plugin.
Your plugin is installed - what's next?
Accepting Bitcoin on your WordPress website is easier than you think
No coding, no experts, and no bureaucratic overhead. Just choose the Coinsnap plugin or add-on that fits your business, follow steps 1 and 2 to set up the technical foundation, and start accepting Bitcoin as early as tomorrow!
