Step 1: Choose BTCPay Server as Your Payment Gateway
Go to your plugin settings [1], and choose BTCPay Server as your payment gateway [2].

Step 2: Enter the Required BTCPay Server Credentials
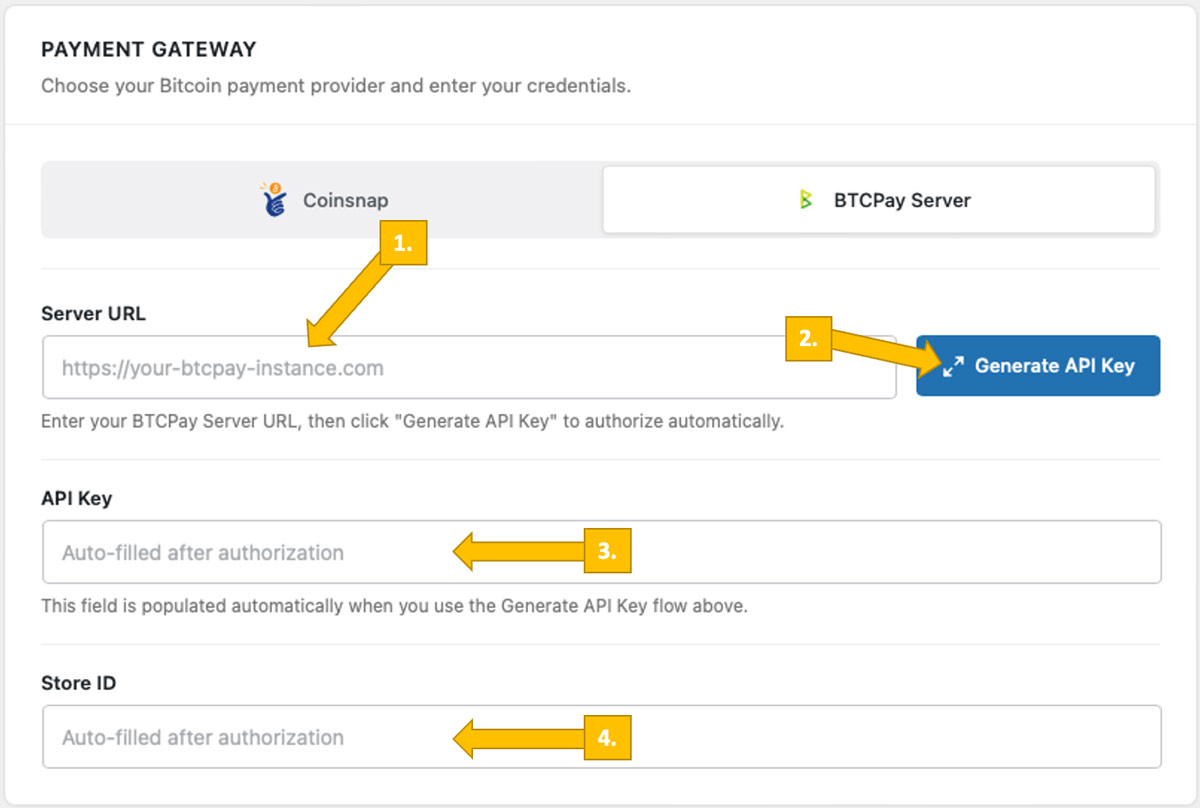
Now you need to enter your BTCPay Server URL [1], generate an API Key [2], and enter your BTCPay Server Shop ID [3] and API Key [4]. If you follow the next step, Coinsnap’s BTCPay Server wizard will complete the final two tasks for you.
We’ll now show you how to get this done.
Step 3: Get Your BTCPay Store ID and Your BTCPay API Key Filled In
Log in to your BTCPay server.
Once you have done this, enter the URL of your BTCPay Server in the Server URL field [1, image above]. Next, click the Generate API Key button [2, image above]. This starts the BTCPay wizard, which automatically retrieves your BTCPay Store ID [3, image above] and API Key [4, image above] and fills them into your plugin settings.
As soon as you enter your BTCPay Server URL, you will be redirected to your BTCPay Server. Select your Store [1] and then click Continue [2].
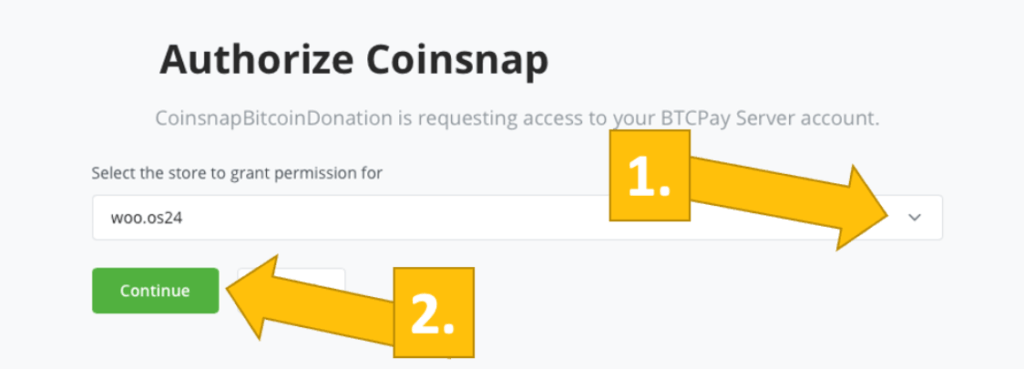
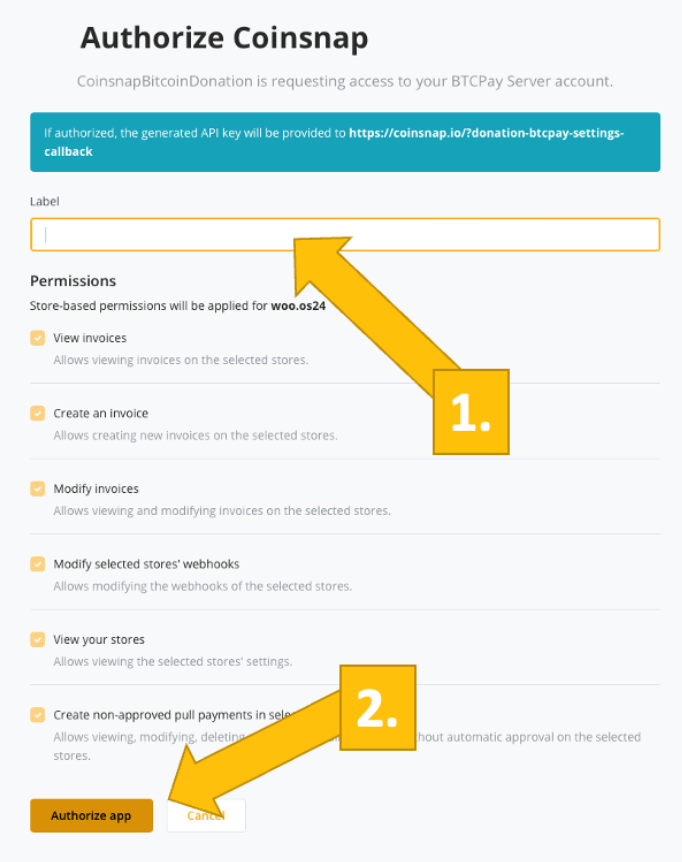
On the following screen, enter the name of your store at the top [1] and then click Authorize App [2].
Done
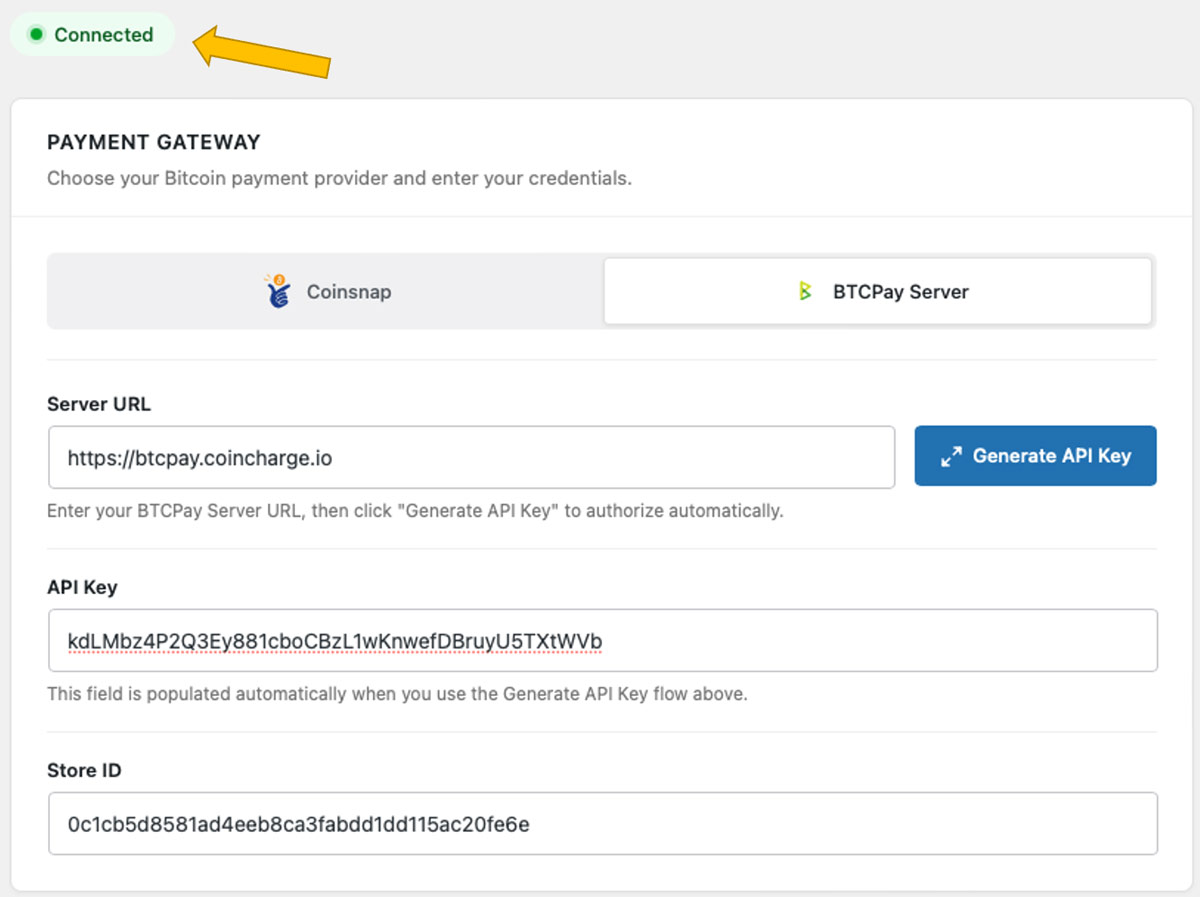
Your BTCPay Server is now successfully connected to your online store via the Coinsnap plugin. (Look for the green success indicator!)