
Step 1: Open the Plugin Installer
Log in to your WordPress admin area and navigate to Plugins → Add Plugin

This opens the built-in WordPress Plugin Directory, where all verified WordPress plugins are listed.
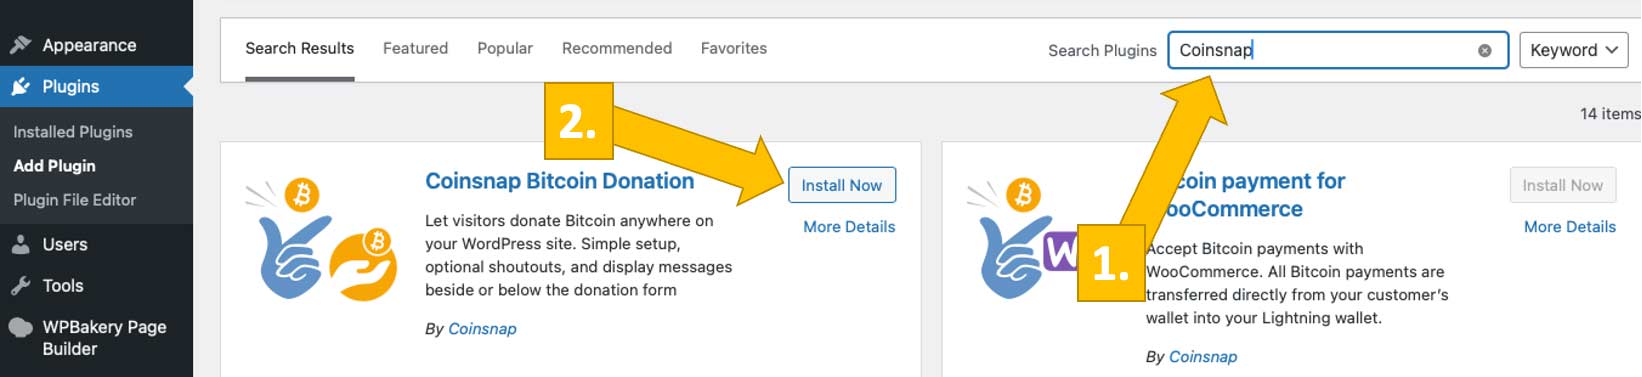
Step 2: Search and Install the Coinsnap Plugin
Use the search field in the top right and enter Coinsnap [1] or the specific plugin name you want to install (e.g. Bitcoin Donation, Bitcoin Invoice, Bitcoin Voting). Choose the one you want to install, and click Install Now. [2]
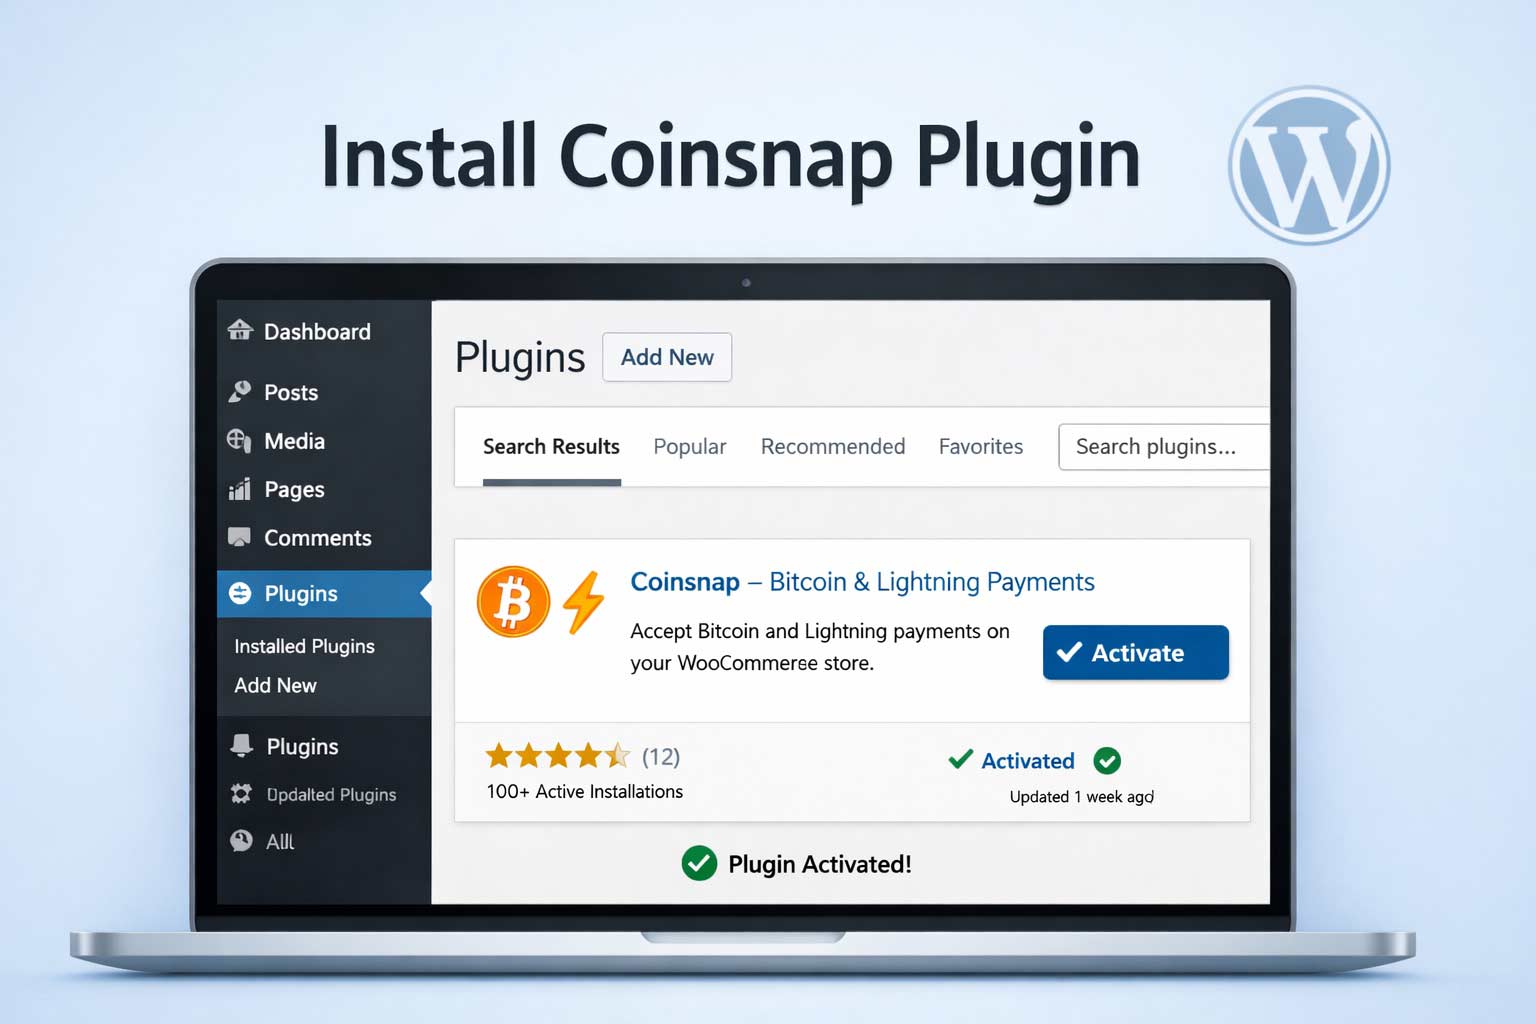
Step 3: Activate the Plugin
Once installation is complete, click Activate.

The plugin is now enabled and immediately available in your WordPress backend.
Step 4: Open the Plugin Settings
After activation, a new Coinsnap menu item or settings page will appear in your WordPress dashboard, depending on the plugin. It can look like this [1]:

From there, you can connect your Coinsnap account and configure the plugin [2] according to your use case. We explain how to do this here.
Done
The Coinsnap plugin is now installed, active, and ready to be connected—no manual uploads, no technical setup, and no external tools required. Done in less than a minute!