GiveWP Bitcoin User Guide
This user guide explains everything you need to know to accept Bitcoin and Lightning payments with the GiveWP Bitcoin module. You will learn the technical requirements, how to install the Coinsnap for GiveWP plugin, how to connect it to your Coinsnap account or a BTCPay Server, how to configure all settings, and how to implement Bitcoin payments directly within your donation forms.
Accept Bitcoin & Lightning donations directly through GiveWP.


Requirements
These requirements must be met for Coinsnap for GiveWP to function correctly:
WordPress & GiveWP
- A self-hosted WordPress website
- GiveWP installed and activated
Coinsnap & Payments
- An active Coinsnap account
-> how to set up a Coinsnap account - A connected Bitcoin Lightning wallet (self-custodial wallet or BTCPay Server)
-> how to get a Lightning address - The installed Coinsnap for GiveWP plugin
-> How to install the plugin and connect it with your Coinsnap account or your BTCPay Server
Server & Access
- Ability to install and activate WordPress plugins
- HTTPS (SSL) enabled on the website
GiveWP Setup
- At least one GiveWP form created
STEP 1 - CONFIGURE AND CUSTOMIZE THE PLUGIN
All the requirements listed above are met, and you have successfully installed the plugin in your WordPress.
If not, here is a Step-by-step: How to install a Coinsnap plugin in WordPress guide to help you install the plugin.
You will soon be able to accept Bitcoin payments (on-chain and Lightning) directly from within your GiveWP —
without the need for a complex shop system like WooCommerce or traditional payment providers such as credit cards or PayPal.
But before you can do that, you need to configure Bitcoin payments in your GiveWP Bitcoin module.
GIVEWP COINSNAP SETTINGS
Go to GiveWP / Settings [1] in the black sidebar on the left. Then click Coinsnap [2].
You will then see this screen:
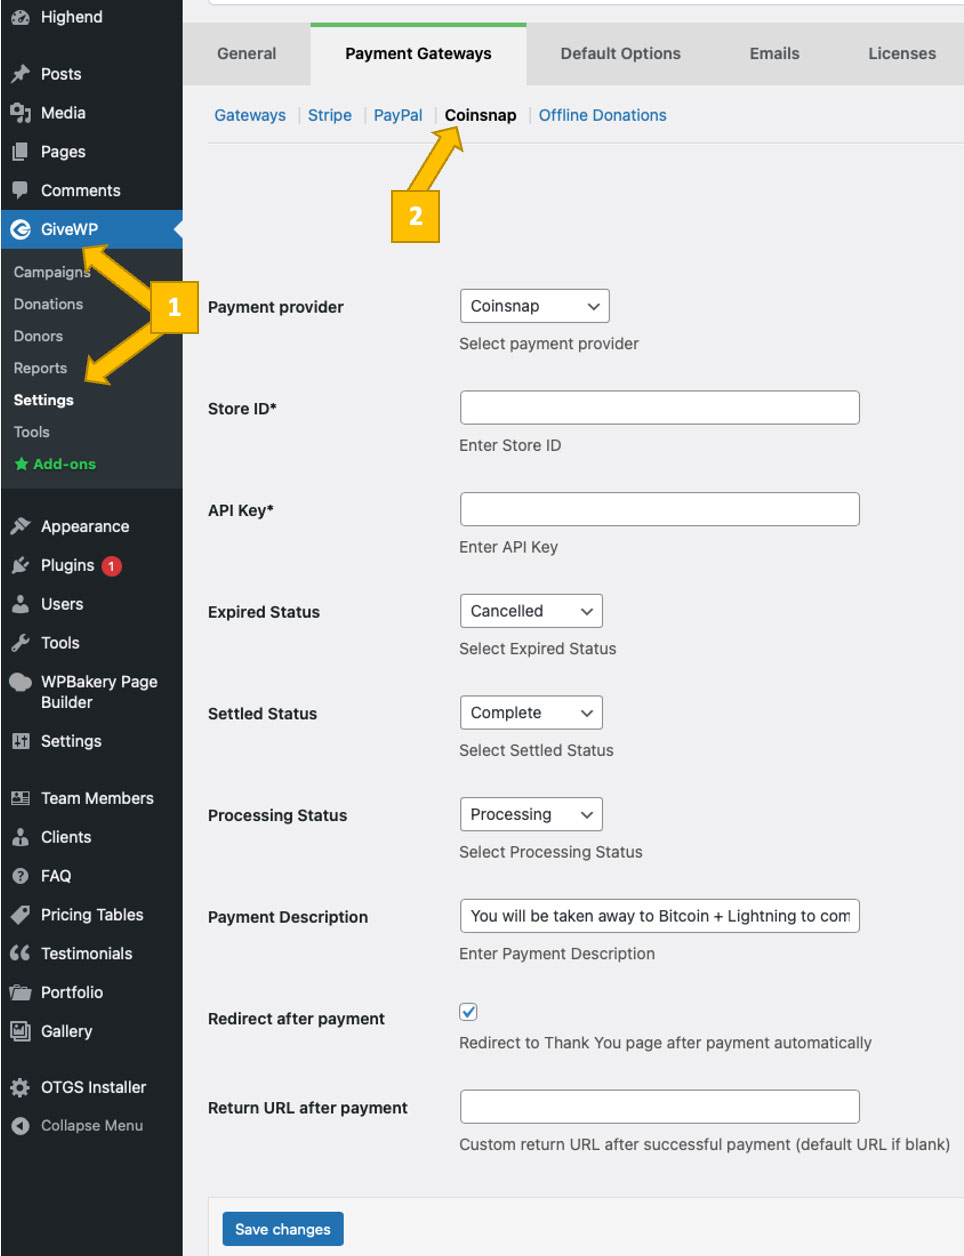
You will now need to configure four parameters: your chosen payment provider (Coinsnap or your BTCPay Server), the mapping of payment statuses (Expired, Settled, Processing), the payment description, and the Redirect after payment or Return URL after payment.
The following steps show you how to set everything up correctly:
1. Choose and set up your payment provider
You now need to choose between two payment gateways: Coinsnap or your own BTCPay Server.

Connect your plugin to your chosen payment provider
After making your selection, enter the corresponding Store ID and API Key for either Coinsnap or BTCPay Server. The following steps explain how to do this.
Coinsnap
Coinsnap is the easiest option. Coinsnap handles the technical setup for you and connects your store to Bitcoin and Lightning payments with just a few clicks. It’s ideal if you want a quick, hassle-free solution without managing your own payment infrastructure.
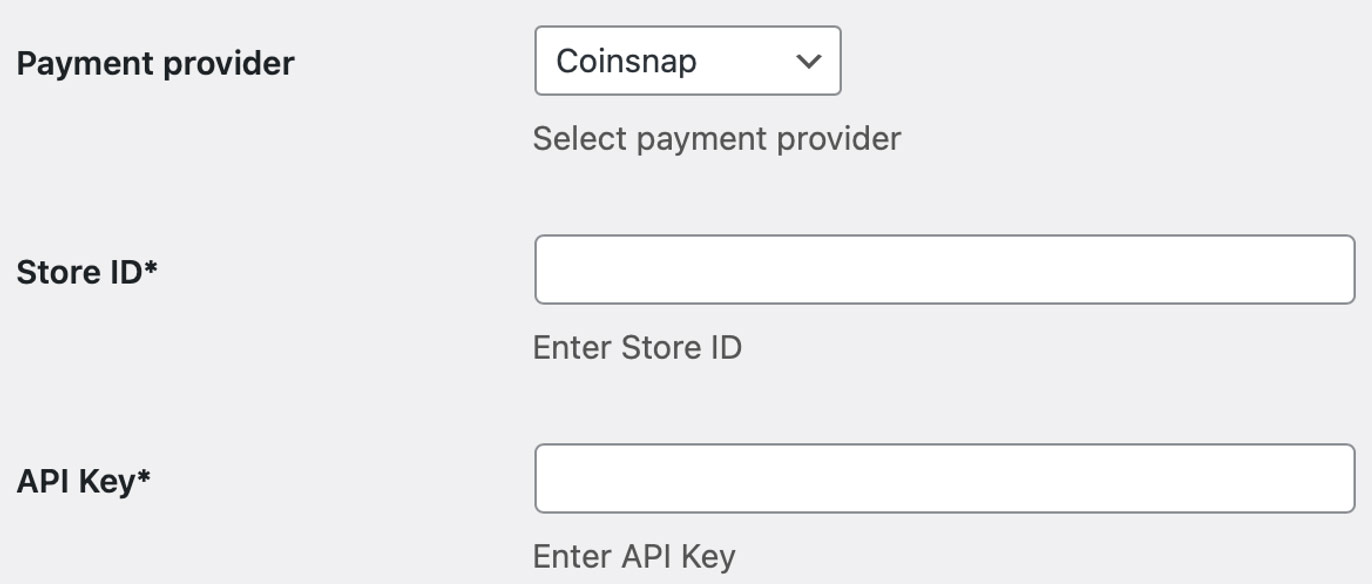
Just enter your Coinsnap Store ID and API Key.
Learn here how to retrieve your Coinsnap Store ID and API Key:
-> Step-by-step explanation: How to connect your Coinsnap account with your plugin
BTCPay Server
BTCPay Server is a self-hosted option for merchants who want full control. You run your own Bitcoin and Lightning payment server, manage your own wallets, and don’t rely on a third party. This option offers maximum independence but requires more technical setup and maintenance.
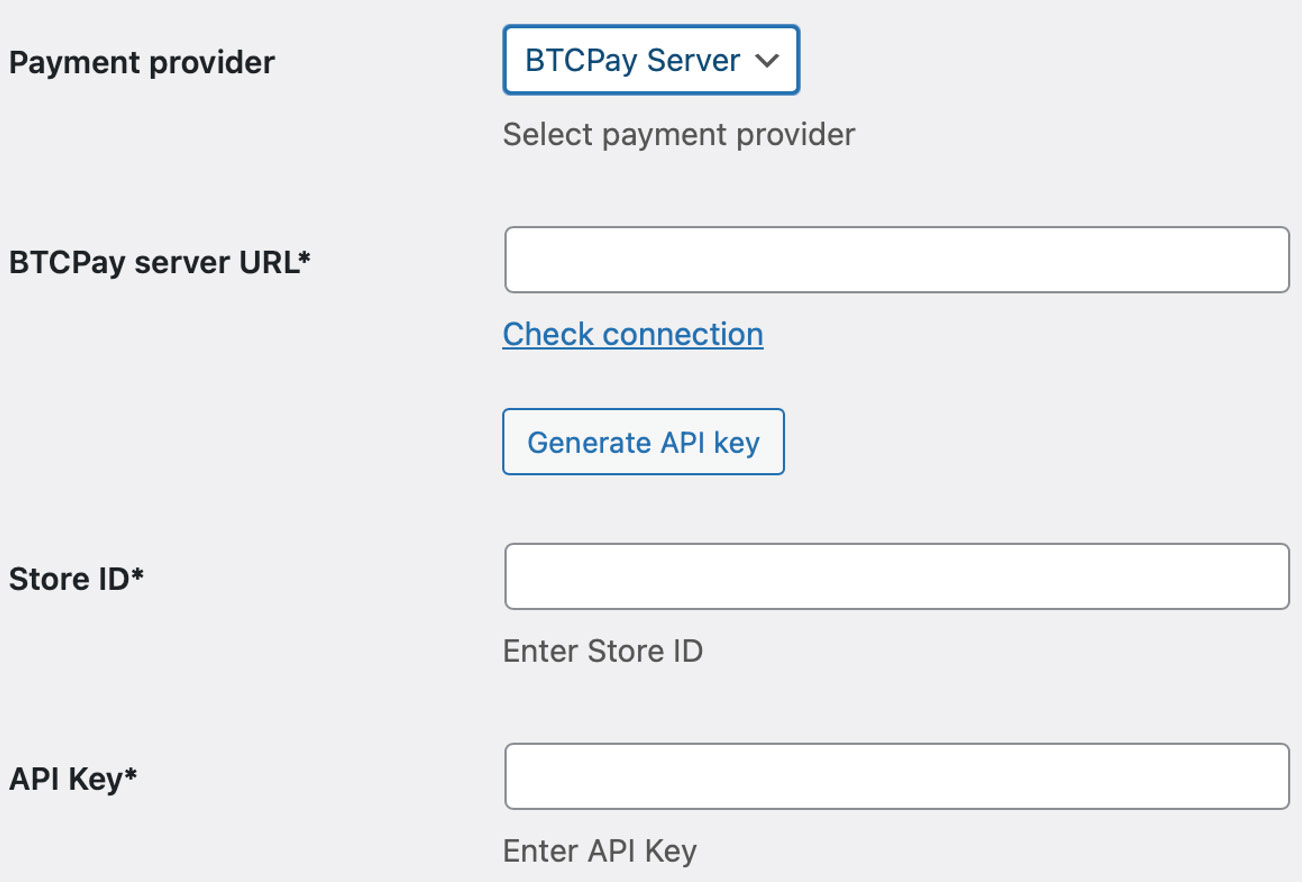
First, enter your BTCPay Server URL. Then enter the corresponding BTCPay Server Store ID and API Key.
Learn how to retrieve your Store ID and API Key using our BTCPay Server wizard here:
-> Step-by-step explanation: How to connect your BTCPay Server with your plugin
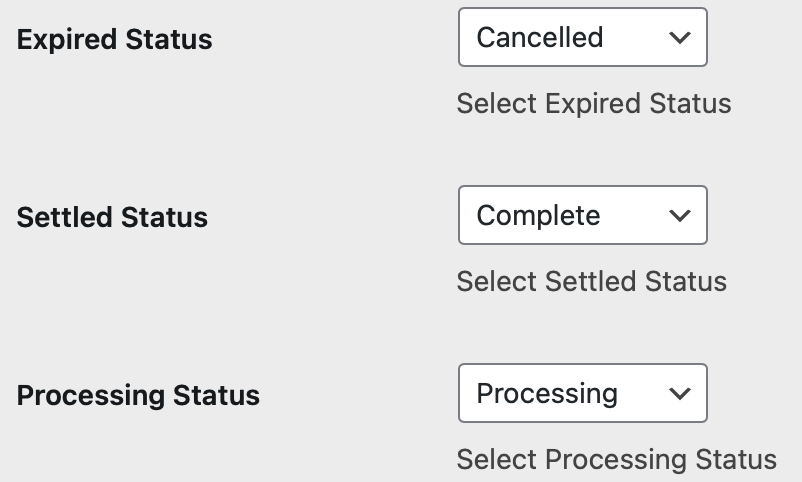
2. Map the Coinsnap/GiveWP payment statuses
GiveWP tracks the status of each payment associated with a form submission. These statuses indicate whether a payment is Pending, Complete, Refunded, Failed, Cancelled, Abandoned, Pre-Approved, Processing or Revoked, and help you understand the current state of each transaction.
The Coinsnap Bitcoin payment plugin only tracks three payment statuses — Expired, Settled, and Processing. You now need to map each of these to the corresponding status option available in Gravity Forms.
We strongly recommend keeping the default payment status mapping, as it provides the most reliable and consistent behavior in almost all cases; selecting an alternative option from the dropdown should only be done in very specific, exceptional circumstances.
3. Enter your payment description
The payment description is the text displayed to the donor in GiveWP when selecting Bitcoin as the payment method during checkout.

The default wording can be customized here to match your organization’s messaging.
4. Redirect after payment and Return URL after payment

Here you define what happens after a successful payment. If Redirect after payment is enabled, the customer will be redirected back to the page containing the form from which the payment was made.
If you prefer to use a custom thank-you page, create the page and enter its URL in the Return URL after payment field.
DONE
Save these settings by clicking the button below, and your GiveWP will be ready to accept Bitcoin payments (on-chain and Lightning).
In the next step, we’ll show you how to integrate Bitcoin payments directly into any of your GiveWP Forms.
Step 2 - enable Bitcoin payment in your GiveWP forms
How do I integrate Bitcoin-Lightning payment in my GiveWP forms?
It is very easy to create a donation or fundraising form in GiveWP and activate Bitcoin payments for contributions.
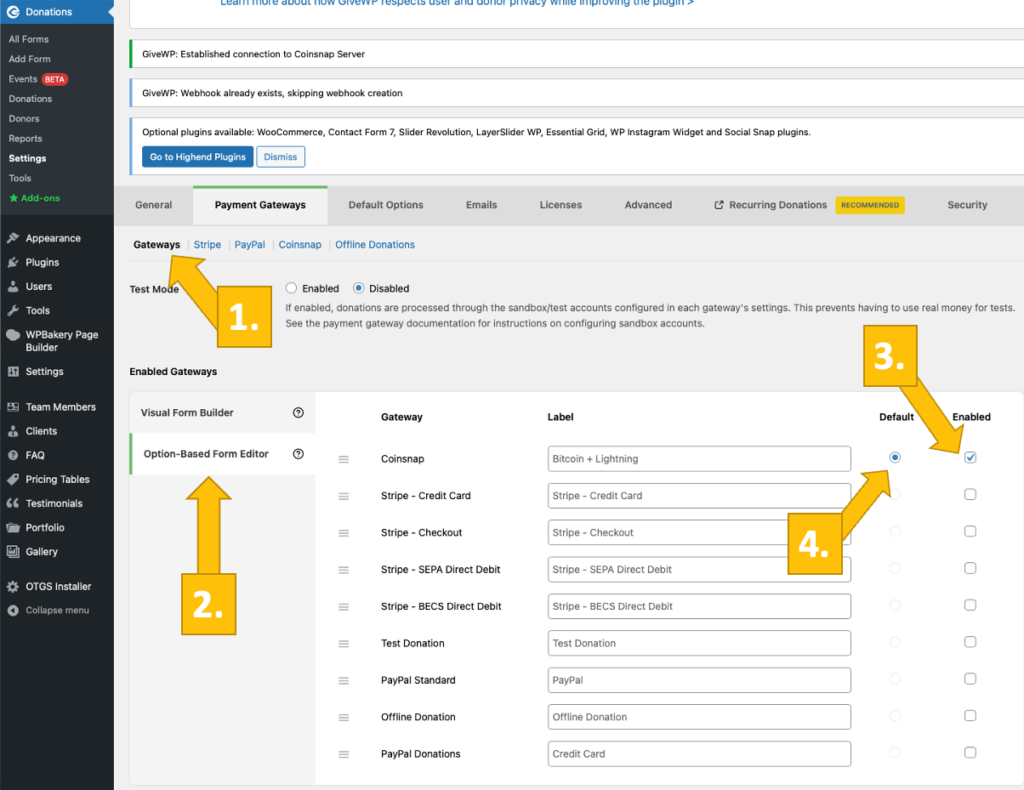
Go to Donations → Settings in the left sidebar.
Open the Payment Gateways tab [1] and click on Option-based Form Editor [2].
Enable Coinsnap Bitcoin-Lightning payments by checking the corresponding box [3].
If you want to prioritize Bitcoin contributions, also activate Default mode [4]. You can still offer other payment methods provided by GiveWP.
That’s it. Your supporters can now contribute to your causes with Bitcoin.
Step 3 - MAKE A TEST PAYMENT TO ENSURE EVERYTHING WORKS CORRECTLY
After all settings have been made, a test transaction should be carried out.
Fill out a GiveWP form you have just created and click the blue button to start the Bitcoin payment.
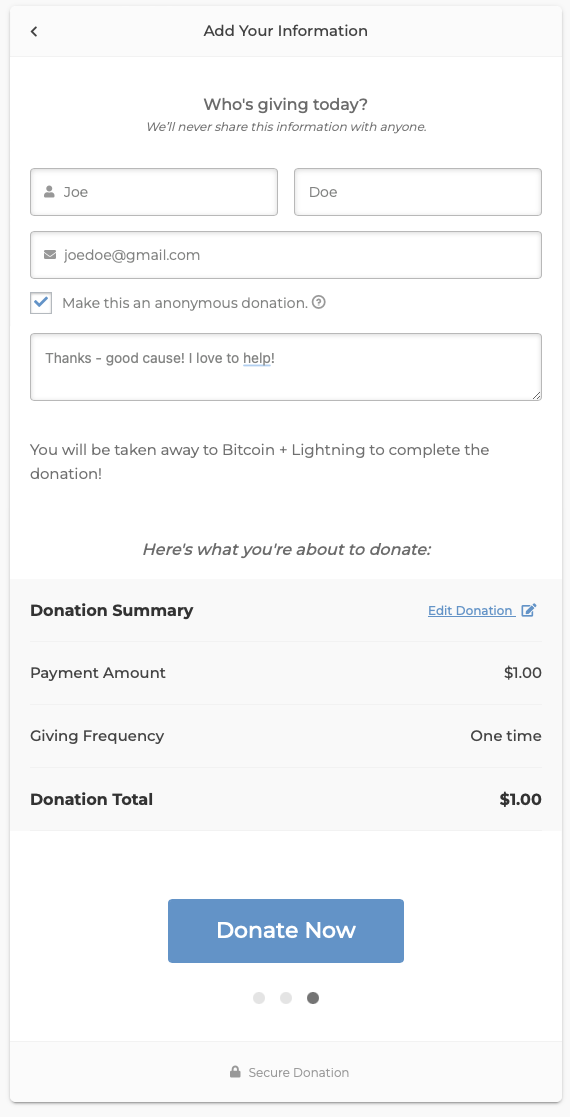
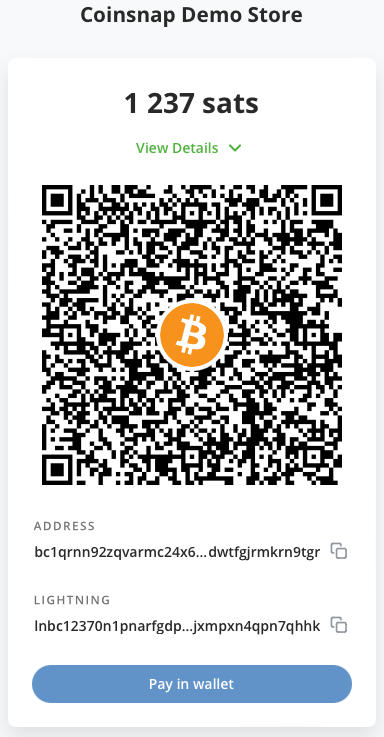
You will then be redirected to the Bitcoin payment page to submit your contribution.
The Bitcoin payment page allows you to choose between Bitcoin and Lightning. Both payment methods are integrated into the displayed QR code.
If the payment was processed successfully, Coinsnap will display a confirmation screen before automatically redirecting the donor to your predefined after-payment page.
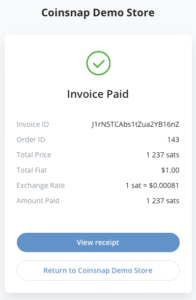
You will now be able to view the full payment details under Donations in your GiveWP dashboard.

Frequently Asked Questions
What Users Ask About This plugin
Can I accept both Bitcoin on-chain and Lightning payments?
Yes. Coinsnap supports both on-chain Bitcoin and Lightning payments. The donor can choose their preferred method on the payment page via the integrated QR code.
Do I need WooCommerce to accept Bitcoin donations with GiveWP?
No. The Coinsnap for GiveWP plugin enables direct Bitcoin & Lightning payments within GiveWP donation forms — no shop system required.
Can I use BTCPay Server instead of a Coinsnap account?
Yes. You can connect the plugin either to your Coinsnap account or to your own BTCPay Server instance.
What payment statuses does Coinsnap transmit to GiveWP?
Coinsnap provides three statuses: Processing, Settled, and Expired. These should be mapped to the corresponding GiveWP donation statuses.
Where can I see completed Bitcoin donations?
All successful donations are listed in your WordPress dashboard under Donations in GiveWP.
Can I customize the Bitcoin payment description shown to donors?
Yes. The payment description displayed at checkout can be edited in the plugin settings to match your organization’s wording.
