Working with the Coinsnap backend
In the Coinsnap backend you will find further setting options for Coinsnap and all information on transactions and settlements.
Understanding the Coinsnap dashboard
After you have registered and logged in for the first time, you will be asked to enter the name of your store and your Lightning address.
You will then be redirected to the Coinsnap Dashboard.
The Coinsnap Dashboard will then always be displayed when you log in to Coinsnap.
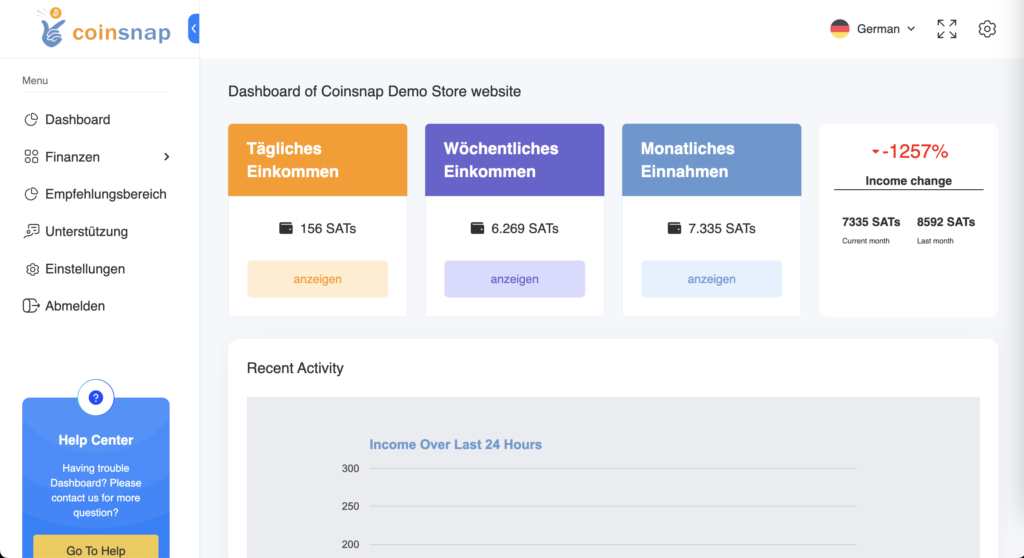
The dashboard provides a quick overview of all Bitcoin and Lightning payments made and can be displayed according to daily, weekly and monthly income.
Current Sales
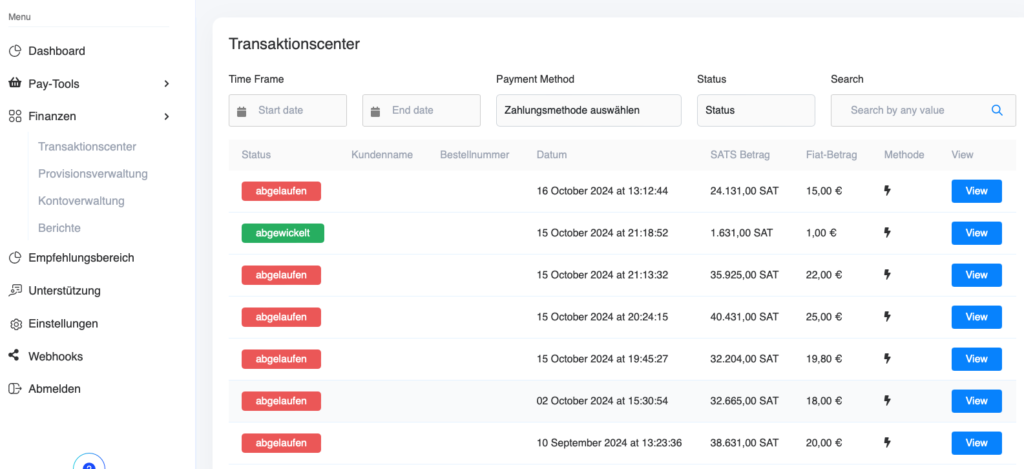
If you click on “View all” in the box at the top right under “Current sales”, you will see your current sales:
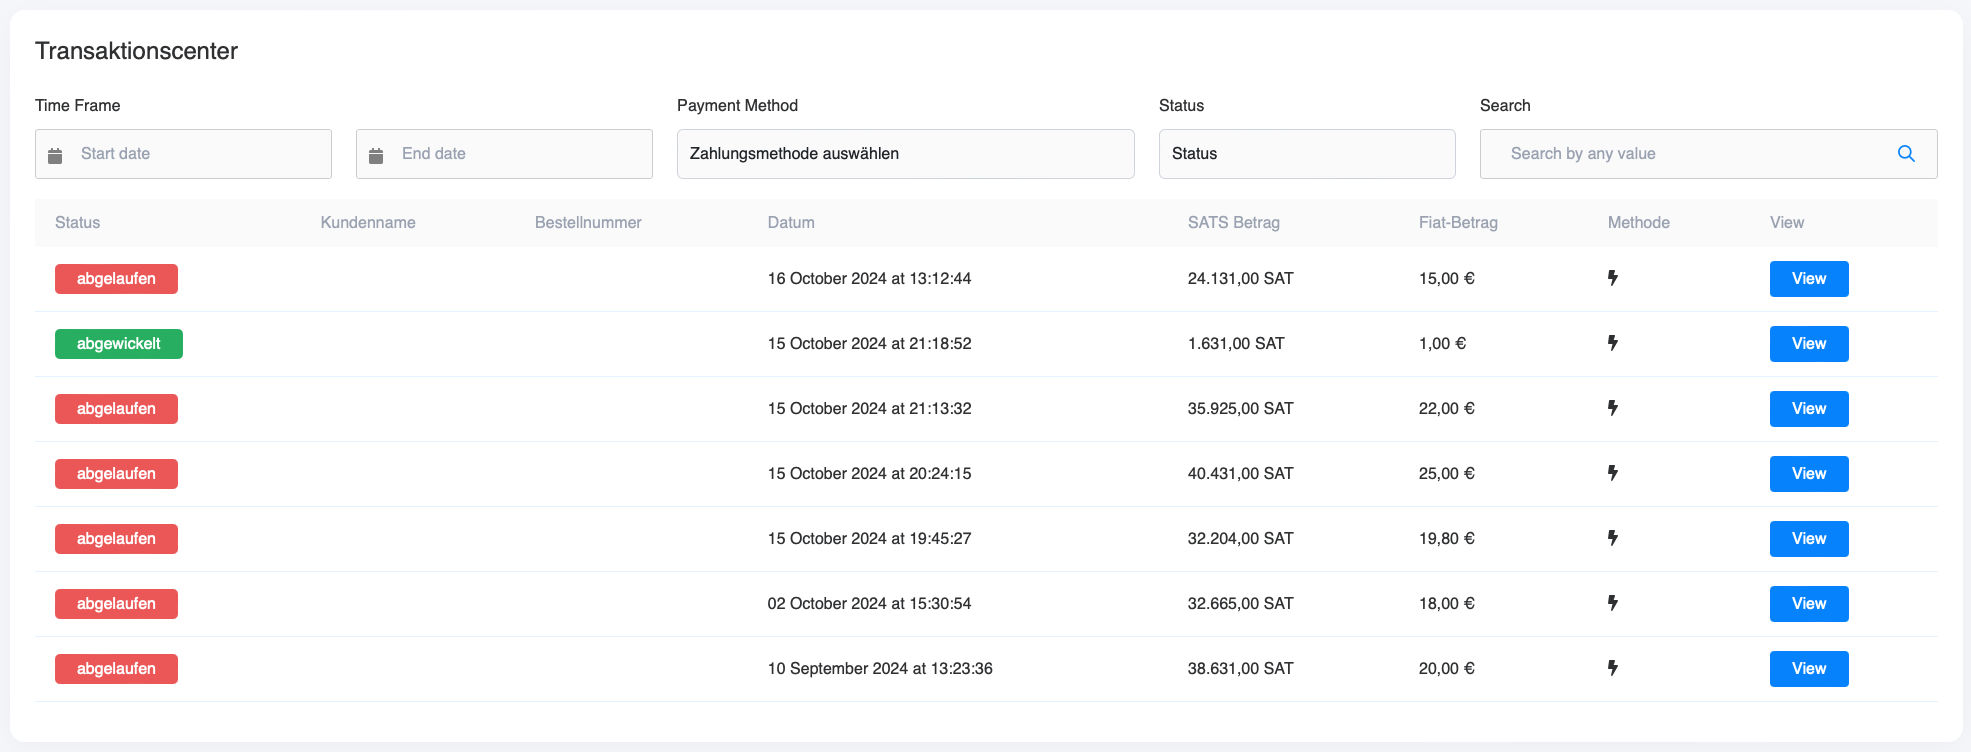
(1) and (2) Filter by date
You can select the start and end date for the display of your transactions.
(3) Payment method
You can sort the payments by Bitcoin and Lightning.
(4) Transaction status
Filter the transactions according to the status “successful”, “pending” or “canceled”.
(5) Show number of transactions
You can display 10, 25, 50 or all transactions at once per page.
(6) Search
Search quickly and easily for a specific transaction.
(7) Status
This refers to the outcome of each order, i.e. whether the merchant has delivered the services to the customer according to the order. The transaction status can be “completed”, “pending” or “expired”.
(8) Customer name
Here you can see the name of the buyer.
(9) Order number
The order ID is a unique identifier that is generated and assigned by the merchant system.
(10) Date
Here the transactions are sorted by date, with the most recent transaction at the top and older ones at the bottom.
(11) SATS amount
This column shows the amount paid by the end user in satoshis (sats).
(12) FIAT amount
This column shows the amount in the FIAT currency of your store (e.g. EUR) that will be paid out to the merchant after deduction of the Coinsnap fee. The payout amount is calculated as follows: Payout amount = invoice amount – Coinsnap fee.
(13) Methods
This column shows whether the customer has used the Bitcoin or Lightning payment method.
(14) View
Detailed information on the transactions can be found here.
Pay Tools
Pay-Tools section
In the Pay-Tools section, you will find our Bitcoin payment tools that do not directly intervene in an online store system. Here we show you what these tools offer you and how you can easily activate and use them:
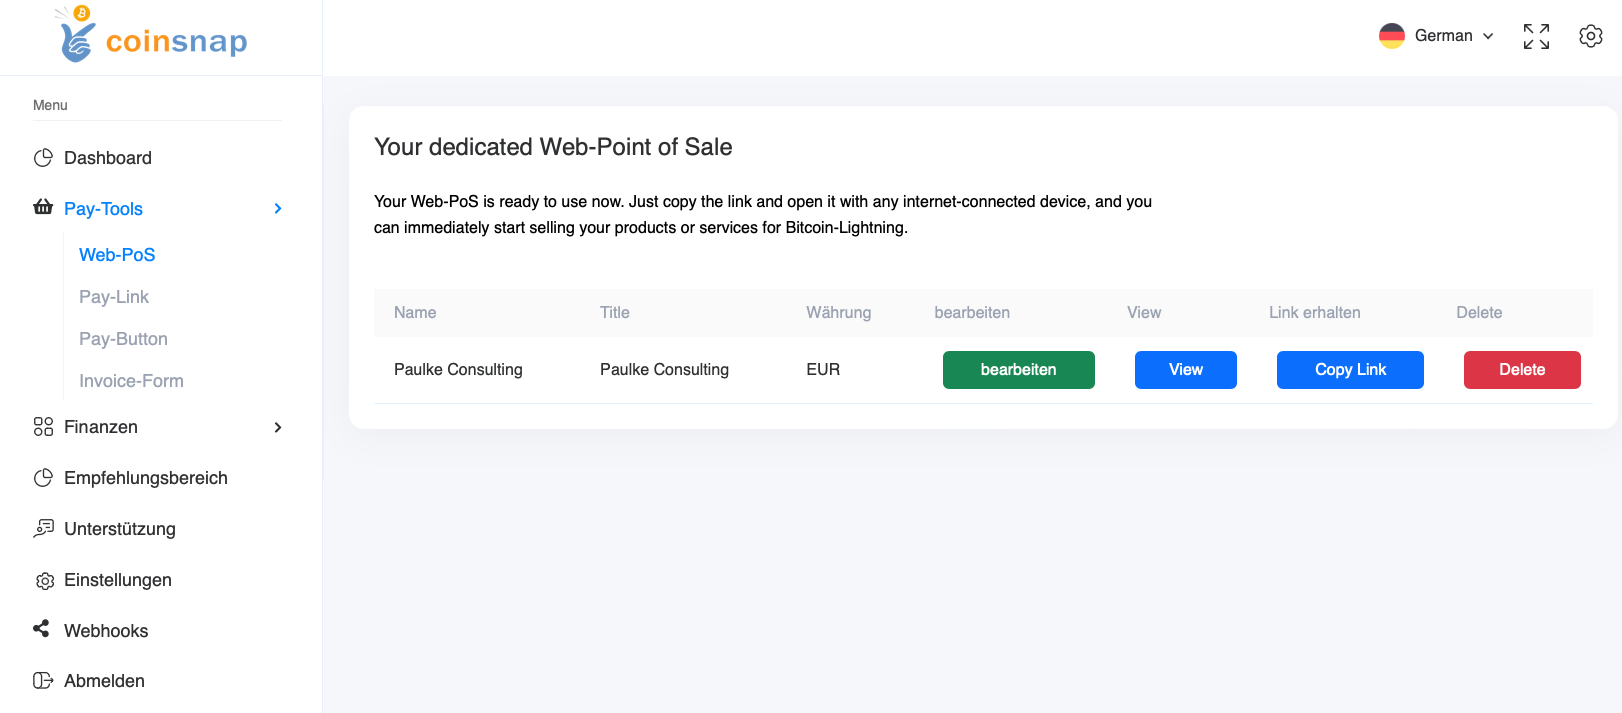
Web-Point of Sale
Transform any internet-enabled device into an on-site Bitcoin terminal, e.g. for use in stores or for guests in your café.
Pay-Link
Simply send your customers a pay link. When they click on the link, the Bitcoin payment processing opens!
Pay-Button
Integrate this shortcode or HTML code wherever you want on your website and sell goods, digital goods or services without having to install a store system!
Invoice-Form
With the invoice form, you can enable any number of customers to pay their invoice with Bitcoin simply by entering their invoice details.
Finances
In the Finance section, you will find an overview of all transactions carried out with Coinsnap as well as your monthly invoices for the services provided by Coinsnap.
Under Transaction Center, you will first see your financial overview, as you have already seen in the dashboard (see above).
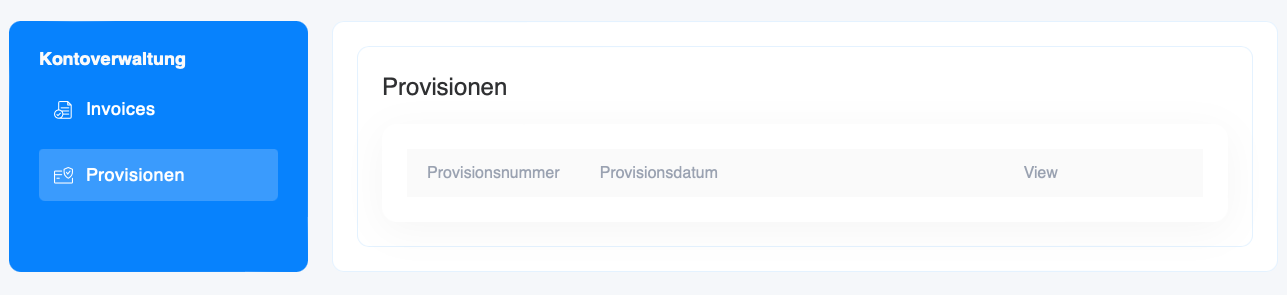
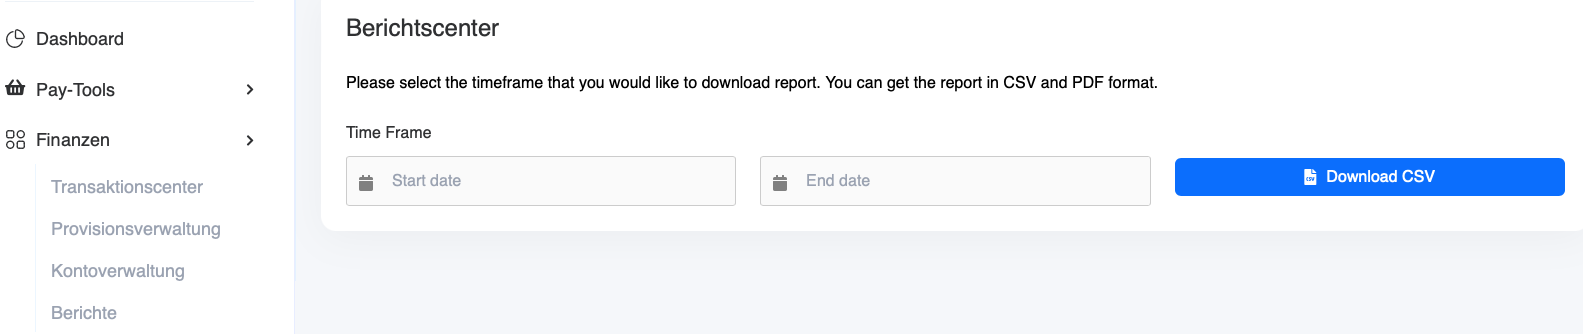
You can find your Coinsnap statement under the menu item Commission management:

You can find more detailed information on commission settlement under the menu item “Account management”:
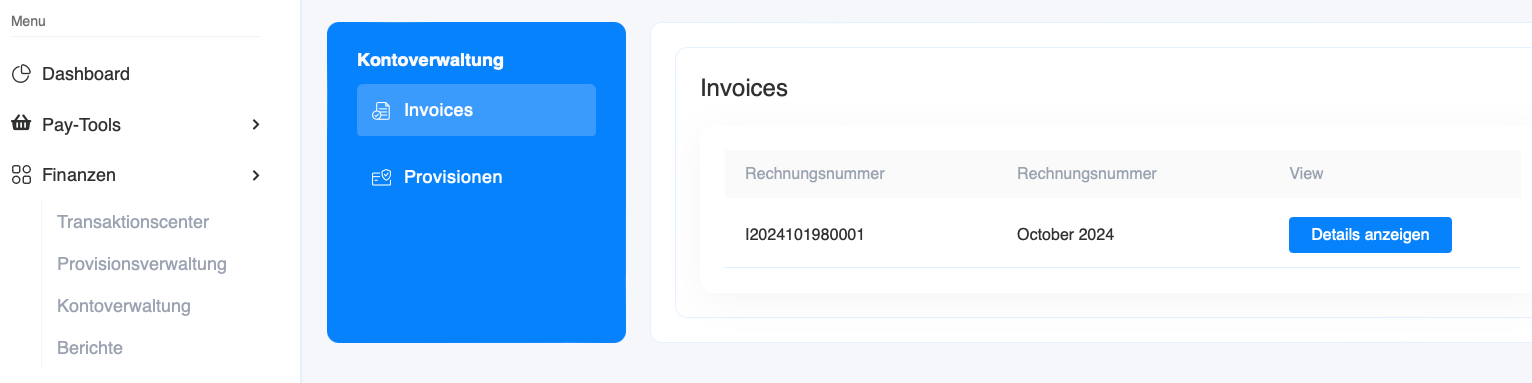
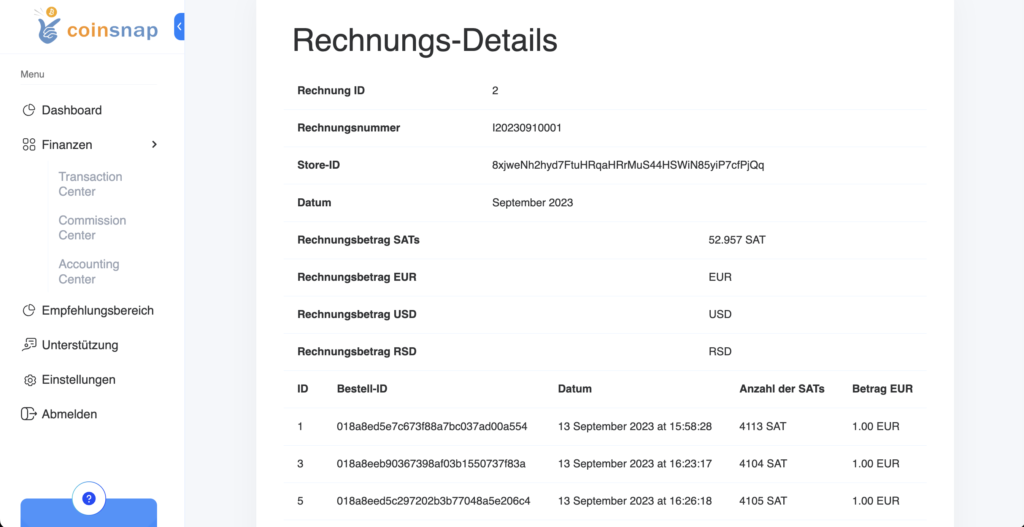
Click on Detail to go to the respective monthly invoice.
The Coinsnap invoice can be downloaded in PDF format.
If the invoice is to be issued to a company, enter the company data under Settings and Company Data.
Recommendation area
In the “Finances” section under “Commission management” you will see a list of the income you have generated by recommending Coincharge.
Because if you use Coinsnap and draw the attention of other store operators to Coinsnap, you can earn money from their Bitcoin sales.
To do this, you need to connect your website to the referral link to Coinsnap (see below).
You can find your personal referral link under “Referral area”.
If a new Coinsnap customer is acquired via your link, you will receive a commission of 0.25% of the turnover made.
If you still need a Coinsnap logo, you can find it on the Coinsnap Media Page.

Referrer Code-Settings
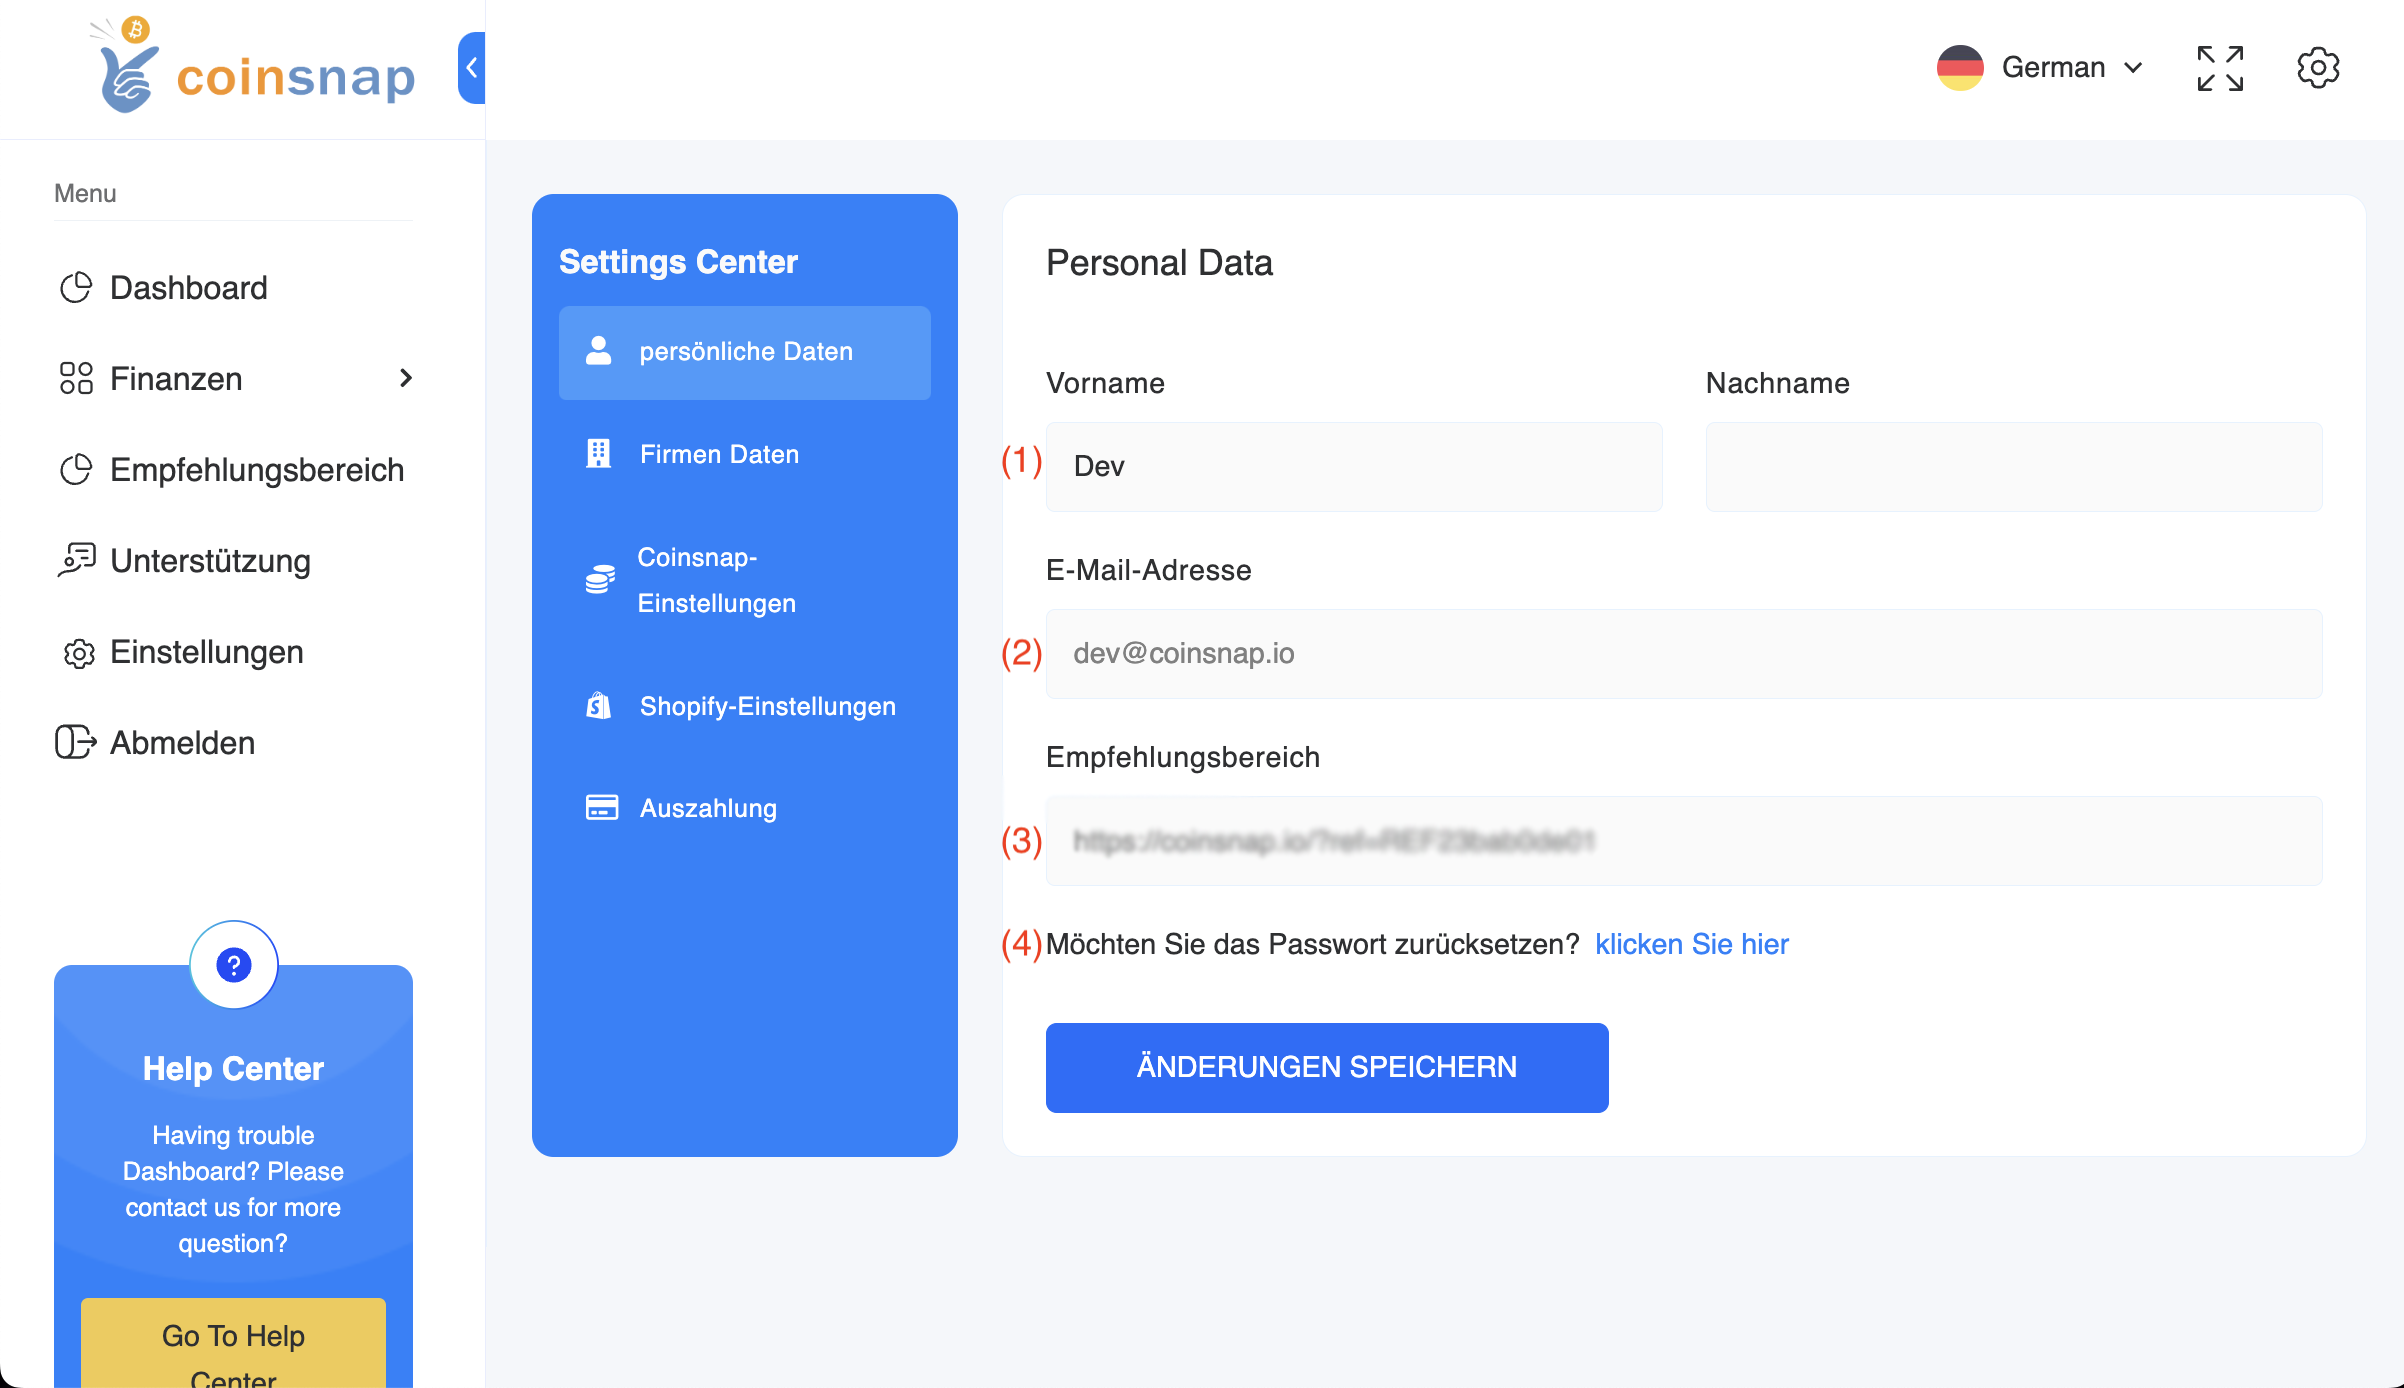
Personal data
First go to “Settings” and then to “Referrer code”. Then make the appropriate settings there:
(1) Name/Surname
This is a editable field.
Your name can be changed after you register with Coinsnap.
(2) E-Mail
The e-mail address used during registration is displayed here.
If you have logged in with Lightning Login, this field is empty.
(3) Referral code
You use Coinsnap and would like to draw the attention of other store operators to Coinsnap?
Then link your website to Coinsnap with this link.
(4) Password
You can change your password by clicking on this button.
Company data
Here you can optionally enter information about your company.
This information is used for invoicing the Coinsnap services.
If you need an invoice in the name of your company, fill in the appropriate fields.

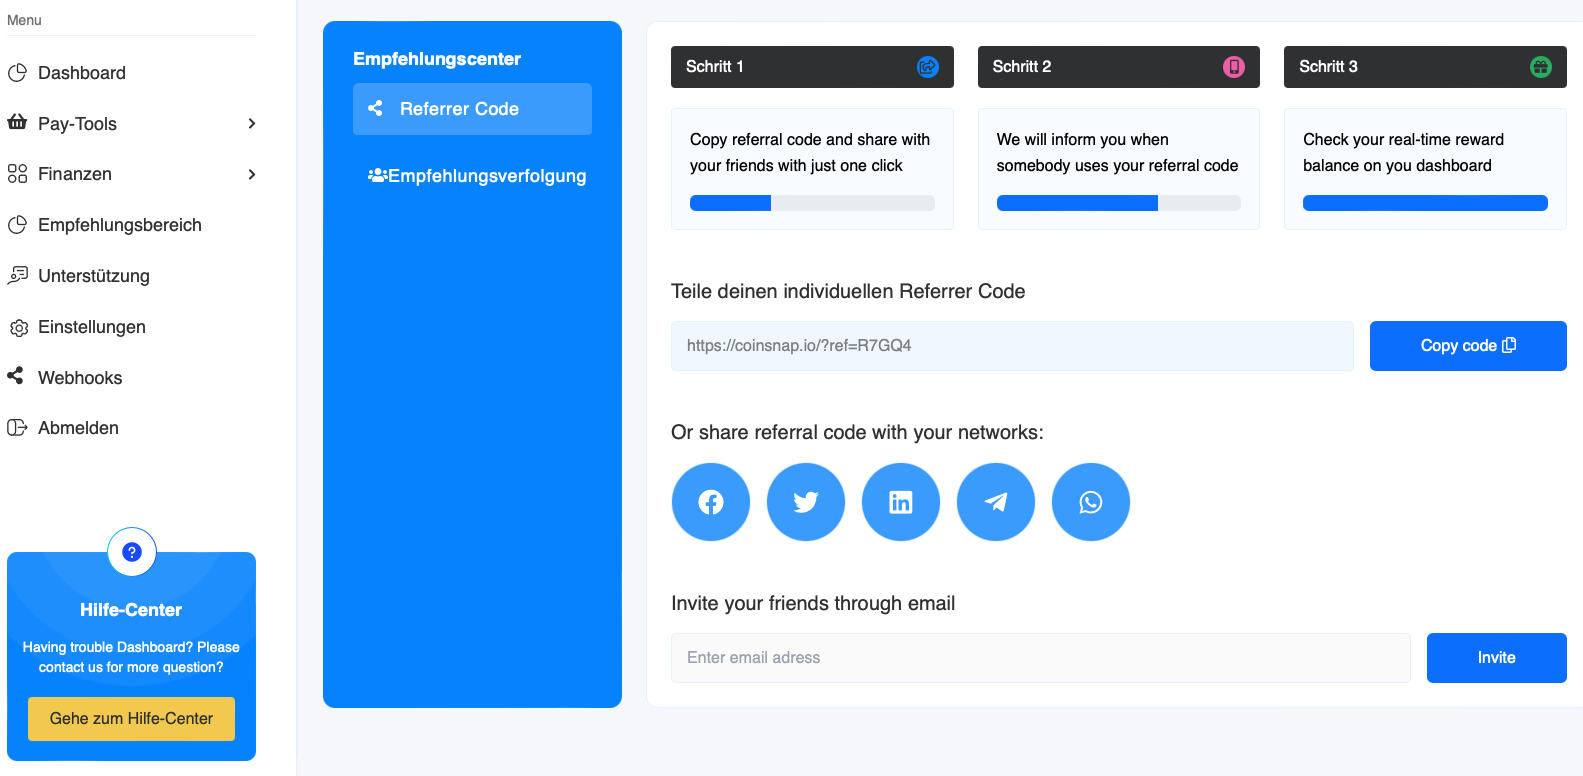
Referrer Code
You use Coinsnap and would like to draw the attention of other store operators to Coinsnap?
Then link your website to Coinsnap with this link.
If a new Coinsnap customer is acquired via your link, you will receive a commission of 0.25% of the turnover generated.
Payout
The payout or forwarding of your customers’ sales is made to the Lightning address stored here.
You entered the Lightning address when you registered with Coinsnap.
For security reasons, this Lightning address cannot be changed at a later date.
Please contact support if a change is absolutely necessary.

Store settings
Store Name
The name of the store you have linked to Coinsnap is displayed here.
Coinsnap Store ID
Below you will find your personal Coinsnap Store ID, which you need to assign your earnings to your Coinsnap.
Coinsnap API Key
This key is used to connect a plugin to Coinsnap.
An API key is like a special password that enables two software applications to communicate with each other.
Just as you would change a normal password for security reasons or if you believe it has been compromised, you can create a new API key here.
Regenerating an API key means creating a new key and deactivating the old one.
This ensures that the connection remains secure.
If someone had unauthorized access to the old API key, they will no longer be able to use it once you have regenerated it.

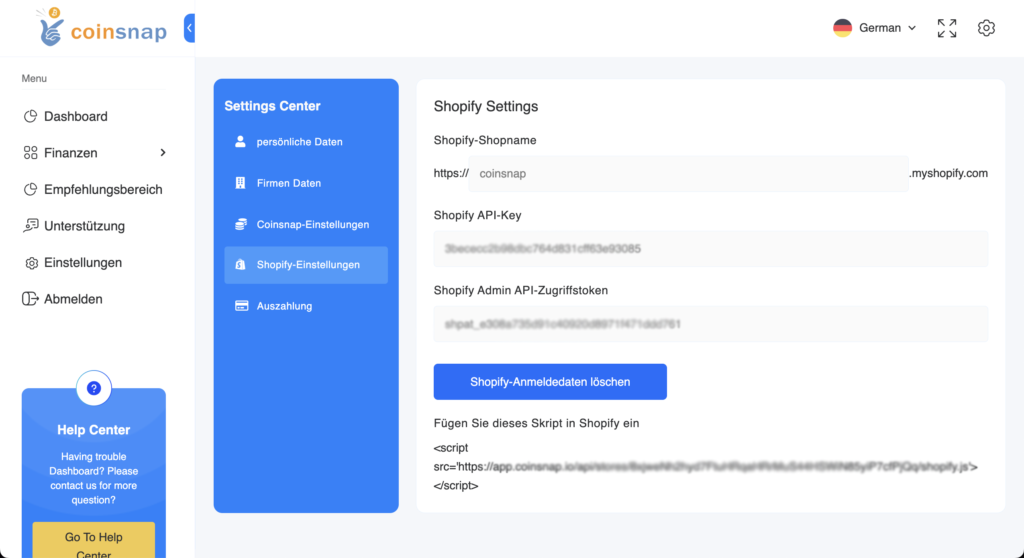
Shopify settings
If you want to use Coinsnap in a Shopify store, you must enter the Shopify data here.
In the first line, enter the URL of your Shopify store.
In the second line the Shopify API Key and then the Shopify Admin API Access Token.
We describe how to obtain this data in the Shopify instructions.