WordPress Bitcoin Invoice Forms Installation Guide

This guide explains everything you need to know to accept Bitcoin and Lightning payments with Coinsnap’s WordPress Invoice Forms plugin. You’ll learn the technical requirements, how to install the Coinsnap plugin, how to connect it to your Coinsnap account or a BTCPay Server, how to configure all relevant settings, and how to enable Bitcoin payments directly for invoices generated through your forms.

Accept Bitcoin & Lightning payments directly through WordPress Bitcoin Invoice Forms.

With the Bitcoin Invoice Form Plugin you can let your clients pay invoices with Bitcoin directly on your WordPress site

Requirements

These requirements must be met for Bitcoin Invoice Forms to function correctly:

WordPress & Bitcoin Invoice Forms

  • A self-hosted WordPress website
  • Bitcoin Invoice Forms installed and activated

Coinsnap & Payments

For this plugin, you need either a Coinsnap account with a Lightning address or your own BTCPay Server

Server & Access

  • Ability to install and activate WordPress plugins
  • HTTPS (SSL) enabled on the website

Bitcoin Invoice Forms Setup

  • At least one Bitcoin Invoice Form created (to enable a test payment)

STEP 1 - CONFIGURE AND CUSTOMIZE THE PLUGIN

All the requirements listed above are met, and you have successfully installed the plugin in your WordPress. If not, here is a Step-by-step: How to install a Coinsnap plugin in WordPress guide to help you install the plugin.

You will soon be able to accept Bitcoin payments (on-chain and Lightning) directly from within your Bitcoin Invoice form — without the need for a complex shop system like WooCommerce or traditional payment providers such as credit cards or PayPal. But before you can do that, you need to configure Bitcoin payments in your Bitcoin Invoice Form plugin.

HOW TO CONFIGURE THE PLUGIN

1. Choose and set up your payment provider

After installing and activating the Bitcoin Invoice Forms plugin, you need to configure a Bitcoin payment gateway connection, either with Coinsnap or with a BTCPay Server.

In the WordPress admin dashboard, go to Bitcoin Invoice Forms → Settings in the left-hand sidebar.

You will now see the following screen:

Bitcoin Invoice Form plugin settings

You now need to choose between two payment gateways: Coinsnap or your own BTCPay Server, and to enter your Store ID and API Key.

Choose your preferred payment provider: Coinsnap or BTCPay Server

Coinsnap

Coinsnap is the easiest option. Coinsnap handles the technical setup for you and connects your store to Bitcoin and Lightning payments with just a few clicks. It’s ideal if you want a quick, hassle-free solution without managing your own payment infrastructure.

Learn here how to retrieve your Coinsnap Store ID and API Key:

-> Step-by-step explanation: How to connect your Coinsnap account with your plugin

BTCPay Server

BTCPay Server is a self-hosted option for merchants who want full control. You run your own Bitcoin and Lightning payment server, manage your own wallets, and don’t rely on a third party. This option offers maximum independence but requires more technical setup and maintenance.

Learn how to retrieve your Store ID and API Key using our BTCPay Server wizard here:

-> Step-by-step explanation: How to connect your BTCPay Server with your plugin

2. Advanced Settings

The advanced settings control how detailed technical information is logged and how webhook requests from Coinsnap are verified. The Log Level defines how much information is written to the log, ranging from Error (only critical issues) to Debug (very detailed technical output for troubleshooting). The option to disable webhook signature verification should only be used in exceptional cases, as it reduces security.

Bitcoin Invoice Forms advanced settings

We strongly recommend leaving all advanced settings at their default values and only changing them if you fully understand the technical implications and know exactly what you are doing.

3. Save settings

After clicking the Save Changes button at the bottom of the screen, you will see a confirmation like this.

The Bitcoin Invoice Forms plugin is connected to your payment provider of choice.

You are now ready to create and send Bitcoin invoices. How to do that, we’ll show you in the next step.

Step 2 - Create your personal Bitcoin Invoice form

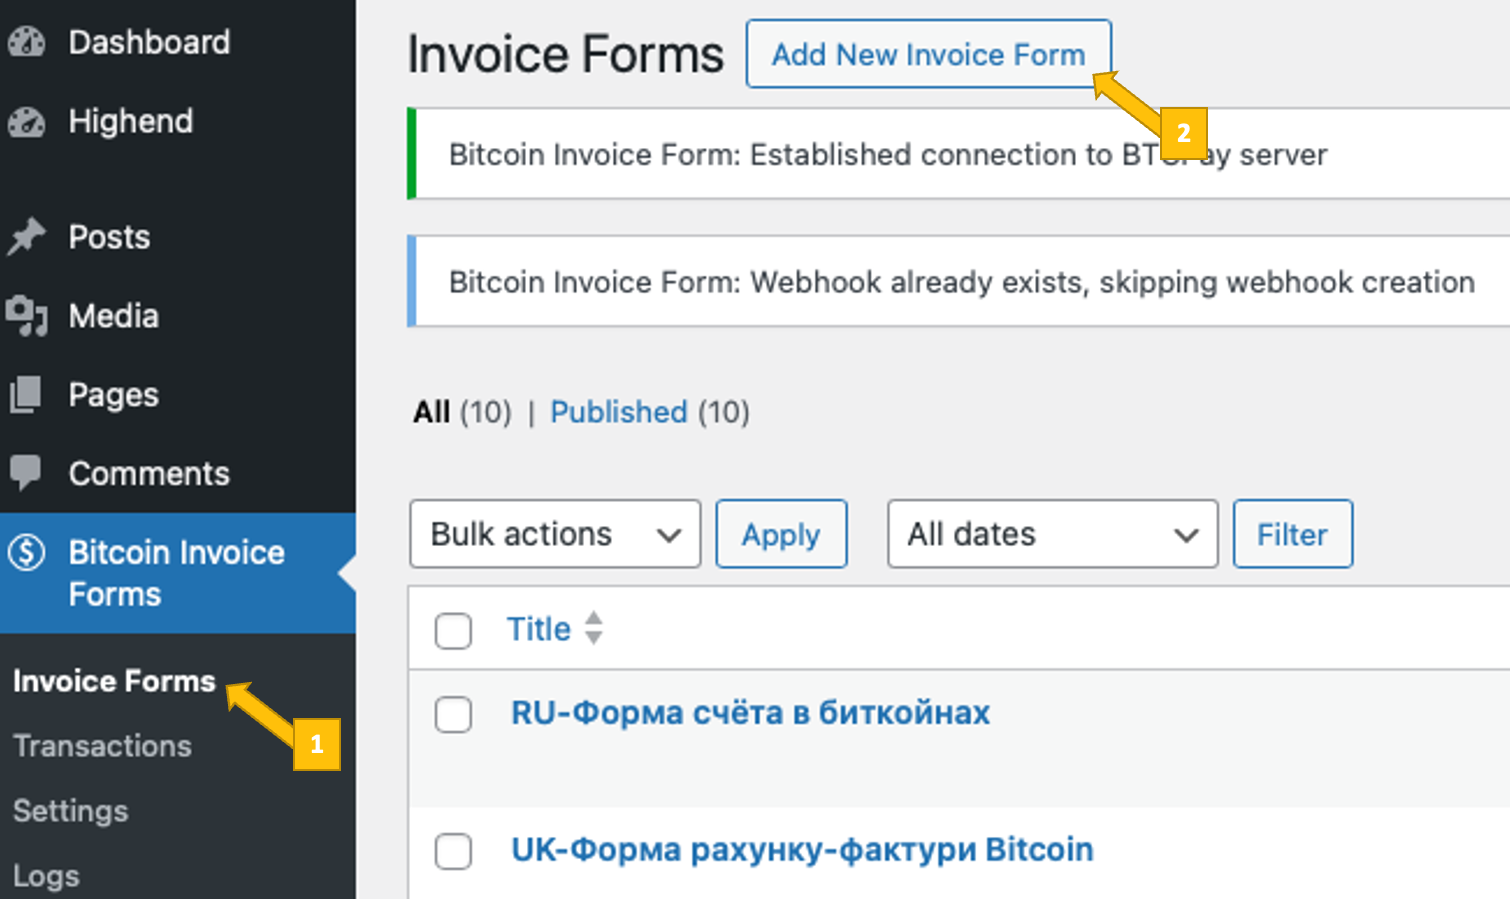
Go to Bitcoin Invoice Forms → Invoice Forms in the left sidebar of your WordPress backend [1]. Then click Add New Invoice Form [2].

Create a new Bitcoin invoice form for your WordPress website

You will now see the Bitcoin Invoice form settings screen:

the Bitcoin Invoice Form settings screen

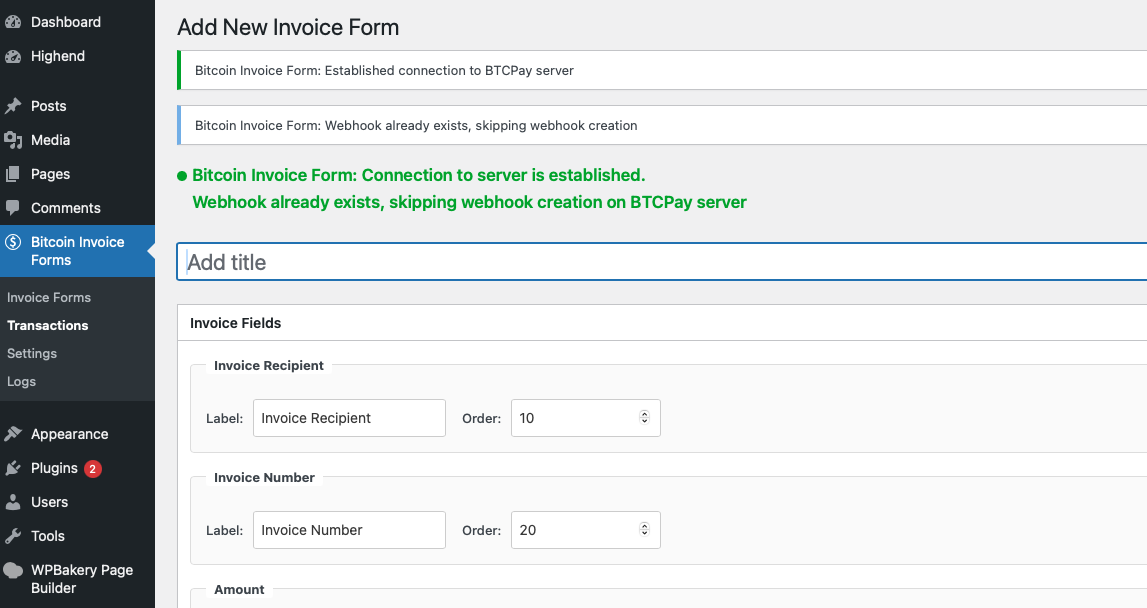
On the Bitcoin Invoice Forms settings screen, you define the structure, behavior, and communication of your invoice form. First, give the form a clear and descriptive name so you can easily identify it later when you need to edit it or place it on a specific payment page.

Invoice Fields

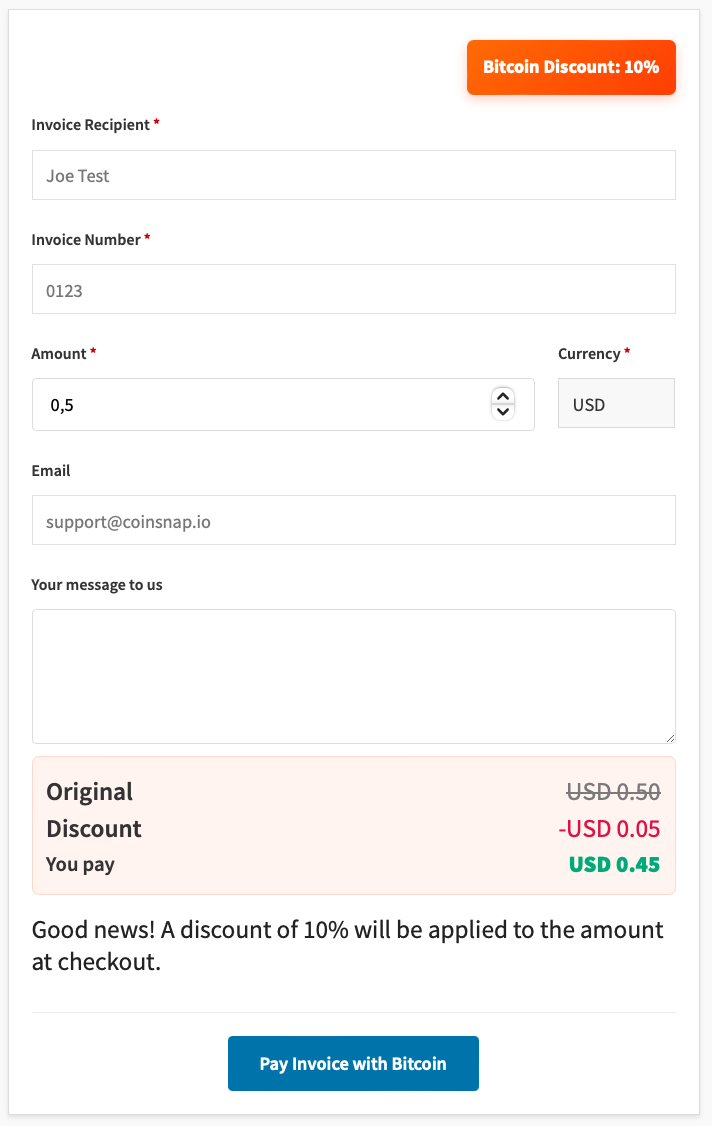
In the Invoice Fields section, you configure which input fields appear on the Bitcoin invoice form and how they behave. There are eight parameters you need to set:

Invoice field settings

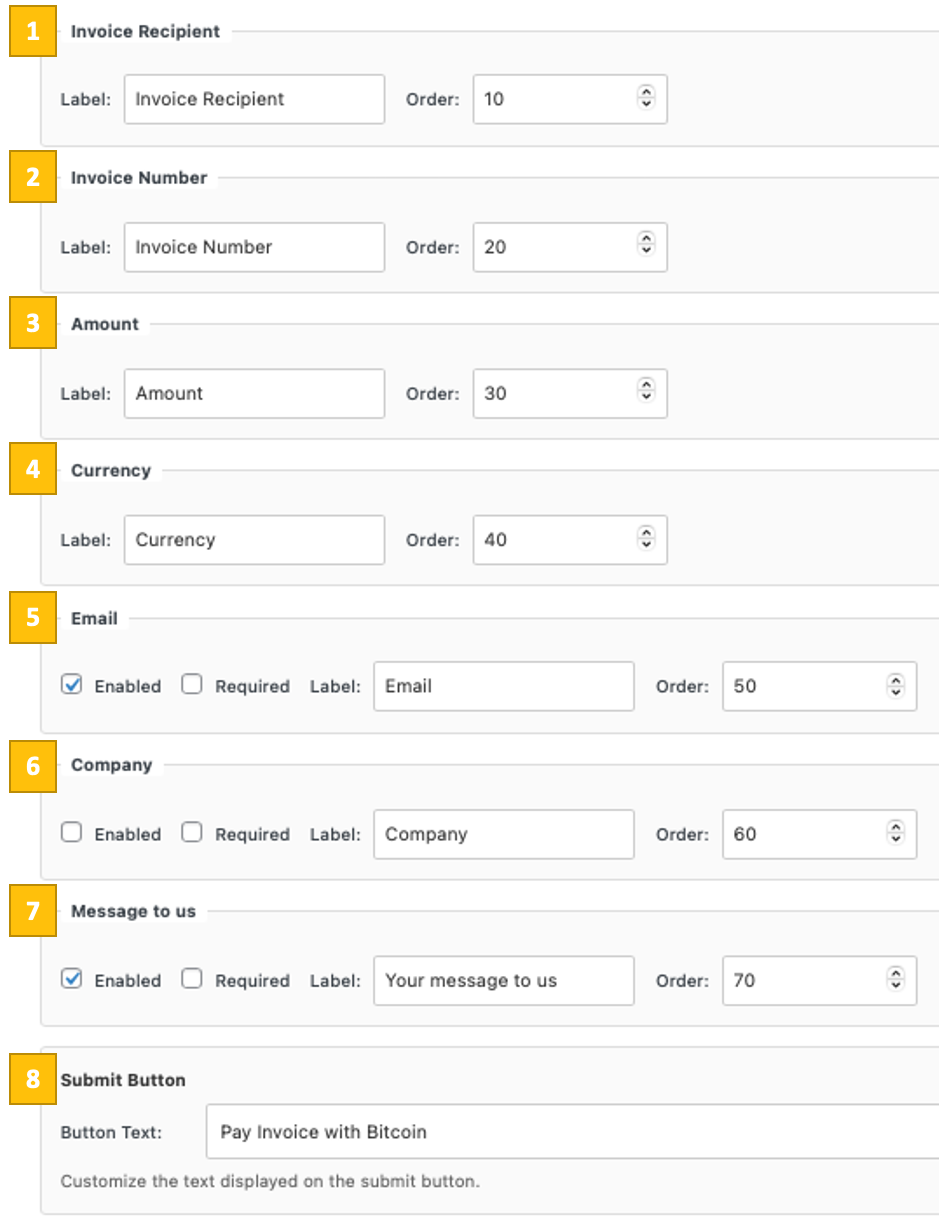
You can enable or disable individual fields such as invoice recipient [1], invoice number [2], amount [3], currency [4], email [5], company name [6], and a message field [7]. You can set a custom label, decide whether it is required (for email, company name, and message), and control the display order within the form(the lowest value is displayed first, the highest value last).

Next, customize the submit button by defining the button text shown to the payer when submitting the invoice for Bitcoin payment [8].

Bitcoin Discount

You can then optionally activate a Bitcoin discount.

Bitcoin discount settings

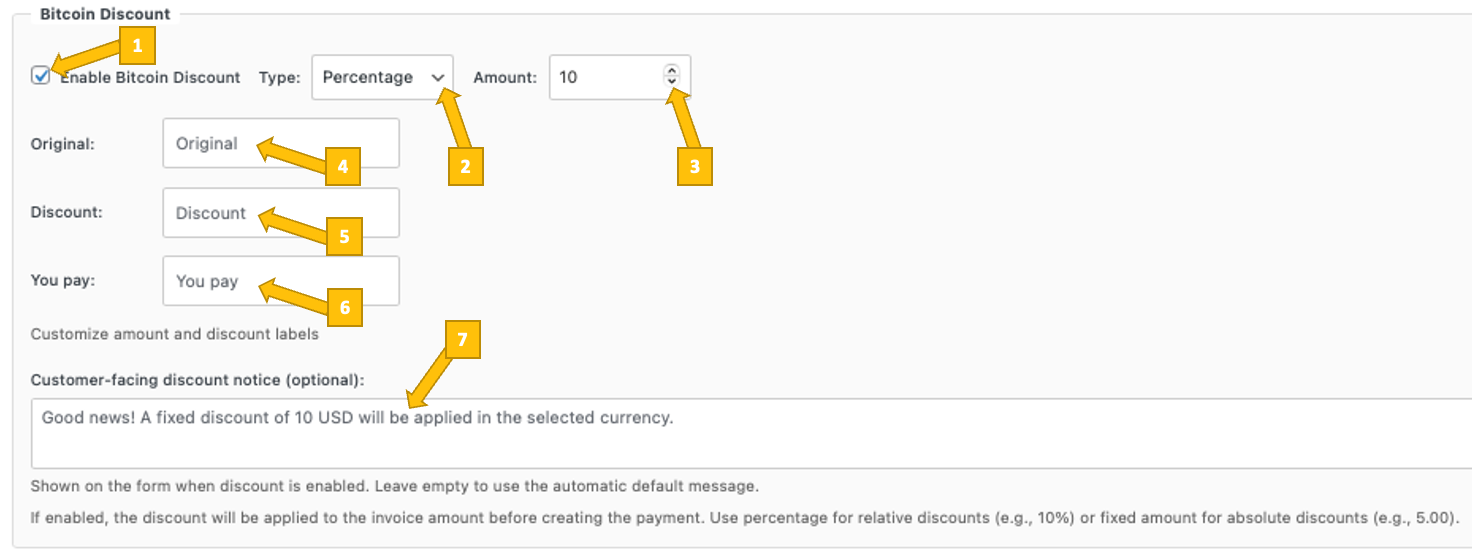
If enabled [1], you choose whether the discount is applied as a percentage or a fixed amount [2], define the discount value [3].

Also, you can customize the labels shown for the original price [4], the discount [5], and the final amount as displayed to the customer [6], and optionally add a customer-facing discount notice that is shown directly on the form [7].

Admin Email Settings

In the Admin Email Settings, you define how and where you are notified when a Bitcoin invoice payment is received.

Email Admin Settings

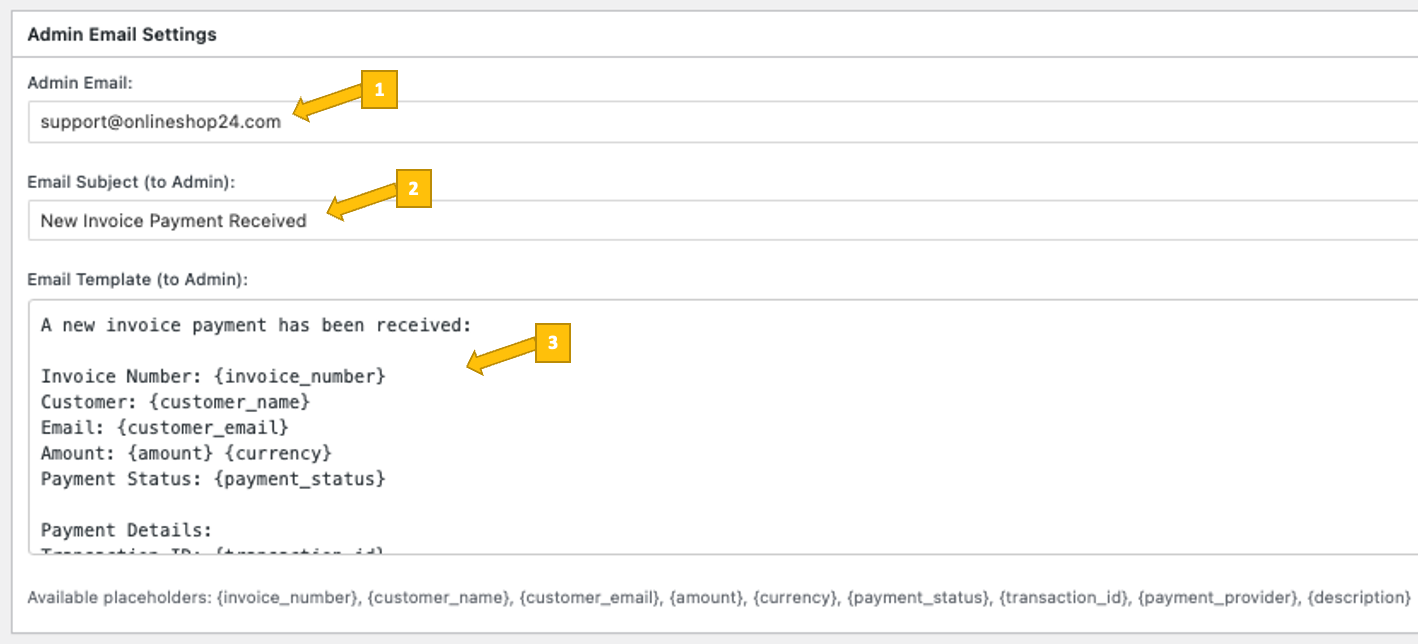
You specify your admin email address that should receive the notification [1], set the email subject line [2], and customize the email template content [3]:  The template can include dynamic placeholders such as invoice number, customer details, amount, currency, payment status, transaction ID, payment provider, and description, which are automatically filled with the corresponding invoice data when a payment is completed.

Customer Email Settings

In the Customer Email Settings, you control whether a confirmation email is sent to the customer after a Bitcoin invoice payment is completed.

Customer Email Settings

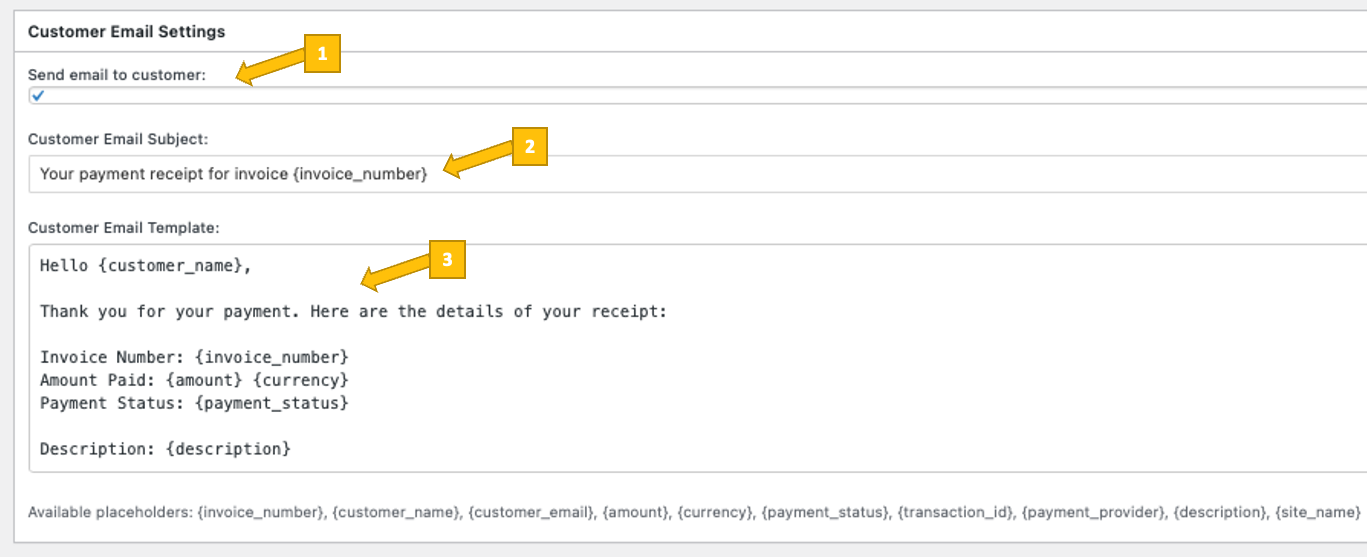
You can enable or disable sending the email [1], define the email subject line [2], and customize the email template content [3]. The template supports dynamic placeholders such as invoice number, customer name, amount, currency, payment status, transaction ID, payment provider, description, and site name, which are automatically replaced with the corresponding invoice and payment details.

Payment Configuration

In the Payment Configuration section, you define how payments are handled for this specific Bitcoin invoice form.

Individual Bitcoin payment configuration per form

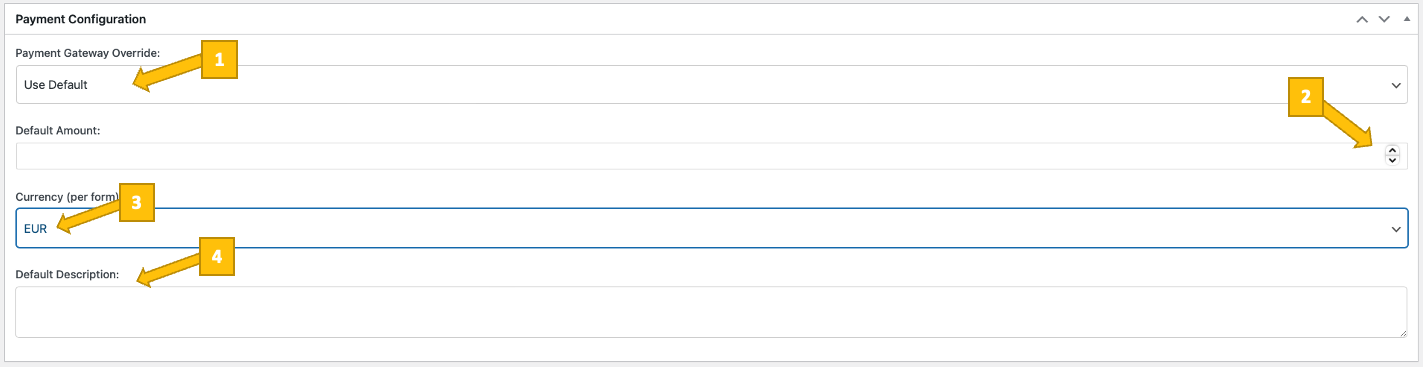
You can choose whether to use the globally configured payment gateway or override it for this form by selecting a different option under Payment Gateway Override [1].

You can set a default amount, which is pre-filled when the form is loaded [2], and define the currency per formIndividual Bitcoin payment configuration per form, allowing you to fix the invoice currency independently of other forms.

In the Default Description field [4], you can enter a short description that will be attached to the invoice and shown in the payment details, helping you and the customer identify the purpose of the payment.

Redirect Settings

In the Redirect Settings, you control what happens after a customer completes or fails a Bitcoin invoice payment.

Redirect Settings

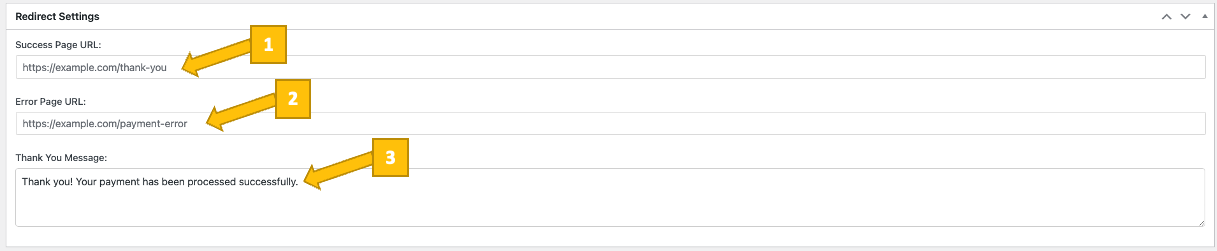
You can define a Success Page URL [1] to redirect the customer to a custom thank-you page after a successful payment, and an Error Page URL [2] to redirect them if the payment fails or is canceled.

Additionally, you can customize the Thank You Message [3] that is shown to the customer after a successful payment, allowing you to confirm the transaction in your own wording.

Step 3 – Placing the Bitcoin Invoice form on Your WordPress Website

How can your clients pay invoices with Bitcoin on your WordPress website?

With the Coinsnap Bitcoin Invoice Form plugin, you can add a simple “Pay with Bitcoin” link to your invoices that leads to a secure form on your own WordPress website.

Your clients enter the invoice amount and reference and pay instantly via Bitcoin or Lightning, while you benefit from full invoice tracking and optional automatic EUR payouts.

Here’s how you do that:

1. Create a Bitcoin payment page on your website

Create a new page on your website called, for example, Bitcoin Payment (myshop.com/bitcoin-payment/).

Start the page with a short description of what it is for and how your customers can use it, for example: Pay your invoice here with Bitcoin (On-chain + Lightning). Then place the Bitcoin Invoice Form you just created directly below this introduction.

Your customer simply fills out the form using the invoice details you provided, such as the invoice number and invoice amount. They then click the payment button to start the payment process, scan the QR code with their Lightning wallet or choose an on-chain payment option, and authorize the payment, which is forwarded instantly to your Bitcoin/Lightning wallet.

2. Place the Bitcoin Invoice form on this website

Go back to Bitcoin Invoice Forms → Invoice Forms in your WordPress backend, open the invoice form you want to place on your site, and scroll down to the Shortcode section to copy the shortcode for that specific form.

Copy the Bitcoin Invoice Form shortcode and paste it into your dedicated payment page.

Then place the shortcode for the Bitcoin Invoice Form you just created directly below the introduction on your dedicated Bitcoin payment page.

Your customer simply fills out the form using the invoice details you provided, such as the invoice number and invoice amount.

They then only need to click the payment button to start the payment process, scan the QR code with their Lightning wallet or choose an on-chain payment option, and authorize the payment, which is forwarded instantly to your Bitcoin/Lightning wallet to finalize the transaction.


STEP 4 — MAKE A TEST PAYMENT TO ENSURE EVERYTHING WORKS CORRECTLY

After completing all settings, you should perform a test transaction. Fill out the Bitcoin Invoice Form you just created with a placeholder invoice number and a test amount, then click the blue button to start the Bitcoin payment.

A Bitcoin Invoice Form created with the Coinsnap Bitcoin Invoice Form plugin

You will now be redirected to the Bitcoin payment page to complete the payment. The Bitcoin payment page is displayed and offers the payer the option to pay with Bitcoin or Lightning. Both payment methods are integrated into the displayed QR code.

Bitcoin Payment QR code provided by the Bitcoin Invoice plugin

After a successful payment, you will see a success screen before being forwarded to the predefined after-payment page:

Success screen for a confirmed paymen

You can now see all payment details under Bitcoin Invoice Forms → Transactions:

See the records of a successful transaction in your plugin’s dashboard.

Done: You’re Ready to Send Bitcoin Invoices

After completing all the steps above, you can now send invoices that include a Bitcoin payment link to the dedicated payment page you created. Your customers can pay their invoices using Bitcoin or Lightning, while you receive instant payment confirmation and can track every transaction directly in your WordPress dashboard, keeping all invoice payments clearly documented and organized.


If you encounter any issues or can’t get Bitcoin Invoice Forms to work as expected, you can always contact Coinsnap support directly from your Coinsnap account dashboard—our customer success team will be happy to help and set it up for you free of charge.

Frequently Asked Questions

What Users Ask About This plugin

What is the main difference between the Invoice Form and the Payment Link?

With a Payment Link, you create a separate link for each invoice by entering all data yourself. With the Invoice Form, you use a single fixed link (e.g. yourdomain.com/bitcoin) that appears on all invoices. Customers enter their own invoice data there, which is ideal if you send many invoices or want a standard Bitcoin option on all of them.

How is the Bitcoin amount calculated?

he customer enters the invoice amount in fiat currency (e.g. EUR). At the time of payment, Coinsnap converts this amount into Bitcoin using the current exchange rate. This way, the BTC value is always up-to-date and you’re not exposed to exchange rate changes between issuing and paying the invoice.

Does the Invoice Form support Lightning and on-chain Bitcoin?

Yes. After submitting the form, the customer is shown a payment page with a Bitcoin / Lightning request that can be paid with compatible wallets — either Lightning or on-chain, depending on your Coinsnap configuration.