
Coinsnap for Ninja Forms Installation Guide
If you use Ninja Forms, integrating Bitcoin-Lightning payments is easy with the Coinsnap for Ninja Forms plugin.
Simply install the plugin, link it to your Coinsnap account and your customers can pay with Bitcoin and Lightning.
All incoming Bitcoin transactions are immediately forwarded to your Lightning Wallet and credited.
- Coinsnap for Ninja Forms-Demo Store: https://ninjaforms.coinsnap.org/
- Blog Article: https://coinsnap.io/coinsnap-for-ninja-forms-plugin/
- WordPress: https://wordpress.org/plugins/coinsnap-for-ninja-forms/
- GitHub: https://github.com/Coinsnap/Coinsnap-for-NinjaForms


You can easily find the Coinsnap for Ninja Forms plugin under Plugins / Add Plugin [1] if you enter “Coinsnap for Ninja Forms” in the search field [2]. Then simply click on Install now in the Coinsnap for Ninja Forms plugin [3] and WordPress will install it for you. You then need to activate the plugin by clicking on Activate.
In the next step you will have to connect the plugin to your Coinsnap account and your Bitcoin-Lightning wallet and you’ll be set to start selling, receiving donations, charging for downloads right from within your forms! We will show you how to do this a bit further below.
Register your Coinsnap account or test the plugin in our demo-store now:
Install the Coinsnap for Ninja Forms plugin
from the WordPress directory
With the Coinsnap for Ninja Forms payment plugin, Coinsnap offers the option of integrating Bitcoin payments quickly and easily into any forms on your WordPress website.
You can download the plugin directly from the WordPress Marketplace or install it directly from within your WordPress installation.
If you have already installed Ninja Forms, log in to your WordPress account.
Call up the WordPress backend and go to Plugins > Add New.

Enter Coinsnap for Ninja Forms in the search bar [1] and click on Install now [2], then Activate the plugin.
The Coinsnap for Ninja Forms plugin is now successfully installed. In the next step to have to connect the plugin with your preferred payment provider (Coinsnap or BTCPay Server).
We’ll show you now how you do that:
Connect Coinsnap account with Ninja Forms plugin
Ninja Forms Coinsnap Settings
After you have installed and activated the Coinsnap for Ninja Forms plugin, you need to configure the Coinsnap settings. Go to Ninja Forms [1] / Settings [2] in the black sidebar on the left. Then choose a form in which you want to implement Bitcoin-Lightning payment and click on edit [2]. Then scroll down until you find the field Coinsnap at the bottom of the tab.
There, just enter your Coinsnap Store ID [3] and your Coinsnap API Key [4] into the respective two fields, and click on save settings on the bottom of the window.
In case you do not know where to find your Coinsnap Store ID and your Coinsnap API Key, we’ll show you now:

Coinsnap Store Settings
In the Coinsnap backend, go to the Settings menu item, then click on Store in the blue field. There you will find the Coinsnap Store ID [1] and the Coinsnap API Key [2]. Copy these one after the other into the corresponding fields in the Coinsnap settings (see above). Then click on the Save Changes button at the bottom of the page to apply and save the settings.
Once you have entered and saved the Coinsnap data in the Ninja Forms Coinsnap settings, you are set to receive Bitcoin transactions from your customers’ wallet to your wallet. Now just one last step remains and you can sell for Bitcoin!

Connect your BTCPay Server with the Coinsnap for Ninja Forms plugin
Coinsnap for Ninja Forms BTCPay Server Settings
After you have installed and activated the Coinsnap for Ninja Forms plugin, you need to configure the Coinsnap settings. Go to Ninja Forms -> Settings in the black sidebar on the left, then scroll down until you find the box Coinsnap.

Now choose your payment gateway BTCPay and click save.

Now, log into your BTCPay Server. If you’ve done that, enter your BTCPay Server URL into the matching field in the Donation Settings tab [1].
Next, you’ll have to click on the Generate API Key button [2].

You’ll then be forwarded to your BTCPay Server.
Choose your Shop [1], then click on continue [2].

You’ll then be forwarded to this screen. Enter your shop’s name on the top [1], and then click on authorize app [2].

Your BTCPay Server is now successfully connected to your Ninja Forms, via the Coinsnap for Ninja Forms plugin!
(You can see the green success notice now).

Create a form with Bitcoin-Lightning payment in Ninja Forms
How do I activate Bitcoin-Lighting payment in a Ninja form?
It is actually very simple to accept Bitcoin payment with Coinsnap for Ninja Forms. Just edit the form you want to use to accept Bitcoin, and click on the Emails & Actions tab on the tab [1]. Then enable Coinsnap [2] and your form will offer Bitcoin payment when it is submitted!

Test the payment with Ninja Forms

After all settings have been made, a test transaction should be carried out.
Fill out a Ninja Forms form you have just created and click on the black PAY WITH SATS button to initiate the Bitcoin payment.
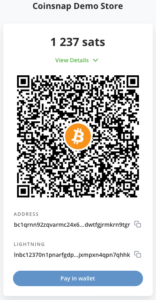
You will now be redirected to the Bitcoin payment page to complete the purchase.
The Bitcoin payment page is now displayed and offers the payer the option of paying with Bitcoin or Lightning.
Both methods are integrated in the displayed QR code.
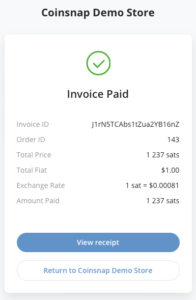
After successful payment, the invoice can be viewed in detail.