Coinsnap for Shopware Installation Guide
This guide walks you through installing the Coinsnap payment plugin for Shopware, connecting your store to the Lightning network and going live with Bitcoin payments.
Accept Bitcoin & Lightning in your Shopware store with ease.


Step 1
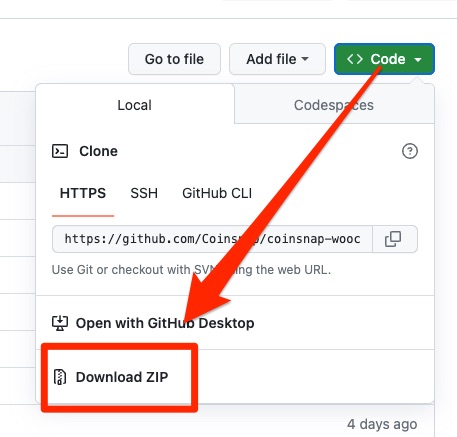
Coinsnap Github page
Visit the Coinsnap Github page where you will find all the payment plugins provided by Coinsnap. Go to Coinsnap for Shopware. There you will find the green button labeled Code. When you click on it, the menu opens and Download ZIP appears. Here you can download the latest version of the Coinsnap plugin to your computer.
Step 2
As soon as a Coinsnap account has been set up, we can start connecting Shopware to Coinsnap.
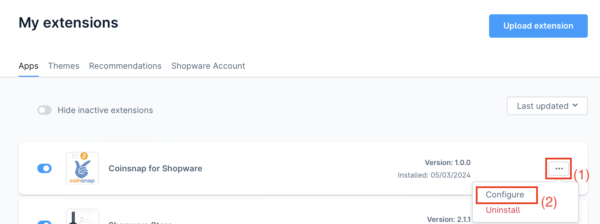
The “Coinsnap for Shopware” extension is available in the “Extensions”> “My extensions” section.
(1) Determination of the configuration process
Click on the three dots on the right-hand side to start the configuration process.
(2) Initialization of the configuration
Click on Configure to start the configuration process.
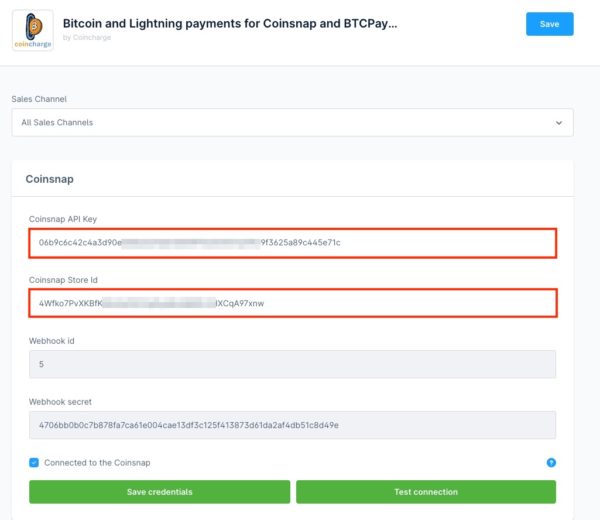
The Coinsnap API Key and the Coinsnap Store ID must be stored in the configuration area.
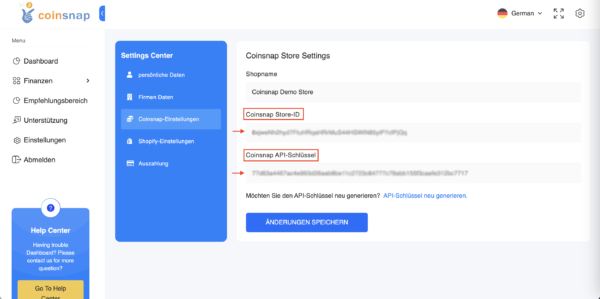
Go to the Settings menu item in the Coinsnap backend.
There you will find the Coinsnap Store ID and the Coinsnap API Key in the Store Settings section.
Then enter the Coinsnap API key and the Coinsnap store ID that you copied from the Coinsnap backend into Shopware.
Then click on “Save credentials”.
Step 3
In the Settings section, you can navigate to the payment methods to change the notes for the various payment methods.
Access is via the Settings menu, which also contains the Payment methods section.
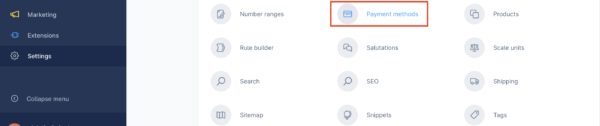
In addition to the standard payment options, Bitcoin and Lightning payment methods are also listed here, which are highlighted in blue when activated.
You have the option of displaying the Bitcoin and Lightning payment methods separately or as a joint payment method.
We recommend using it as a common payment method.
The end customer is then shown a QR code containing both Bitcoin and Lightning.
Regardless of whether the user uses a Lightning or a Bitcoin wallet, payment is possible and unwanted terminations can be avoided.


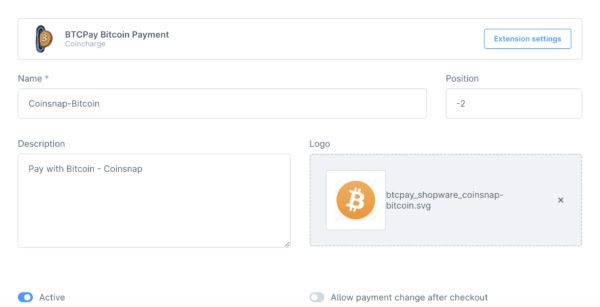
This can be used to change the display for the payer, e.g. to “Bitcoin” in our example.
The order of the payment methods displayed, the descriptive text and the associated logo can also be customized.
It is recommended to activate the function “Allow change of payment method after completion of the order”.
If someone chooses Bitcoin as a payment method but later decides against it, they can easily switch to another option.
Step 4
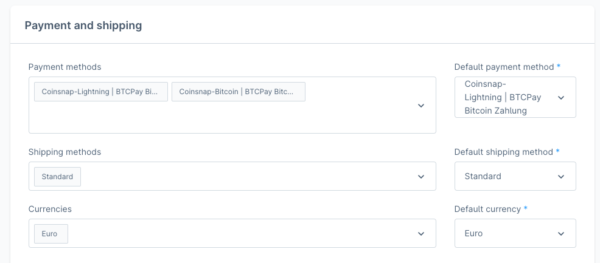
Within the sales channel, the configuration options for payment and shipping can be found under General basic settings, followed by Payment methods.
Here you can select Bitcoin and Lightning as your payment method.
As soon as this is done, these payment methods are activated and can be used in the store.
Step 5
The Shopware extension makes integrating Bitcoin and Lightning payment options into a Shopware 6 online store via Coinsnap a simple task.
If you don’t want to install the Coinsnap plugin yourself, we can install Coinsnap for Shopware for you.
To do this, you must grant Coinsnap access to your backend.
After installation, please delete Coinsnap as a user.
Log in to your Shopware store in the Shopware Administration Panel.
In the left menu bar, go to Settings.
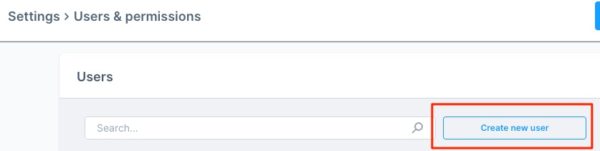
Then click on System and then on Users & Permissions.
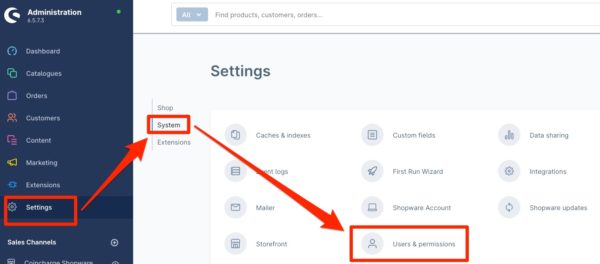
You are in the area for creating users and authorizations.
Here you go to User and click on “Create New User”
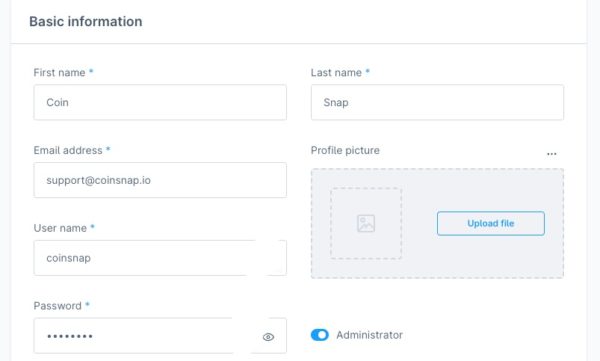
Here you create a new account for the new user Coinsnap.
You can enter the following data:
- First name: Coin
- Last name:
Snap - Email Address: support@coinsnap.io
- User name: coinsnap
- Password: Please create it yourself and tell Coinsnap.
- Administration: Set the button to Administrator to give Coinsnap the required administration rights.
Then click on Save.
Shopware will ask you to confirm the creation of the Coinsnap user with your own password.
Please send us an email to support@coinsnap.io and let us know that we can start with the integration. Please enter the e-mail address you used to register with Coinsnap and the URL of your store. After Coinsnap has integrated the payment module into your store, you must delete the Coinsnap user.
Frequently Asked Questions
What Users Ask About This plugin
Which wallet should I use?
Any Lightning-capable wallet; ensure you control the keys for best privacy.
Can I settle fiat instead of Bitcoin?
Yes — you can link automatic fiat settlement if preferred.
