Bitcoin Paywall Plugin Installation Guide
This guide shows how to use the Coinsnap Bitcoin Paywall Plugin to restrict pages, posts, downloads, or videos until a Bitcoin or Lightning payment is made.
Lock premium content behind Bitcoin & Lightning payments.


Step 1
How to install your Coinsnap Bitcoin Paywall plugin directly in WordPress:
Go to the plugin area and click on “Add New Plugin”. Then enter Coinsnap Paywall in the search field and select the plugin from the results.

Click on Install Now, and when the installation is complete, click Activate.
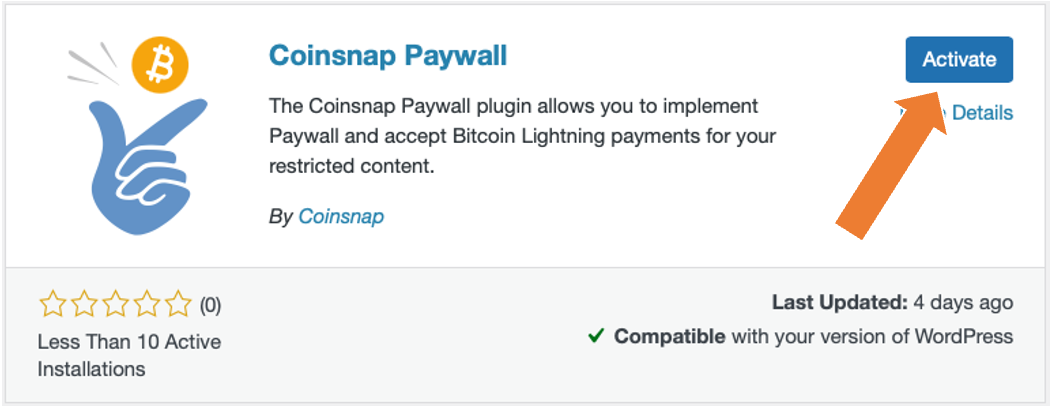
Your Coinsnap Paywall plugin is now installed and activated.
Now all you have to do is configure the plugin settings to make content available for Bitcoin on your website.
You can see how to configure the plugin here.
Step 2
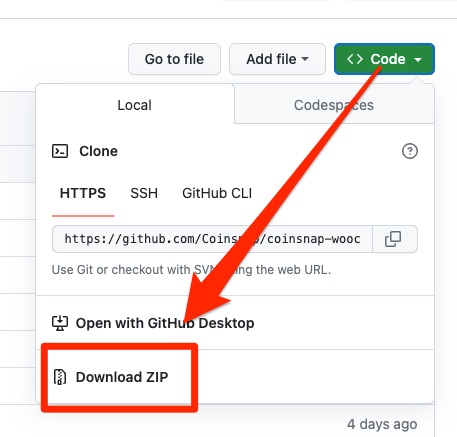
If you want to install the Coinsnap Bitcoin Paywall, you must first download it from the Coinsnap Github page here.
Then look for the green button labeled “Code”. When you click on it, the menu opens and Download ZIP appears.
Here you can download the latest version of the Coinsnap Bitcoin Paywall to your computer.
Step 3
As soon as you are registered with Coinsnap, log in to your store and open the backend.
Coinsnap Bitcoin paywall settings
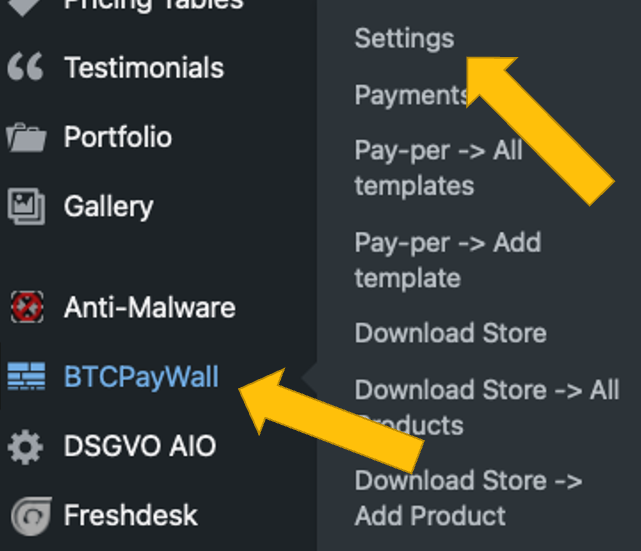
After you have installed and activated the Coinsnap Bitcoin Paywall, you need to configure the Coinsnap settings. You can find them in the left sidebar under Coinsnap Bitcoin Paywall.
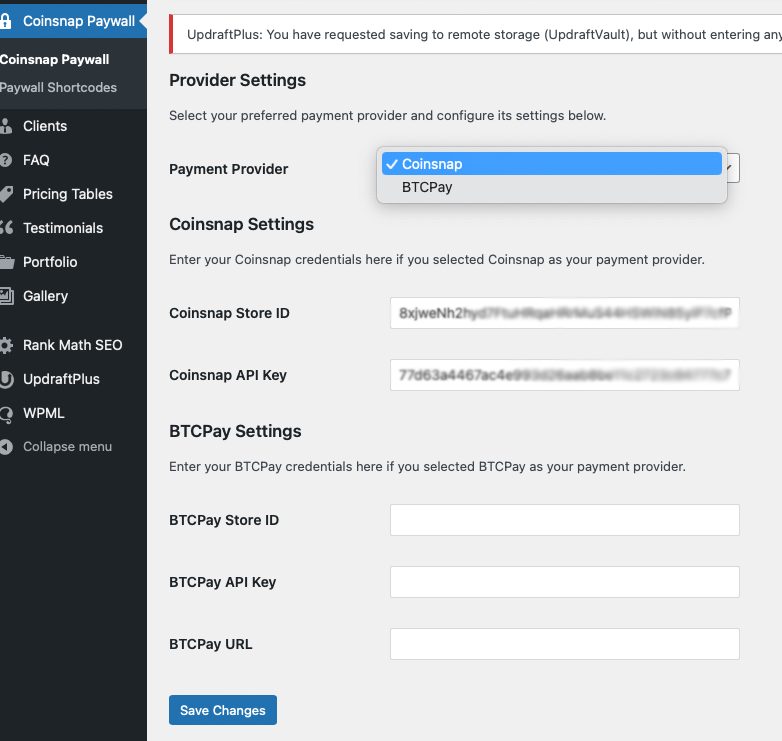
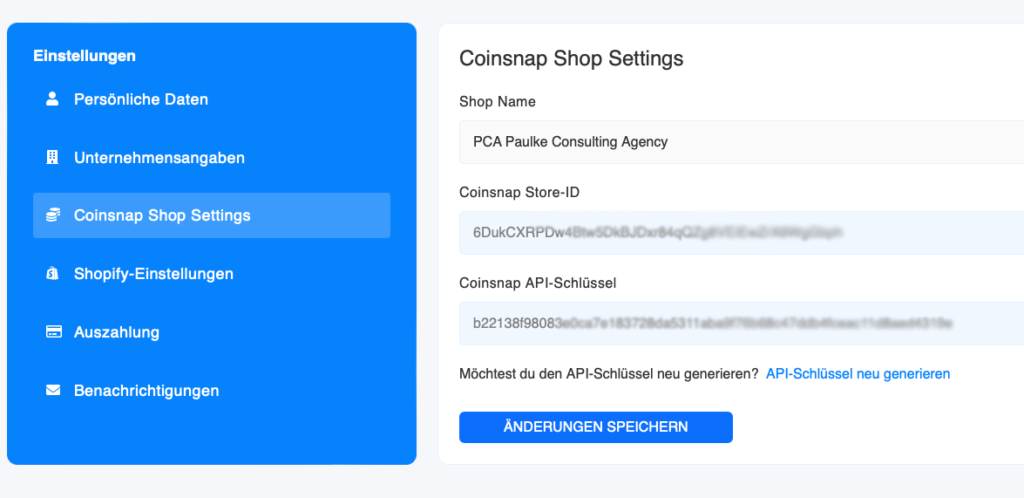
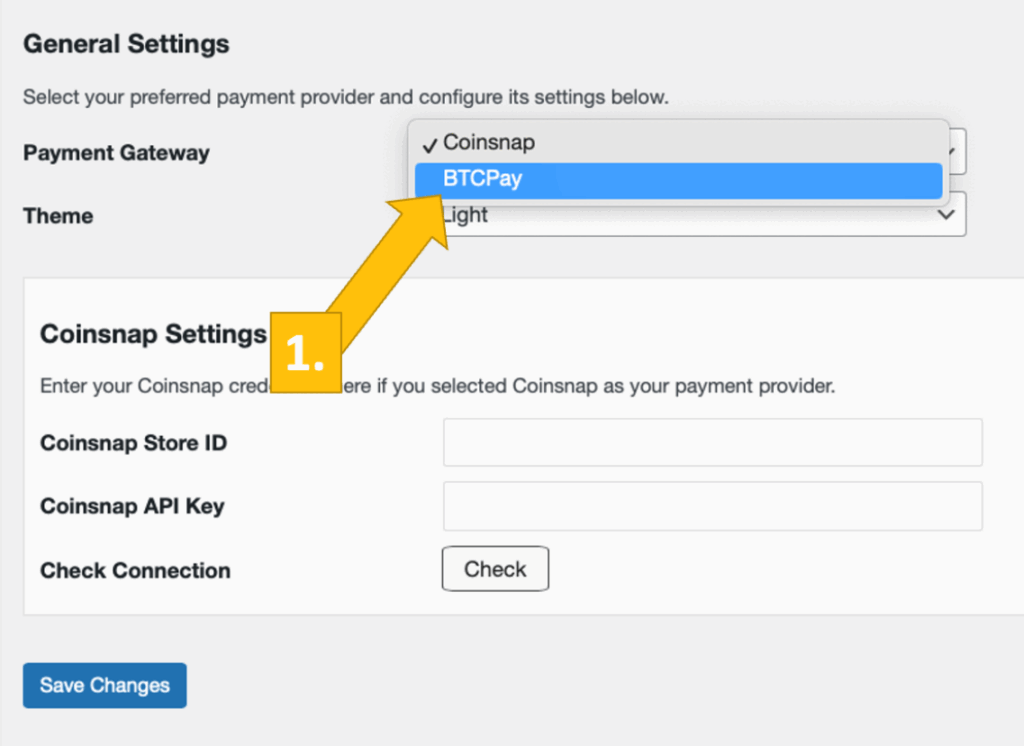
Enter your Coinsnap Store ID and your API key. You can find these in your Coinsnap account under Settings → Coinsnap Shop Settings.
Step 4
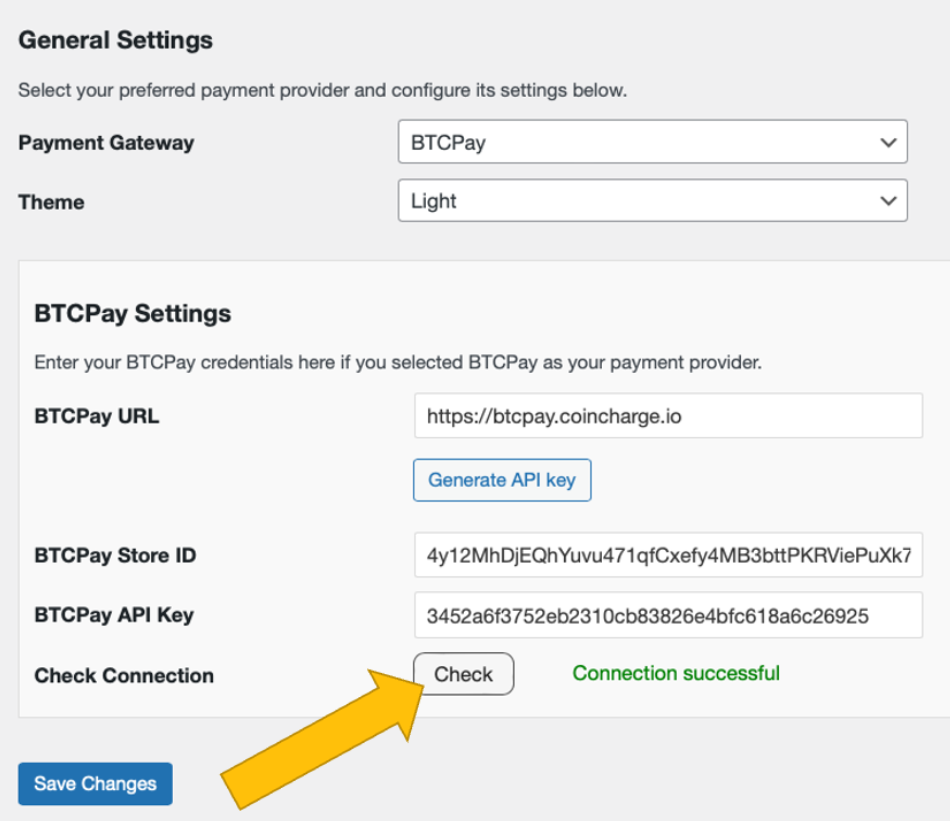
Bitcoin Paywall BTCPay Server Settings
After you have installed and activated the Coinsnap Bitcoin Donation plugin, you need to configure the Coinsnap settings. Go to BTC Paywall → Settings in the left sidebar.
Choose your payment gateway BTCPay and click Save.
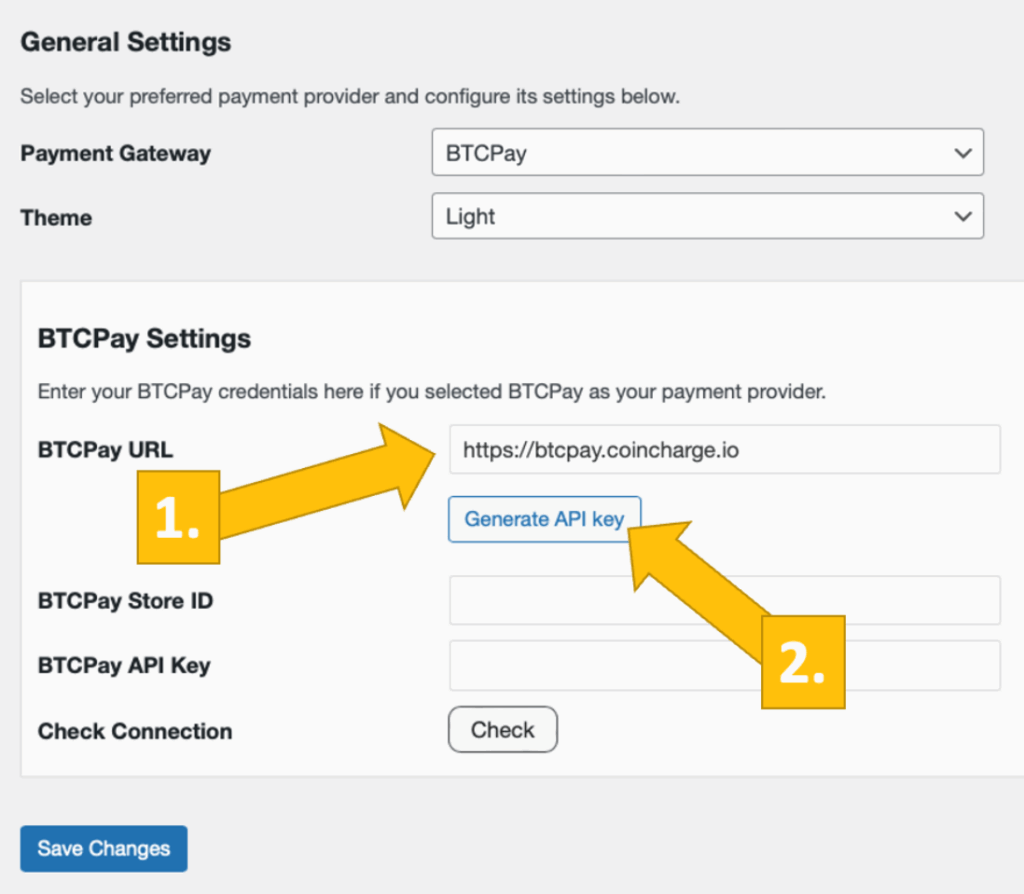
Log in to your BTCPay Server and enter your BTCPay Server URL in the corresponding field. Then click Generate API Key.
You will be redirected to your BTCPay Server. Choose your Shop and click Continue.

Enter your store’s name and click Authorize App.
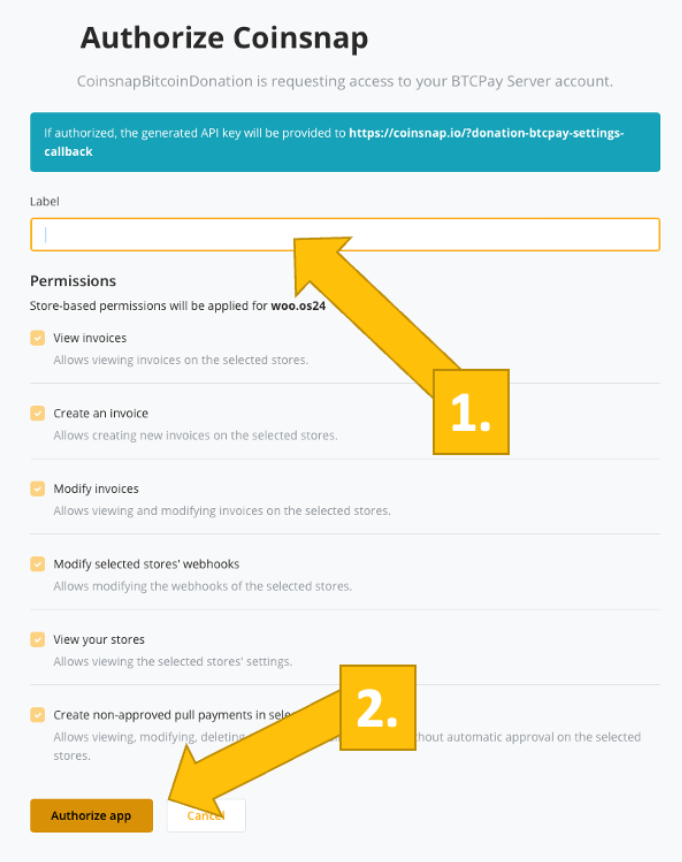
Your BTCPay Server is now successfully connected to your website via the Coinsnap Bitcoin Paywall plugin.
If you click Check, you will see a green success message.
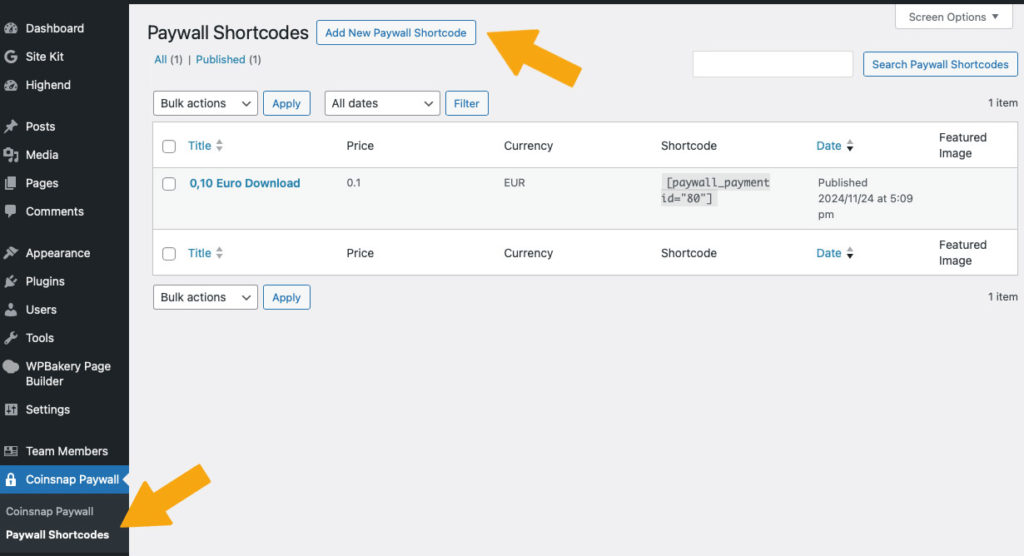
Step 5
Create a paywall shortcode
Go to Coinsnap Bitcoin Paywall in the sidebar on the left in your WordPress dashboard and click Paywall Shortcodes.
Then click Add New Paywall Shortcode at the top.
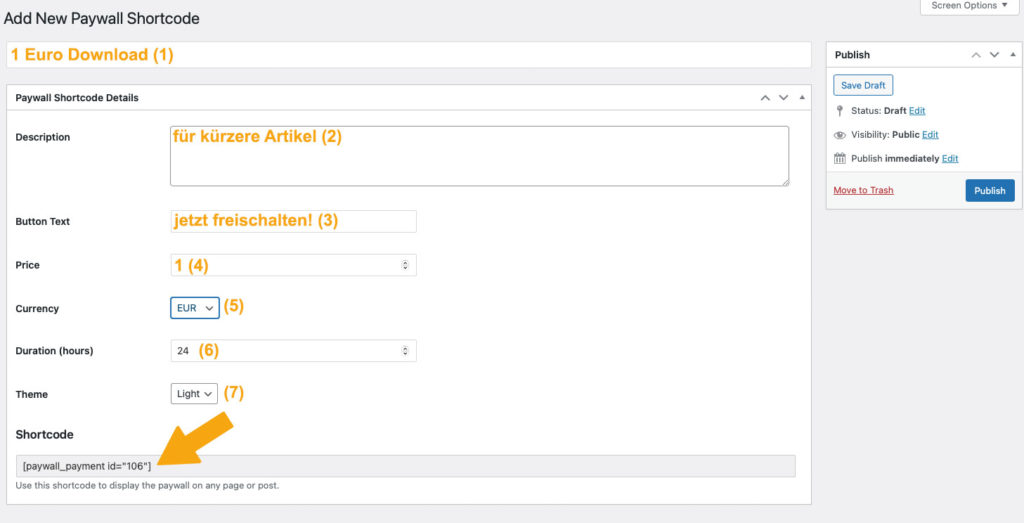
Configure your paywall shortcode
In the window that appears, configure the following settings:
- Assign a name so you can identify the shortcode later.
- Enter a short description for internal reference.
- Set the text of the payment button.
- Set your price.
- Select the currency in which the price is displayed.
- Define the activation duration.
- Select the color scheme of the paywall.
Now you can copy the shortcode at the bottom and use it in your content.
Step 6
Create content
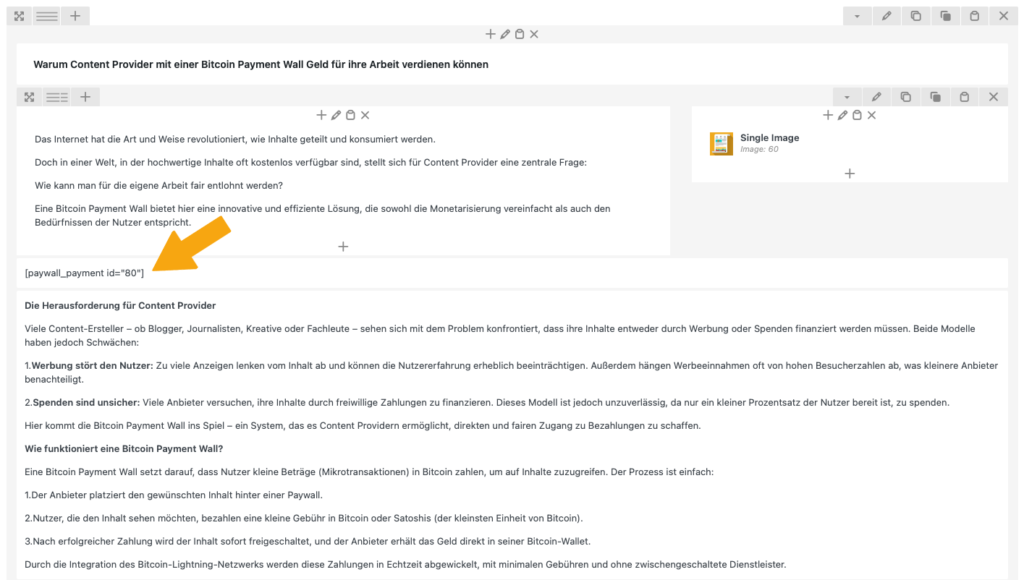
Now create content as usual in your WordPress, for example a text as in this example.
As soon as you have finished the article, you must place the shortcode you have just produced at the point where you expect payment from your reader. You usually do this after the introductory paragraph, see right:
Frequently Asked Questions
What Users Ask About This plugin
Can I use partial paywalls (unlock only some content)?
Yes — you can wrap content with [coinsnap_paywall] shortcode.
Does the paywall work with membership plugins?
Yes — you can combine Coinsnap Paywall with membership or LMS plugins.
