Crowdfunding Plugin Installation Guide
Follow this guide to set up the Coinsnap Crowdfunding Plugin and allow supporters to fund your project using Bitcoin and Lightning payments.
Launch Bitcoin-powered crowdfunding campaigns on your website.


Step 1
With the Coinsnap Bitcoin Crowdfunding plugin, Coinsnap lets you raise Bitcoin funds quickly and easily on any page of your WordPress website.
You can download the plugin directly from the
WordPress Marketplace
or install it directly from within your WordPress installation.
Log in to your WordPress account, open the WordPress backend, and go to Plugins → Add New.
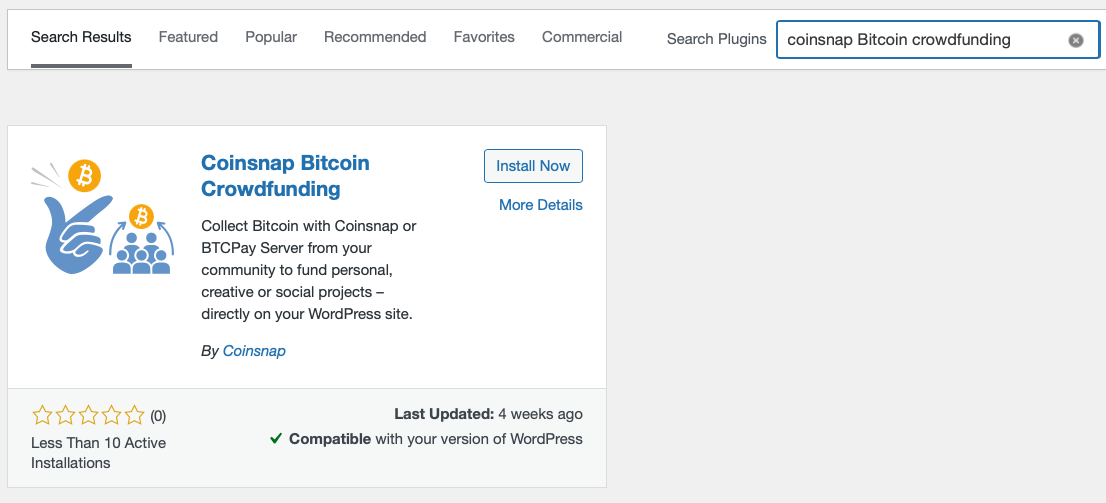
Enter Coinsnap Bitcoin Crowdfunding in the search field.
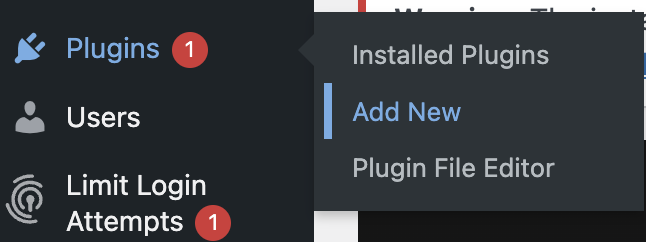
Click Install Now, then Activate.
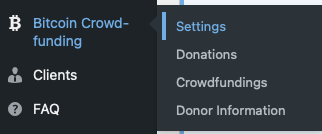
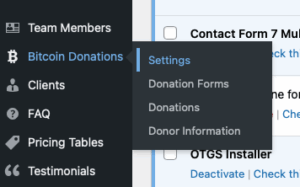
The Coinsnap Bitcoin Crowdfunding plugin is now successfully installed and appears as Bitcoin Crowdfunding in the left sidebar of the WordPress backend.
Step 2
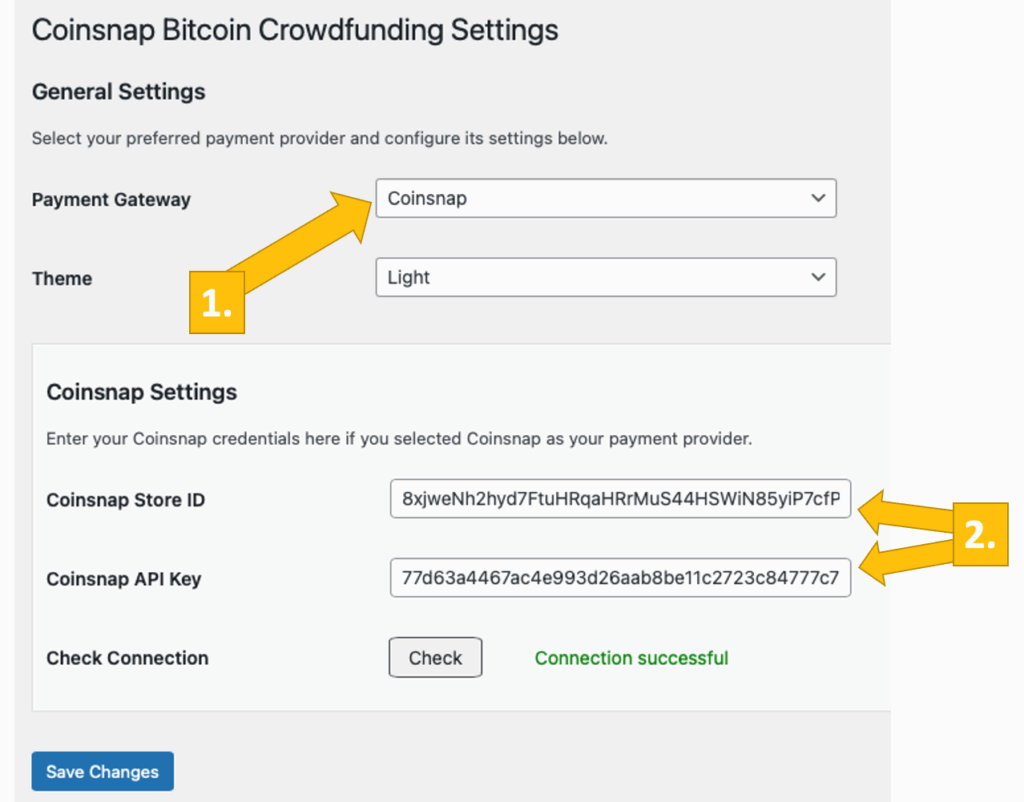
Bitcoin Crowdfunding Coinsnap Settings
After you have installed and activated the Coinsnap Bitcoin Crowdfunding plugin, you need to configure the Coinsnap settings. Go to Bitcoin Crowdfunding → Settings in the left sidebar.
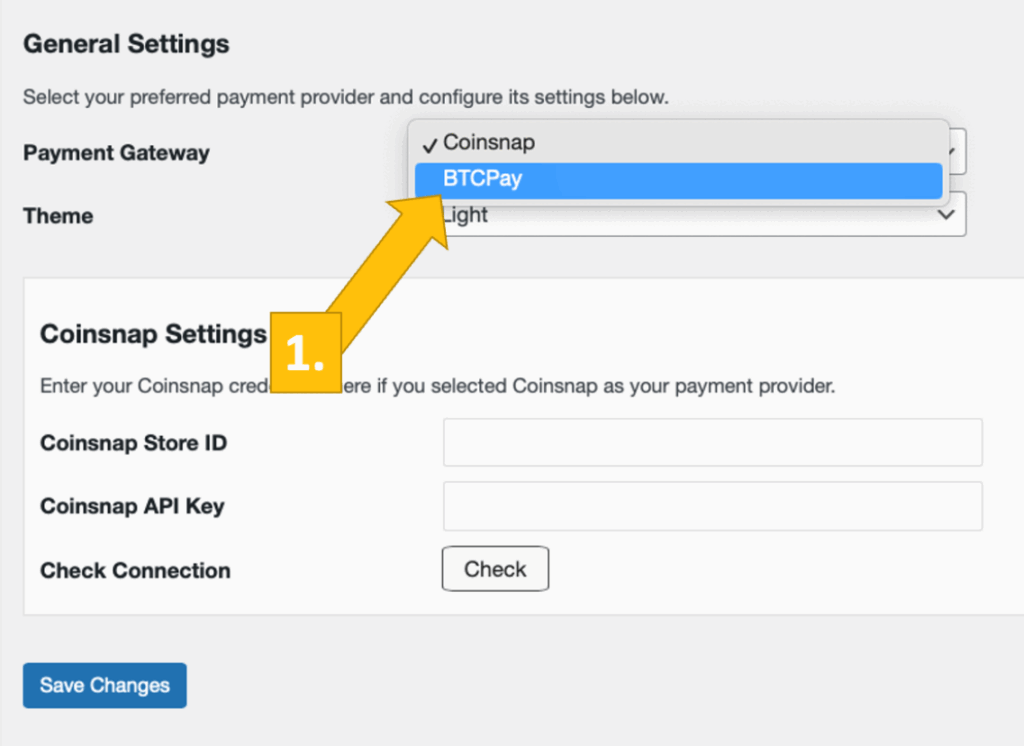
Choose your payment gateway Coinsnap. (You can also choose BTCPay Server if you are using one and then fill in the respective information.)
Enter your Coinsnap Store ID and your Coinsnap API Key. After pasting both values, click Check. If you see a green Connection successful message, your plugin is ready to accept Bitcoin donations and credit them to your Lightning wallet.
Don’t forget to click Save changes before configuring your fundraising box.
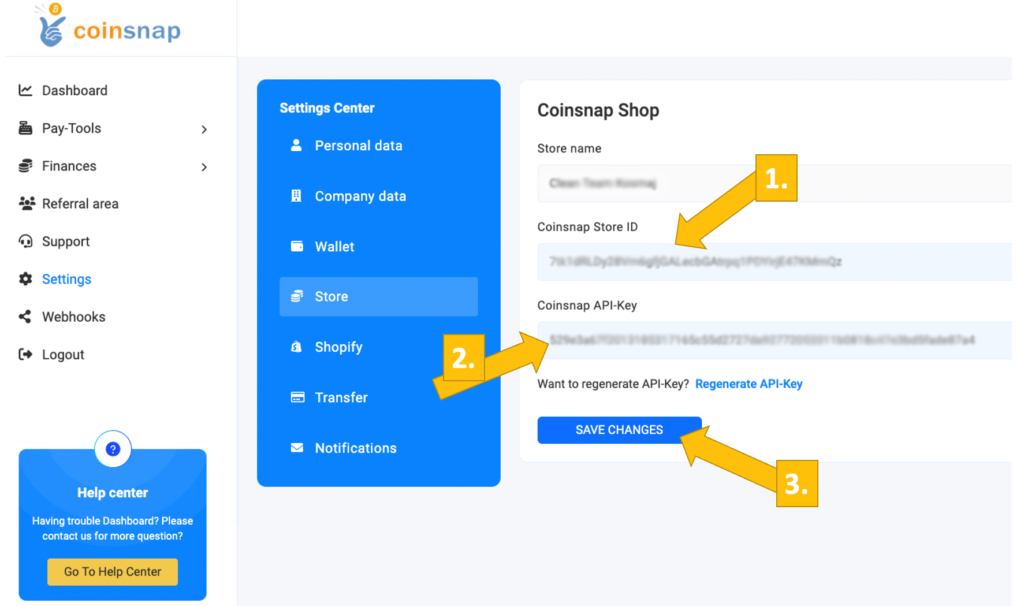
Coinsnap Store Settings
In the Coinsnap backend, go to Settings and then Store. There you will find your Coinsnap Store ID and Coinsnap API Key. Copy both values into the corresponding fields in the plugin settings and click Save Changes.
Once the Coinsnap data is saved, you are ready to receive Bitcoin transactions directly to your wallet. Now you can start raising funds in Bitcoin.
Step 3
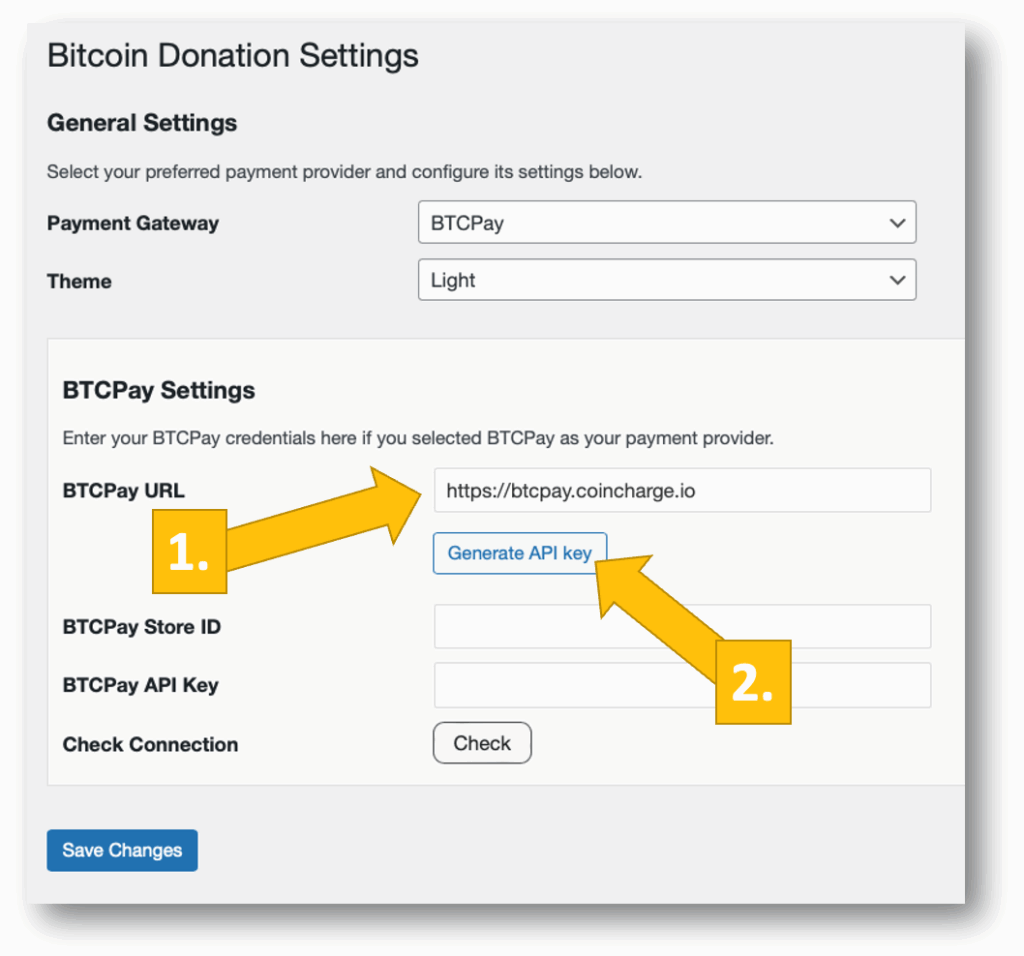
Bitcoin Crowdfunding BTCPay Server Settings
After you have installed and activated the Coinsnap Bitcoin Crowdfunding plugin, you need to configure the Coinsnap settings. Go to Bitcoin Crowdfunding → Settings in the left sidebar.
Choose your payment gateway BTCPay.
Log in to your BTCPay Server and enter your BTCPay Server URL in the corresponding field. Then click Generate API Key.
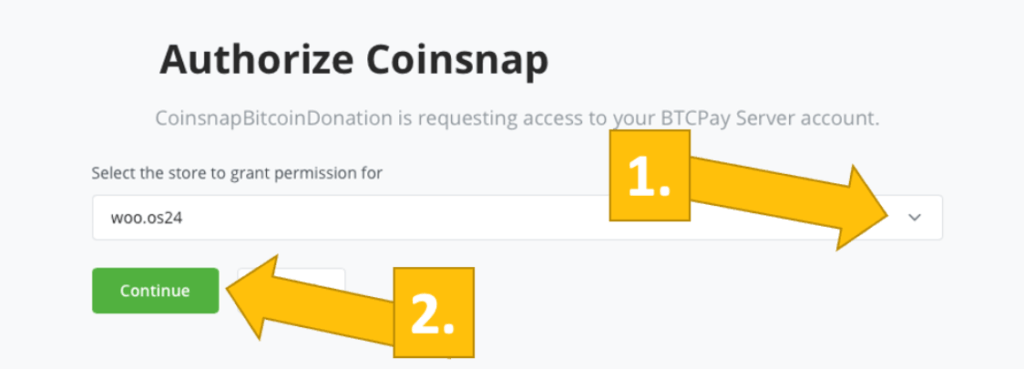
You will be redirected to your BTCPay Server. Choose your Shop and click Continue.
Enter your shop’s name and click Authorize App.
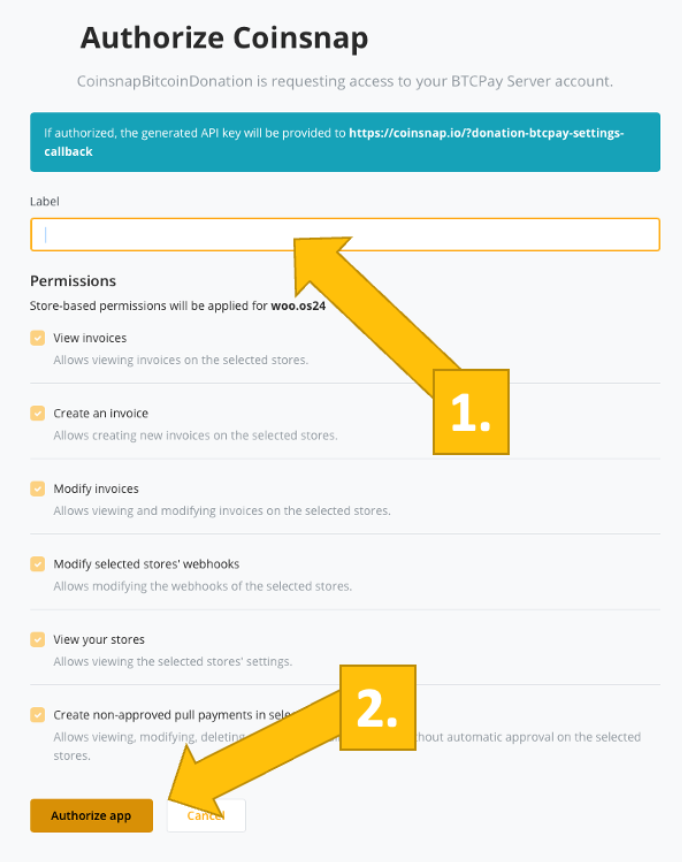
Your BTCPay Server is now successfully connected to your online store via the Coinsnap Bitcoin Crowdfunding plugin.
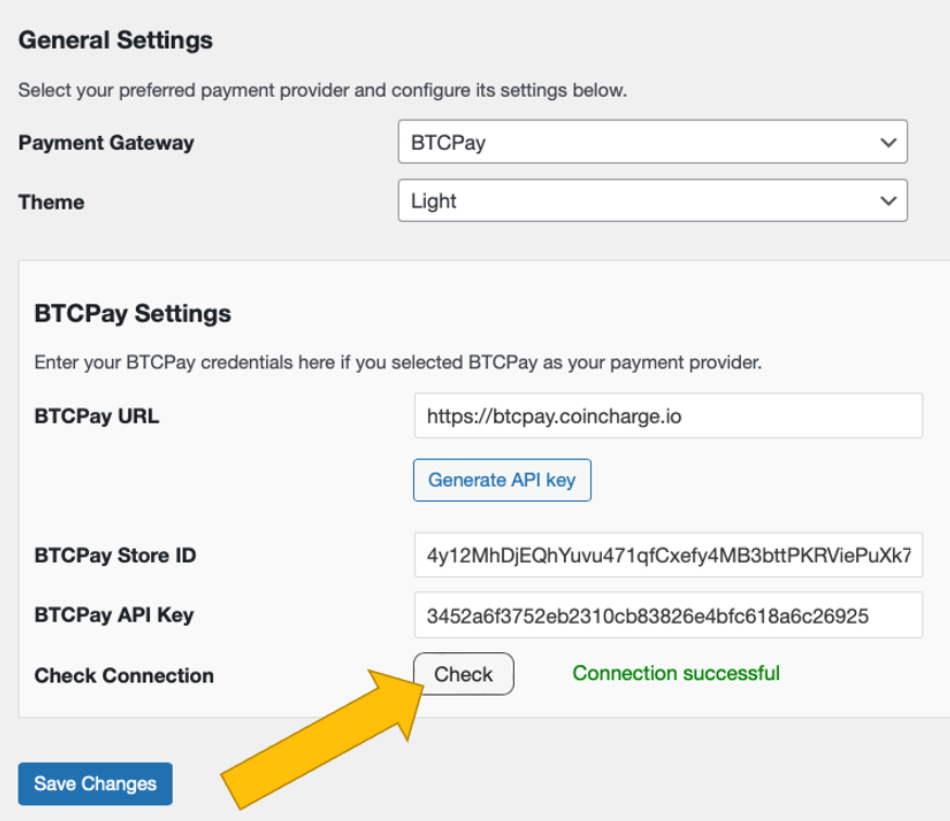
If you click Check, you will see a green success message.
Step 4
After all settings have been made, a test transaction should be carried out.
Fill out a crowdfunding box that you created on your website and click the payment button (Donate).
If you are collecting donor information, fill out the form that appears next.
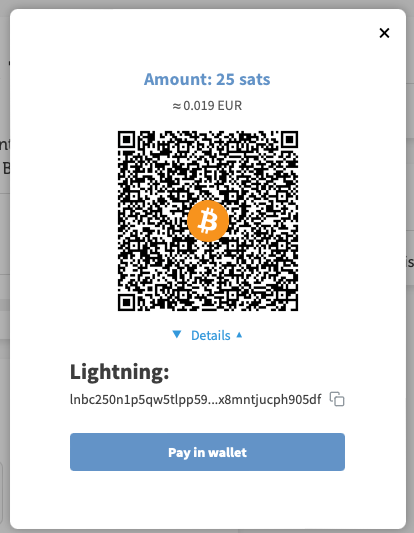
You will then be redirected to the Bitcoin payment page to complete the purchase.
The Bitcoin payment page allows the payer to choose between Bitcoin and Lightning. Both payment methods are integrated into the displayed QR code.
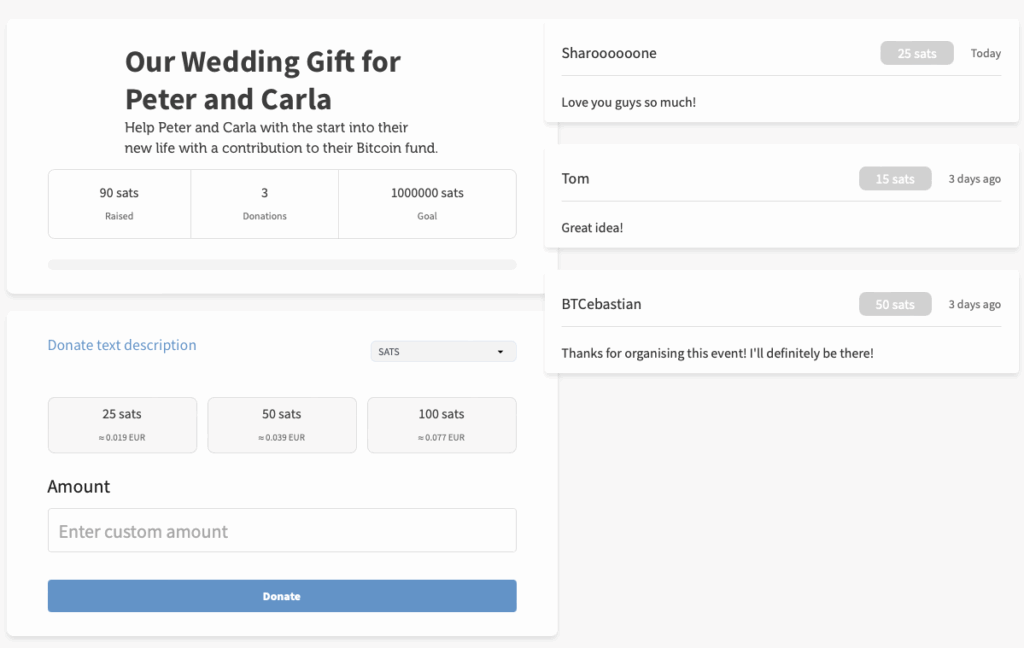
After a successful payment, you will see the updated crowdfunding box showing the current amount of sats received and the new shoutout.
Step 5
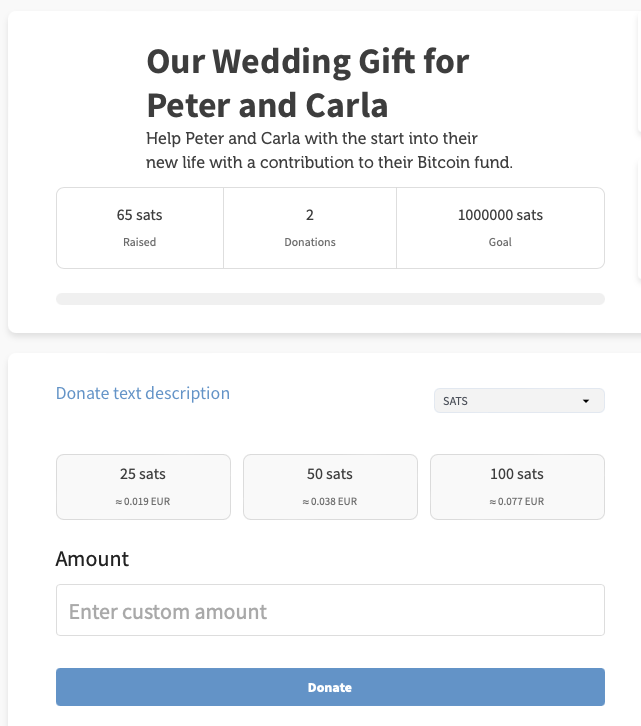
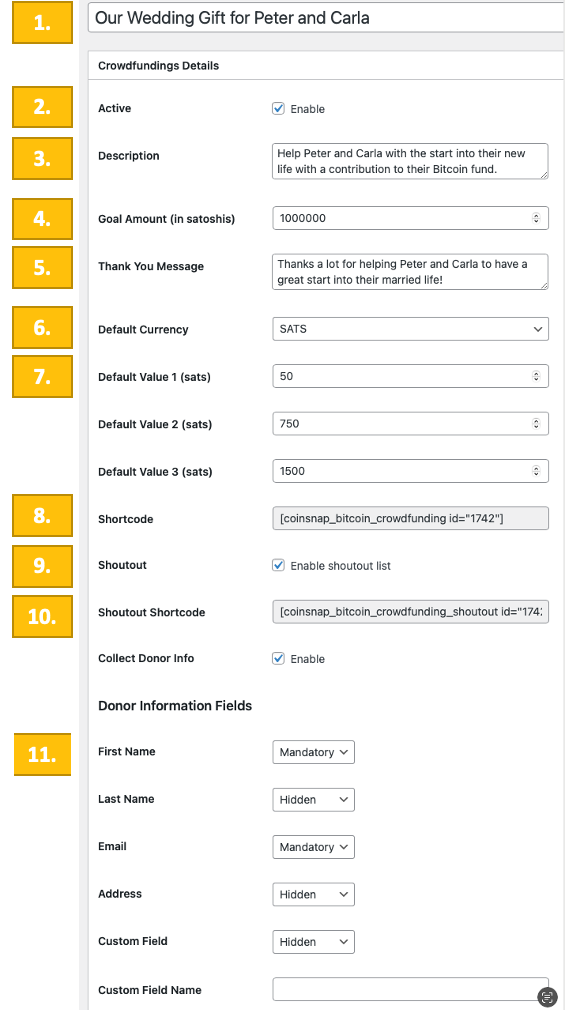
How you set up a crowdfunding box
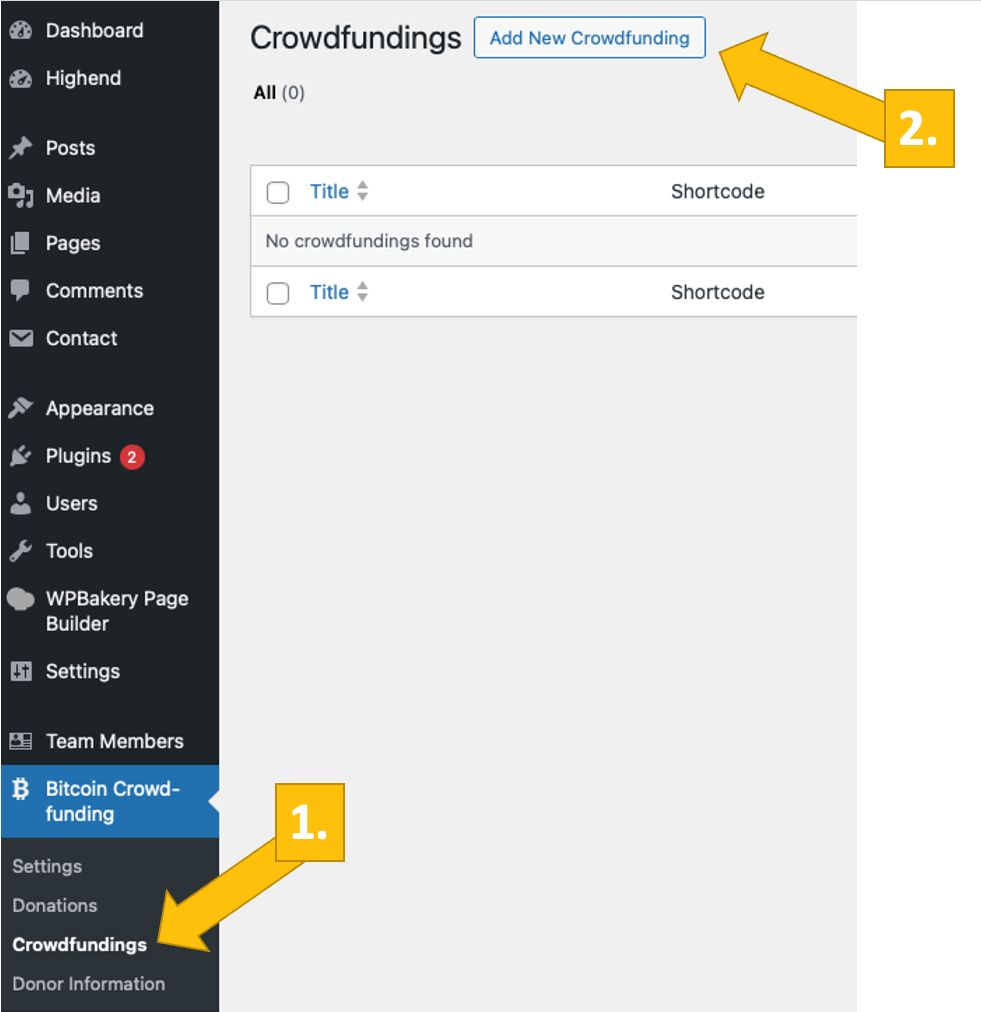
Go to Bitcoin Crowdfunding → Crowdfundings in the left sidebar, then click Add New Crowdfunding at the top.
Creating a crowdfunding form is simple and straightforward. First, give your crowdfunding a name and activate it. Then add a description so potential donors understand what they are contributing to.
Next, set a goal amount for how much you want to collect and define a thank-you message that visitors will see after making a contribution.
Choose the default currency your visitors will see and set predefined contribution values in sats. Visitors can always enter a custom amount if they want to give more or less.
Collecting information from your donors
If you want to collect information from your donors, enable Collect Donor Info above the Donor Information Fields.
Select which information you want to collect and whether it should be mandatory, optional, or hidden.
In this example, the donor’s first name is mandatory, the last name is hidden, and the email address is mandatory. Any field marked as hidden will not appear in the crowdfunding box.
Placing the Bitcoin donation box on your website
To display the Bitcoin donation box on your website, copy the shortcode and paste it wherever you like.
If you want contributors to leave a message, activate the Shoutout list, copy its shortcode, and place it next to the crowdfunding box or on a dedicated page.
Frequently Asked Questions
What Users Ask About This plugin
Does the plugin allow multiple contribution tiers?
Yes — you can create custom tiers with different amounts.
Can supporters donate anonymously?
Yes — Bitcoin payments do not require personal data unless you request it.
