Wix Bitcoin User Guide
This User Guide shows you how to accept Bitcoin and Lightning payments on your Wix website with the Wix Bitcoin module. It explains the requirements, how to connect your Wix site with the Coinsnap Bitcoin gateway, how to configure all relevant settings, and how to enable Bitcoin payments so customers can pay instantly via Bitcoin (on-chain + Lightning).
Add Bitcoin + Lightning to your Wix website — no complex setup, no custom development.


GET STARTED - REQUIREMENTS
To enable Bitcoin payments with Coinsnap in your WIX store, you must meet the following requirements:
- A WIX Store with administrator access
- An active Coinsnap account
- Download the .zip-File with the Coinsnap for WIX module, and the
Coinsnap-config.js
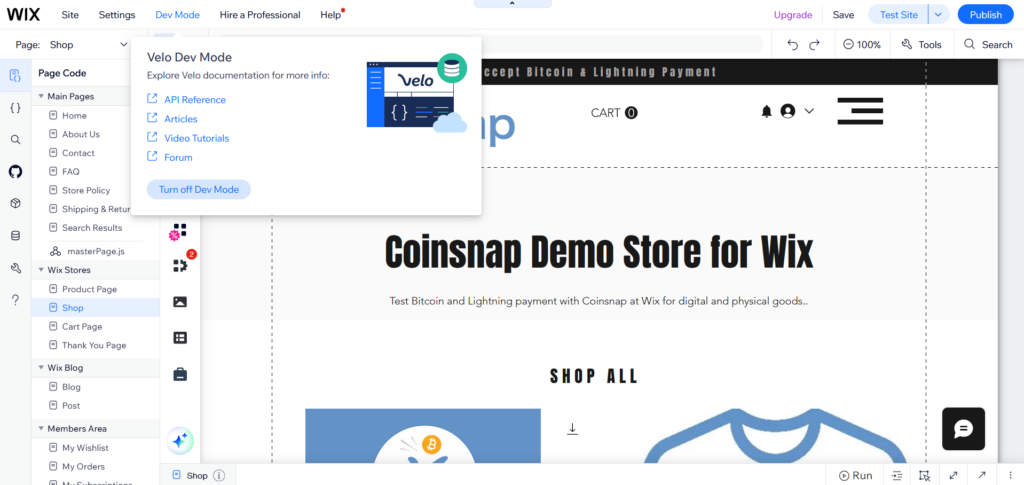
Step 1 - Activate developer mode
Open the Wix editor on your Wix website.
Click on Dev Mode in the upper area and then click on the Turn on Dev Mode button to activate developer mode.
Step 2 - Open the code editor
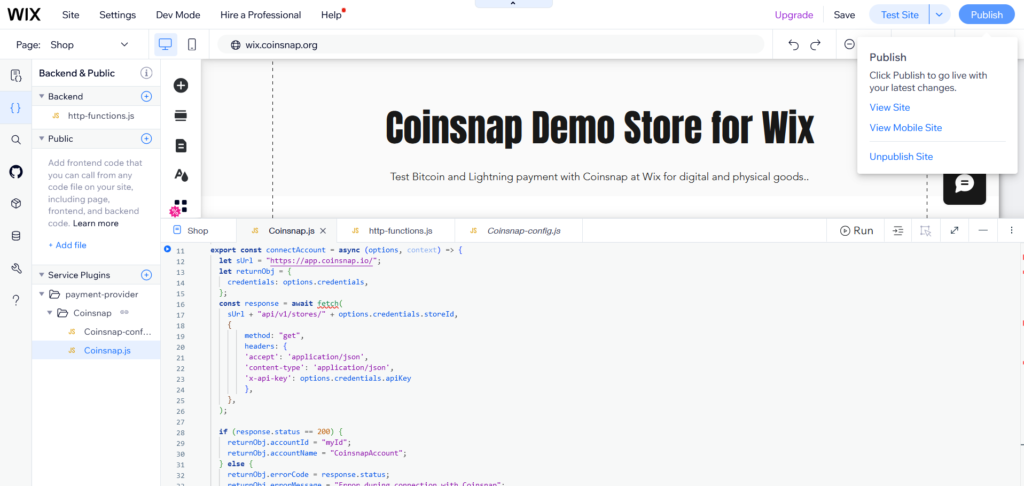
Click on the { } icon on the left-hand side to open the code editor.
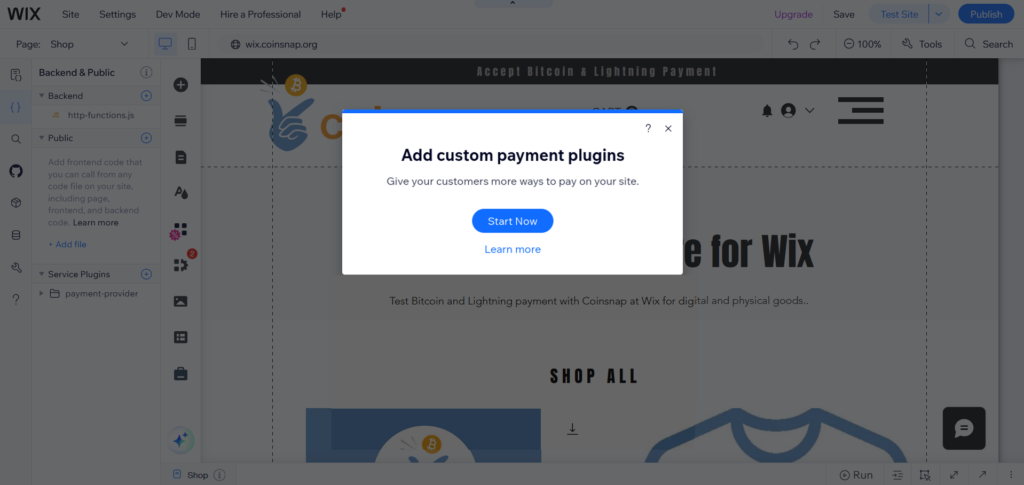
Step 3 - Add payment provider service plugin
Click on the (+) sign in the Service plugins area and select Payment to add a service plugin for payment providers.
Step 4 - Start setup
Click Start now on the following screen.
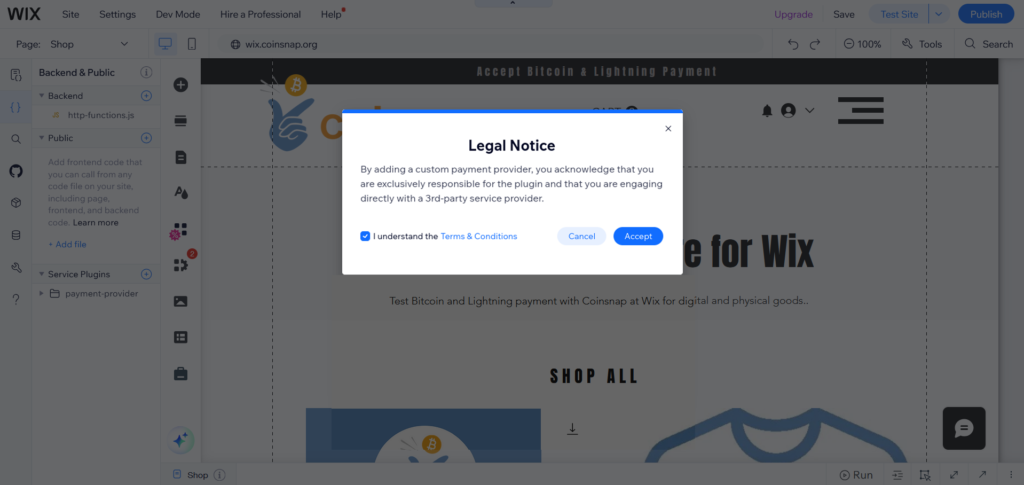
Step 5 - Accept conditions
Check the conditions on the page with the legal provisions and click on Accept.
Step 6 - Name the plugin
Enter the name of the plugin: Coinsnap (you can use any name you like, but this will make it easier to follow the instructions).
Click on Add & edit code.

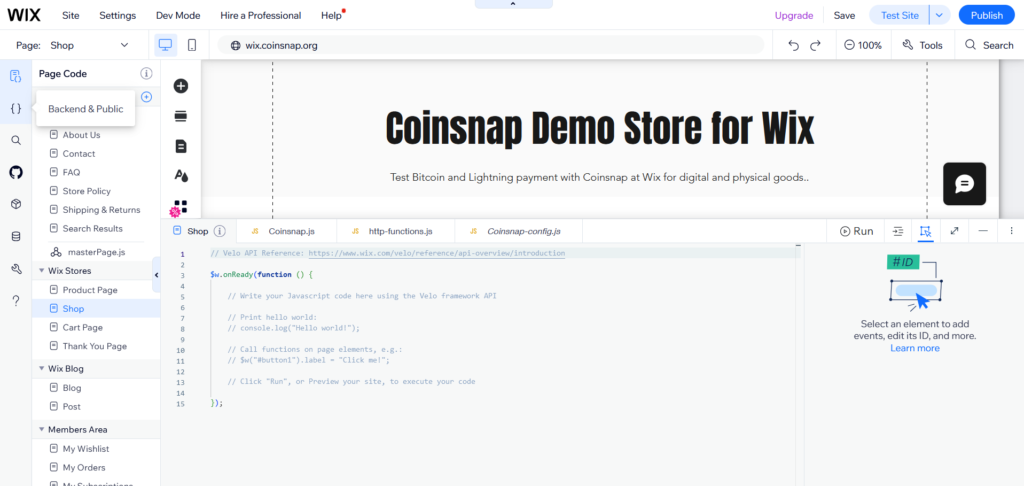
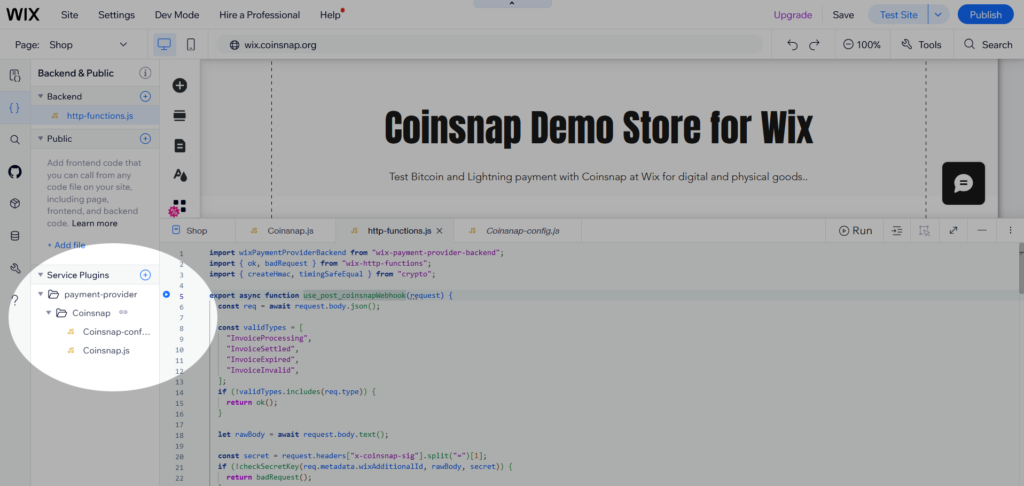
Step 7 - Localize created files
This creates a directory called Coinsnap, which contains two files: Coinsnap.js and Coinsnap-config.js, which are opened in the editor.
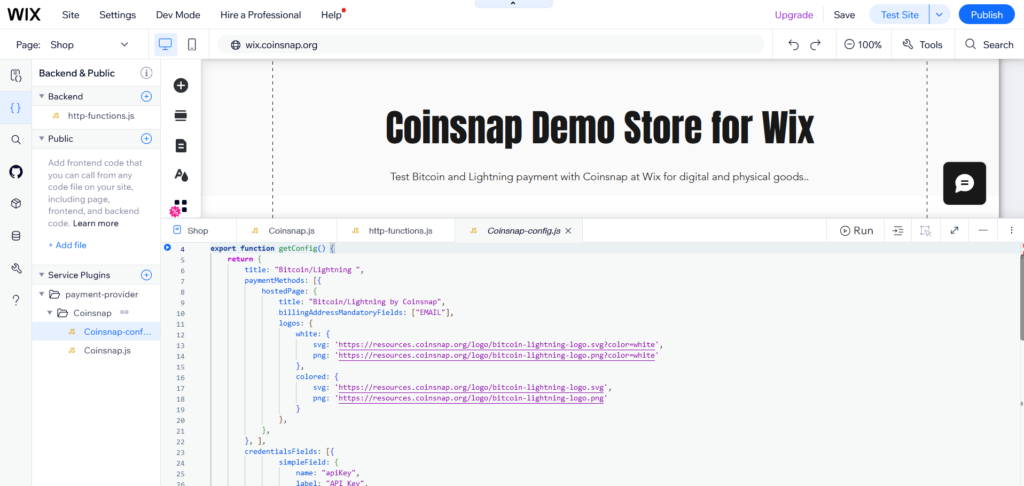
Step 8 - copy code to Coinsnap-config.js
In Coinsnap-config.js, paste the code from our Github repository. Click on the Copy raw file icon to simply copy the code.
Make sure that you delete any sample code in Coinsnap-config.js in the Wix Editor before inserting the new code.
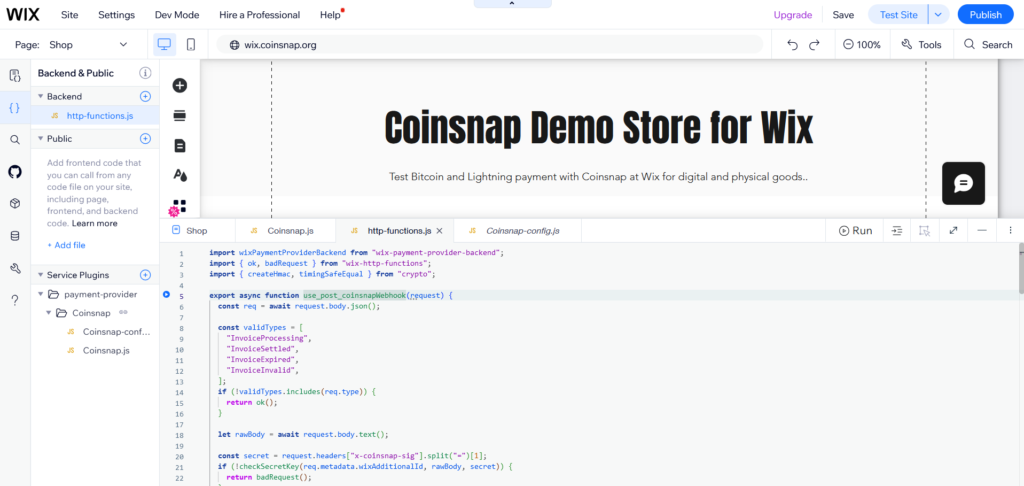
Step 9 - Copy code to Coinsnap.js
Open Coinsnap.js in the Wix editor and paste the code from our GitHub repository.
Delete the entire sample code from Coinsnap.js before inserting the new code.

Step 10 - Add http-functions.js to the backend directory
In the backend section of your editor, click on the (+) icon and select Expose Site API, which will create an http-functions.js file. (If this file already exists, you can skip this step).
Copy the code from our Git repository to http-functions.js. If http-functions.js already exists, paste the code from GitHub under the existing code. If not, delete the sample code before pasting.
Step 11 - Publish your changes
Once the code is complete, click on Publish to save the changes and make the plugin available.
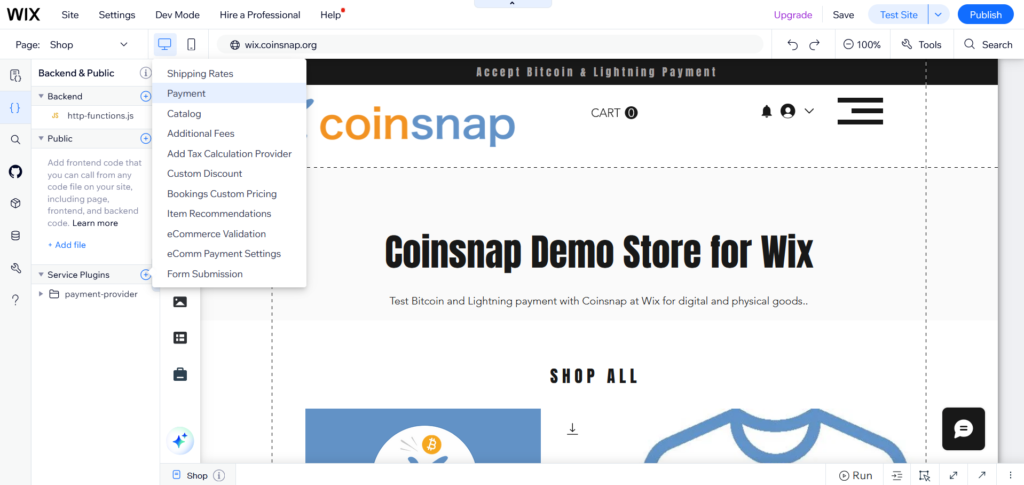
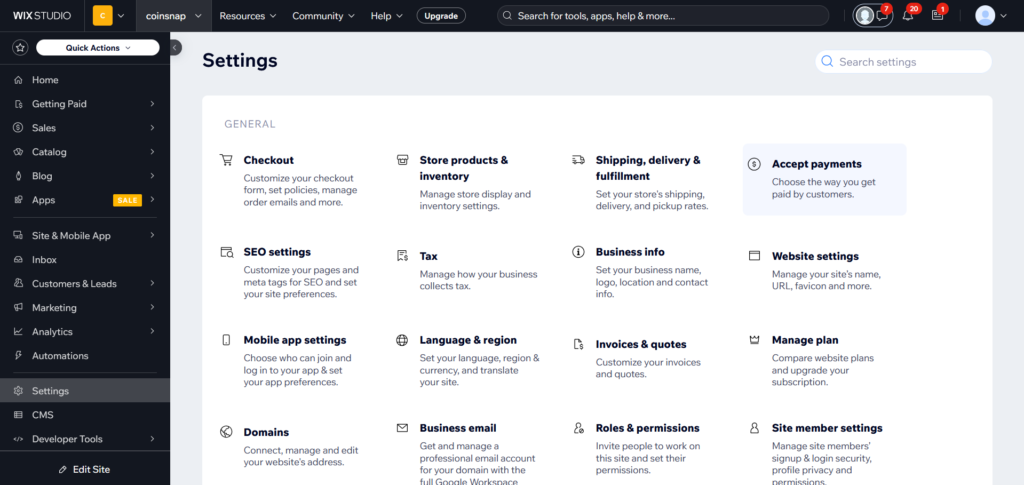
Step 12 - Set up payment configuration
Open the dashboard of your website and click on Settings in the left-hand menu.
Click on Accept payments on the Settings page.
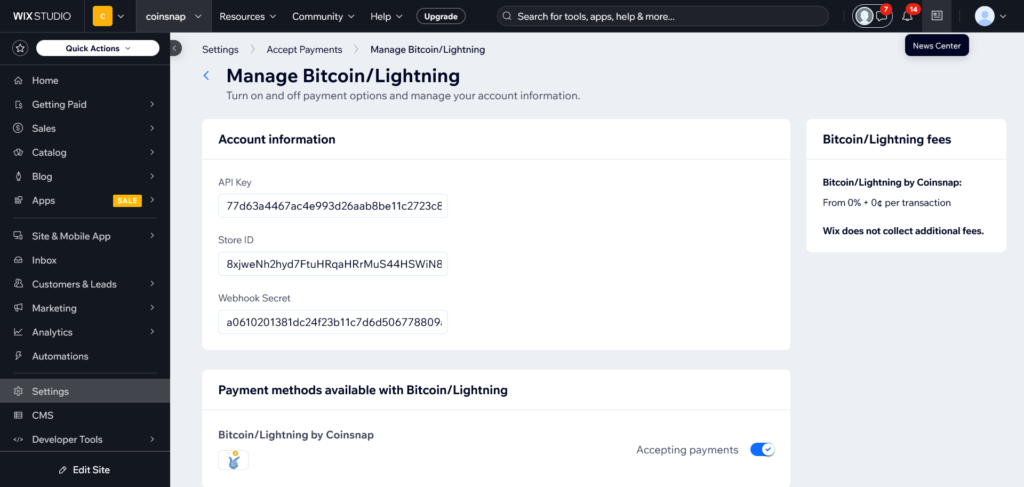
Step 13 - Connect Coinsnap as a payment provider
On the following page you should see Bitcoin/Lightning with Coinsnap as payment provider. If not, refresh the page to clear the Wix cache.
Click on Connect next to Coinsnap.

Step 14 - Enter Configuration Details
You will be asked to enter the following fields:
- API Key
- Store ID
- Webhook Secret
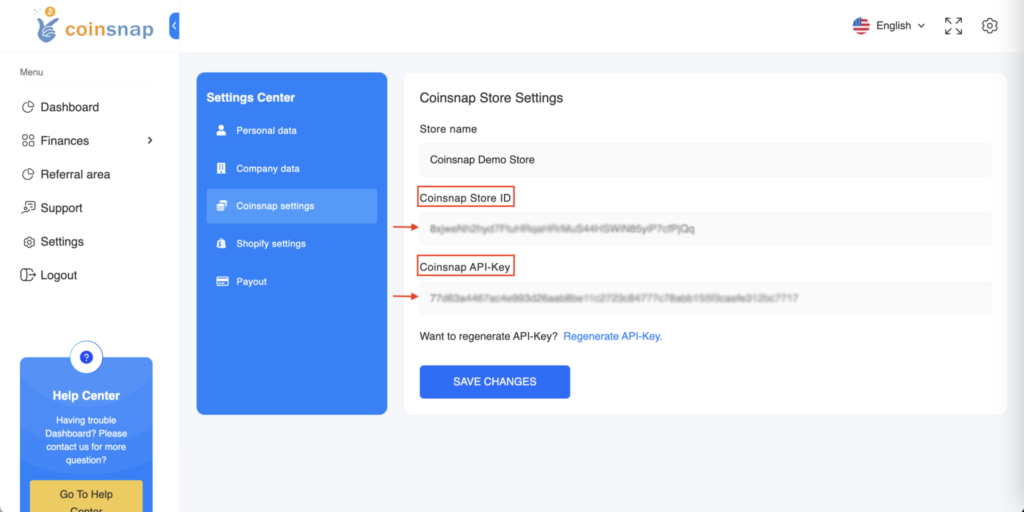
Step 15 - Store ID and API key
In your Wix store, paste the Store ID into the Store ID field and the API key into the API key field.
Frequently Asked Questions
What Users Ask About This plugin
Do my customers pay in Bitcoin or Lightning?
Customers can choose freely between Bitcoin on-chain and Lightning. Both payment methods are integrated into a single QR code shown during checkout.
Is the price shown in Bitcoin or fiat currency?
Prices are displayed in your store’s fiat currency (e.g. EUR, USD). The Bitcoin or Lightning amount is calculated automatically at the time of payment using the current exchange rate.
Do I need a Wix App or Wix App Market listing?
No. Coinsnap is integrated using Wix Developer Mode and service plugins. No App Market installation or approval process is required.
Is developer knowledge required to set this up?
Yes. This integration requires solid familiarity with the Wix Editor and Wix Developer Mode, as well as the ability to work with JavaScript files and backend code. You will need to copy, adjust, and manage code snippets correctly in multiple files. While no advanced API development is required, basic coding skills and confidence working in Wix’s developer environment are necessary.
If you prefer not to handle the technical setup yourself, Coinsnap offers a free integration service. The Coinsnap team can connect your Wix store with the Coinsnap Bitcoin gateway for you and ensure that everything works correctly.
Can I use Coinsnap with Wix Stores only, or also with other Wix pages?
Coinsnap is integrated as a payment provider for Wix Stores checkout. It is not intended for standalone payment buttons on regular content pages.
Can I embed multiple Coinsnap payment buttons on one Wix page?
Yes. You can place multiple buttons or links for different products or services.
Does Wix allow Bitcoin at checkout natively?
No. Wix does not support native crypto gateways, but Coinsnap embeds and links work perfectly.
What happens if a customer does not complete the WIX Bitcoin payment?
If the payment is not completed, the order remains unpaid in Wix and is not marked as completed.
